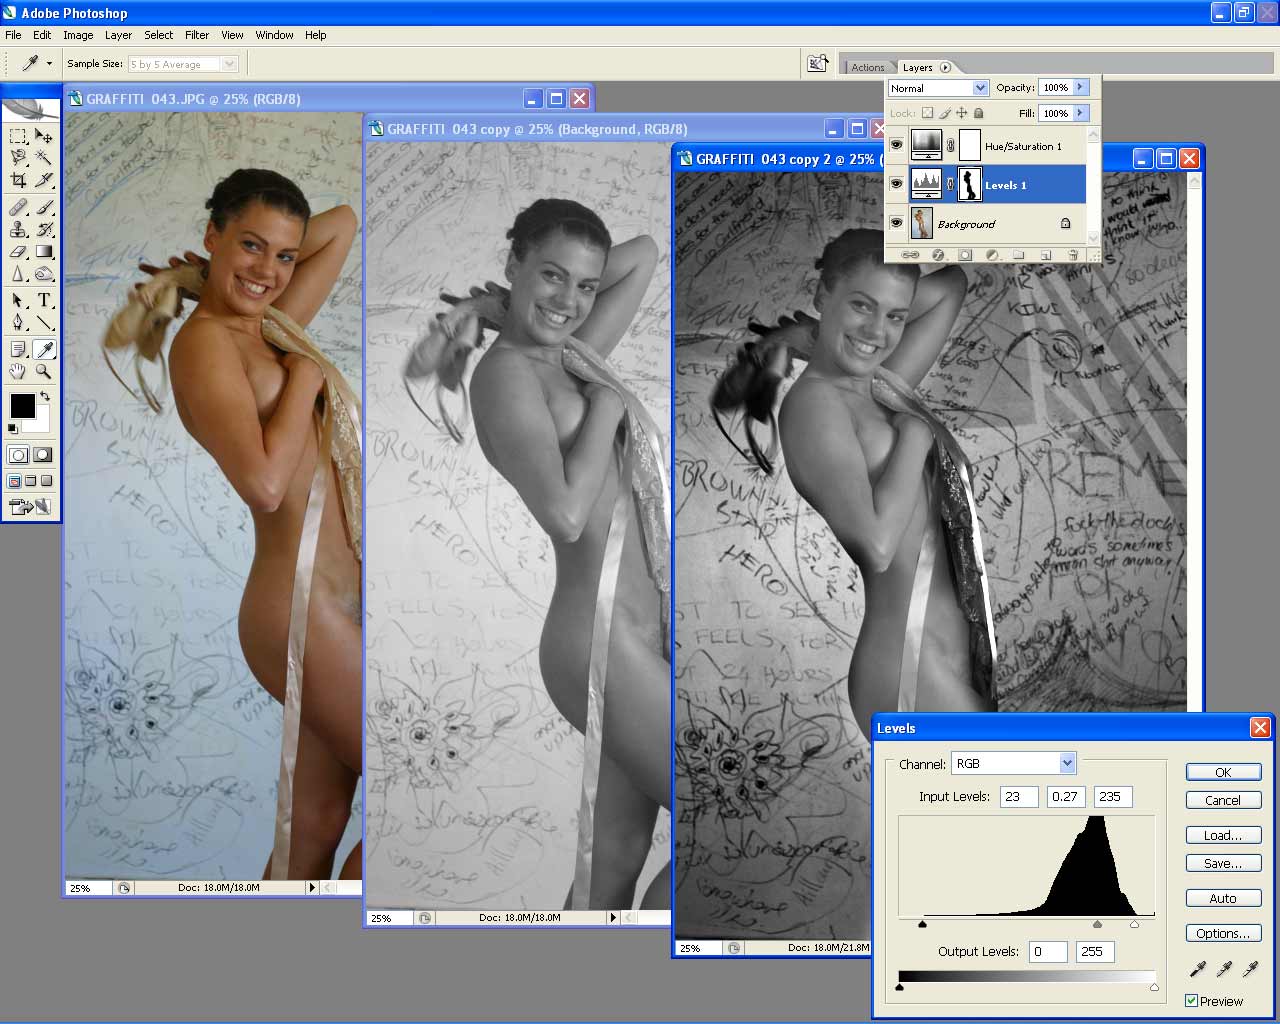
This is part 2 of the adjustment layer explanation
and ventures on slightly more complicated grounds.
On the left is the original image in colour
The middle one is the same image with an
adjustment layer in Hue/Saturation to take
out the colour. The image is a bit flat but I
like the skintones.
The third image is one with an additional adjustment
layer to increase the contrast. I have inserted this layer
between the background and the Hue/Saturation layer.
The layer which you are working on is highlighted in blue.
I like playing with levels but you can also use curves or
brightness/contrast. This is down to personal preferences.
The entire image went dark and the skintones got lost.
By painting in with the black foreground and a soft
brush, I have erased the 'level' adjustment over the skin
which has retreived the skintone as was in the underlying
layer.
If I were to paint in the Hue/Saturation layer, the B/W
adjustment would be erased/replaced by the original
background colour.
It is well worth experimenting with this but if you get stuck,
just send me a message or post a comment and I'll guide
you through the steps.

Previous steps