HOW TO MEASURE YOUR OWN SKYFOG: Set your digital camera to ISO 800, aperture to f4 and just place it on the ground looking at zenith. Vary exposure length till you get the peak at mid-histogram (on the back-of-camera histogram!!!). Use either the translation scale given below, easiest, or the following calibration formula to get an estimate of your skyfog, likely accurate to within 0.1 Mag:
Mag/sq arc-sec = 13.93+2.5*log10(seconds to mid histogram at ISO 800 and f4)
High altitude, extraordinarily dark sites on exceptional nights have been reported to be at Mag 22/sq arc-sec (28 minutes to mid-histogram!), but more accessible pristine dark sites can also take up to 16 minutes to reach mid-histogram. In my experience, I would classify any site that takes longer than 12 minutes as very dark and pristine for amateur astroimaging. So you can immediately see how much brighter your skyfog is compared to a pristine dark location. It's that ratio of exposure times to mid-histogram that is important.
TRANSLATION SCALE: You can use the translation scale below to convert "Minutes Exposure to mid-histogram at ISO 800 and f4" to Magnitude per square arc-second and to Visual Limiting Magnitude:
Mins-----------------28---17.7---11----7.0----4.4---2.8---1.8---1.1---0.7---0.45---0.28
Mag/sq arc-sec----22---21.5----21---20.5---20---19.5---19---18.5--18----17.5-----17
VLMag--------------6.6---6.4----6.1---5.8----5.5---5.1----4.8---4.4---4.0-----3.5----3.1
Bortle-----------------1---2----3-----4-------5-------6-------7-------8-------9---------------
TO SPEED UP THE MEASURING: Nobody likes to waste precious dark time waiting 16 minutes for a camera to measure skyfog. You may of course increase ISO and open your lens to a faster focal ratio. Each doubling of ISO from 800 implies a doubling of your time-to-mid-histogram before entering the Translation Scale. Each f-stop wider than f4 also implies a doubling. Let us say we find it takes half a minute to reach mid-histogram at f1.4 and ISO 3200. We need the time to be for f4 and ISO 800 to use the Translation Scale. ISO 3200 is 4x faster than 800, and f1.4 is 8x faster than f4 (difference of 3 f-stops). So we multiply that half minute by a factor 4*8=32x and use 16min on the Translation Scale. It's obvious therefore that with a fast lens we can measure the skyfog very quickly, no matter how dark the site is.
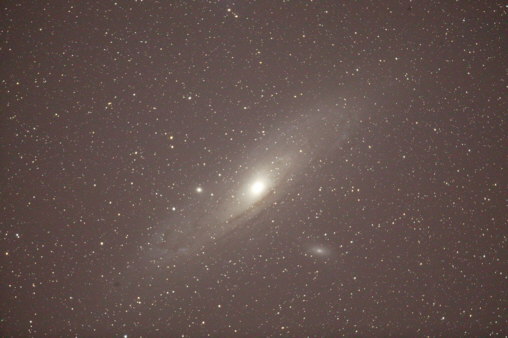
WHICH HISTOGRAM TO USE: The above, out-of-the-camera Jpeg has been reduced in size only, to save on bandwidth. Should be suitable for measurements, histogram plots, whatever. Following queries, I downloaded this image, opened it in Photoshop and displayed its histogram. The result is shown on the last slide in this gallery. I took a sample of the background sky from the above Jpeg frame (keeping away from the vignetted corners and also from the galaxy itself) and got Luminosity readings around 33% of full-white. That's for a 5-minute exposure at f4 and ISO 1250. To translate this roughly (ignoring gamma since we need just a ballpark figure) to my standard reference of "Mid-histogram (50%) at f4 and ISO 800", we need to multiply 5 minutes by 50%/33% and ISO1250/ISO800, yielding 12-minutes or Mag 21+ /sq arc-sec, a satisfactorily dark sky in that specific direction of M31! By following this simple example you can, in fact, deduce your skyfog level from any frame taken at any ISO, focal ratio and exposure length, provided the exposure was long enough for the skyfog to be well detatched from the origin in the histogram of its Jpeg file. Do NOT use the 16-bit Linear-converted file for these estimates, use nonLinear conversion to 8-bit Jpeg (as you do for normal, daytime photography).
STARTING FROM A BUNCH OF SUBS TAKEN DURING AN IMAGING RUN: OK, you did not plan on measuring your skyfog, but many weeks later decided to find out how much skyfog you had anyway. Take any typical one of the Raw subs that you used for stacking. Convert it from Raw to Jpeg using "Normal" conversion, not "Linear"!!! Display its histogram in any image editor and see where the skyfog peak falls, let us call this PCT, eg if the peak is at 23% along the X-axis then we will have PCT=23. You already know the ISO you used and the FR (focal ratio of your OTA, e.g. if it was f6.7 then FR=6.7). Finally the length of the subexposure was EXP in minutes(!), e.g. if the sub was 100sec, then EXP=1.7. To get the equivalent time (Mins) required for the translation scales displayed above, simply use:
MINS = EXP * (ISO / 800)*(50 / PCT)*(4 / FR)*(4 / FR)
Use the resultant MINS to enter the translation scales displayed above and you will have a pretty good estimate of your skyfog at a site you were at weeks or even years ago :-)
HOW DARK CAN A REALLY, REALLY DARK SITE GET?: While amateurs usually refer to Visual Limiting Magnitude, professional astronomers prefer referring to the skyfog through a V filter compared to a star (e.g. the skyfog at the darkest, remotest, high altitude sites have been reported to be about as bright as a Magnitude 22 star placed in each square arc-second). One can make an accurate translation scale from "Exposure to Mid-Histogram at ISO 800 and f4" to "Mag/sq arc-sec". I measured the skyfog at a high altitude, reasonably remote site, tens of km from the nearest village, at 16 minutes to mid-histogram and calibrated it against a Unihedron Sky Quality Meter (21.4 Mag/sq arc-sec). In theory these scales should be reproducible and consistent. However, the Unihedron SQM has a very wide acceptance angle (80+ degree cone) that is probably far too large for a light polluted location, since there are always annoying, localised light sources somewhere, likely leading to readings that are brighter than the true zenith is. The DSLR is a more flexible instrument since we can set its acceptance angle, by simply changing the lens, to whatever is relevant for our particular imaging circumstances.
VISUAL LIMITING MAGNITUDES: For convenience we may talk of Visual Limiting Magnitudes. Note, for convenience only. The VLimMag translation scale shown above is not absolute. It is observer dependent and very subjective, but I found it to be sort of OK at a heavily light-polluted site when I glance up quickly. Staring longer enables me to see deeper, by, say, up to half a Magnitude. It is NOT a linear function of the other two scales, because the sensitivity of human vision seems to plateau out for dimmer stars. To make things worse, there have been reports that some rare, very experienced and exceptional observers can see deeper by as much as two Magnitudes. However, the above scale is based on the extensive research work of B.E.Schaefer and later put into a web-based calculator by K.Fisher. You can check out the numbers for your own site and decide whether it is to be shifted to the left or to the right, depending on your visual acuity, sky knowledge, etc. It's not important exactly where you wish it to end up. Very likely your visual assessment will be within a half VLMag of the above translator scale. But for ease of phrasing, whenever I refer to a number for VLMag on my webpages I am referring to a number obtained using the above translation scale.
The Bortle translation above is my guesstimate since I am unable to reconcile Mr Bortle's Mag/sq arc-sec with my VLimMag. Basically just MEASURE your skyfog and work with Mag/sq arc-sec.
WHY BOTHER?: Why is it useful to know how much brighter your skyfog is compared to a pristine dark site? Budding astrophotographers tend to assume that they have massive light pollution at their home sites because their images do not have a black background. They may or may not. Better find out up front. Actually, as seen from the above example, an image that has been adequately exposed should in fact NOT have a black background. The SNR (Signal to Noise Ratio) in your final, stacked and processed images has a direct relationship to how much skyfog you have. Let us say that you are at a site for which the skyfog takes 1-minute to reach mid-histogram and you have exposed enough frames to end up with an integration time of one hour. You then repeat the exercise at a dark site for which the skyfog takes 15-minutes to reach mid-histogram. At this darker site you will require 1/15th the total integration time as at the first site to achieve the same SNR. Ie 4-minutes integration time will yield a final, processed image with the same SNR as your earlier one-hour stack.
INTEGRATION TIMES: For similar SNR from two different sites, the total integration times used in the stacks of frames need to be in direct proportion to how much more skyfog you have at the more light polluted site. Six times more skyfog (eg semi-rural suburbia), six times longer integration time. So to reproduce those beautiful DSO images that took 3-hours integration at a dark site will require 18-hours integration at the light polluted site; for the same SNR. Basically, extend integration times to the limit of your stamina, at any site.
EXPOSURE TIME PER FRAME: The thing to remember is that with proper post processing we can remove most sources of camera noise, but not all. With modern, low-noise DSLRs used at ambient temperatures cooler than, say, 25deg C, the use of darks, flats and bias frames removes most noise very effectively. But not the Read-Noise of the camera and the Poisson Statistical Noise in the skyfog. Longer and ever longer integration times will reduce the skyfog statistical noise by a factor proportional to the square root of the integration time. But when we stack frames, each with a short exposure, we are also stacking the camera's Read Noise in each frame! We need to separate this Read Noise from the skyfog statistics. Fortunately there is a way to do this. Expose each frame so that the skyfog peak is well removed from the origin of that back-of-camera histogram. An often-mentioned rule is to expose so that the skyfog peak is at a quarter to a third of the horizontal axis of the back-of-camera-histogram. Tracking is usually the main limitation as to how long each exposure can be. So how short can we make each exposure and still feel reasonably secure that we capture as much faint detail in our DSO as we can ever hope for? My own rule-of-thumb: use the highest ISO your camera offers, but not one that you have to invoke some special function. ISO 1600 seems an excellent choice for current (2006) Canon DSLRs. It actually seems to have lower Read Noise than lower ISOs. Expose each frame long enough so that you can see a distinct gap between the TRAILING edge of that skyfog mountain and the origin on the back-of-camera-histogram. In your post processing, after calibrating with darks, flats and bias frames, you will very likely use the trailing edge of that skyfog mountain as your "Black Point" anyway, so you are not likely to sacrifice any faint data on your DSO. Can you do even better by exposing each frame longer? Theory says that the improvement in final SNR diminishes asymptotically from this stage onwards. So, yes, expose each frame longer if you can, even up to mid-histogram, but you are eating into the dynamic range of your camera and risking mistracking, cosmic rays, planes, satellite tracks, whatever. You may of course recover dynamic range by simply switching to a lower ISO. How much is a "distinct" gap? The skyfog mountain is simply displaying statistical variations within it (OK, also vignetting), so if we examine it on an expanded vertical scale (eg we use a logarithmic luminance axis) the trailing edge will extend even closer to the origin than we see on the back-of-camera-histogram. So try to keep a healthy gap, but I expect that any clear gap (10%?) should be quite ample. You will find that even at a dark site, the use of fast optics, eg f4, and ISO 1600 means you need individual exposures no longer than, say, a couple of minutes to do excellent DSO imaging. Of course I trust you also realise that shorter individual exposures means a larger stack to achieve the same integration time. Most DSOs need at least 2 to 3 hours integration time even at a dark site to come out nicely, so shoot a whole night on just one or a maximum of two DSOs. And you will still wish to have shot more frames.
FROM MY OWN EXPERIENCE: A pristine dark site would take 12+ minutes at f4 and ISO 800 to mid-histogram (or VLMag 6+ on the above scale), my own home base fluctuates between VLMag 3 and 4 at zenith (much worse 30 degrees or more off zenith and rapidly degrading to VLMag 1 when just 20deg above the horizon). The more transparent your sky is, lack of dust, the less degradation you get as you go away from zenith and the darker the site feels. One clear winter night/morning at 4am I even measured my home light pollution at VLMag 4.4 at zenith. If only that happened often... I would suggest that if the sky at your homebase is VLMag 4.5 or better at zenith then it`s probably better just to use more frames in your stacking (and filters) than heave all that astro equipment to a darker site. People who have a VLMag 4.5 sky often report that they can "just about" make out the Sagittarius Milky Way. So, IMHO, if you can make out any part of the Milky Way at all at your home base, then you are likely better off stacking loads and loads of frames at home, rather than lugging all that equipment into the boonies.
TO BE NOTED: The translation to Mag/sq arc-sec above is an actual calibration at a dark site. The translation to VLimMag is a subjective estimate and will always remain observer-dependent. All references to mid-histogram in the above discussion refer to the BACK-OF-CAMERA HISTOGRAM (!!!), or the histogram of the Raw frame converted using nonLinear, as used for normal daytime photography. A histogram of the same Raw frame that has been converted in Linear fashion, as used for astrophotography, will be much darker and very likely dependent on camera brand or model. The reason is that there's a gamma curve that is incorporated when you convert using nonLinear or when the camera does the conversion internally straight onto Jpeg. To maintain consistency between camera brands I restricted the above discussion to back-of-camera histogram (equivalent to a Jpeg capture) and a fixed ISO, otherwise data will not be portable between different camera brands. Consequently the above discussion is also not portable to astroCCDs either. You will first have to calibrate it against a normal digicam at ISO 800.
THE GOOD NEWS: Modern DSLRs have low enough thermal noise at reasonable ambient temperatures (25deg C and cooler) that with proper procedures (darks, flats and bias frames used in calibration) they are capable of beautiful astro images of very dim DSOs, and even narrowband imaging using modified DSLRs. They also have low Read-Noise compared to many astroCCDs. This enables their use in the desirable, so-called skyfog-limited mode with quite short exposures using relatively fast optics; a couple of minutes per frame with f4 optics, even at very dark sites. Much shorter exposures may be used at light polluted sites and still remain in the skyfog-limited regime. Many people with excellent tracking prefer to shoot longer exposures per frame, perhaps even at a lower ISO. What really matters is that the skyfog statistics in each frame are not interfered with by your camera's Read-Noise and that you have ample integration time. I discuss the question on minimal sub-exposures more extensively here: http://www.samirkharusi.net/sub-exposures.html
THE BAD NEWS: Integration time! There is no obvious way around having to achieve proportionately longer integration times at light polluted sites compared to a dark site. Shorter exposures per frame simply imply having to take even more frames. Let us work out some numbers: Assume that our mount can deliver satisfactory tracking for 6-minute exposures at our desired focal length. At a very dark site we can often achieve a satisfactory (not great, but satisfactory) image of a faint fuzzy with about an hour integration time. A "great" image will typically require 3 to 5x as much integration time, even at a dark site. On the other hand, star clusters such as globulars require much less integration time. Depending on the focal ratio of our OTA we may find that at ISO 1600 there is a nice gap between our skyfog mountain and the origin, on the back-of-camera histogram using 3-minute exposures. So we decide to use 20x3minute exposures to deliver the one-hour integration time. Back at our home base in semi-rural suburbia we find that the skyfog is 6x brighter than at the dark site. This is not atypical and we need to shoot 6-hours integration time to achieve the same final SNR. We will also likely find that at ISO 1600 there is already a nice gap between the origin and the skyfog mountain with exposures as short as one-minute. So we have a choice, shoot 360x1min frames at ISO 1600 or use longer exposures at a lower ISO? We wish to achieve 6-hours integration time in all cases. Perhaps we decide to settle on 60x6min frames at ISO 400. Either route is valid and the resultant SNR after stacking should be similar, 20x3min at ISO 1600 at the dark site compared to either 360x1min at ISO 1600 or 60x6min at ISO 400 at the light polluted home base. There is no getting around having to increase the integration time enormously. To keep the total number of frames reasonable it is often wise to use a lower ISO at a light polluted site. In all cases you also wish to have a clear gap between the trailing edge of the skyfog mountain and the origin, so that Read-Noise does not mess up your skyfog photon statistics. The greater the number of frames in your planned stack, the clearer the gap has to be and the more dependent you become to the absolute linearity in the response of your camera. I often try to use exposure length and ISO that keeps the total number of frames in a stack under a hundred.