


|
|
|
|
|
|
| Dick Lowthian | profile | all galleries >> Galleries >> Digitizing Old Slides | tree view | thumbnails | slideshow |
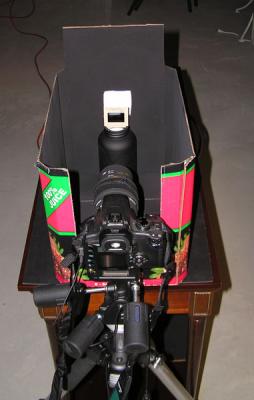 Setup 1.jpg |
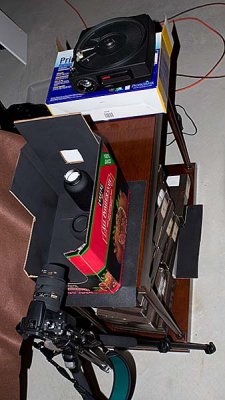 PB-IMG_4223.jpg |
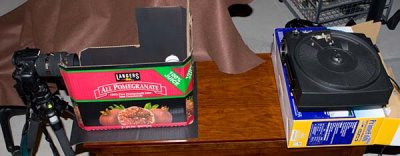 PB-IMG_4226.jpg |
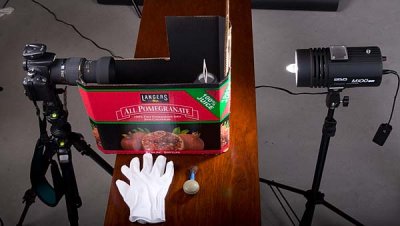 PB-IMG_2649.jpg |
 Slide Holder.jpg |
 PB Sister_13.jpg |
 PB Dianna 100 percent crop.jpg |
 PB Marsha .jpg |
 PB IMG_4640.jpg |
 PB-IMG_7584.jpg |
 PB-IMG_7586.jpg |
 PB-Dad Link 1957.jpg |
| comment | share |
| James | 16-Mar-2013 16:11 | |
| Colin | 23-Apr-2011 09:46 | |
| gorgi | 09-Dec-2010 17:45 | |
| Bob | 24-Dec-2008 14:02 | |
| Ron | 10-Dec-2008 22:27 | |
| 11290 | 28-Jul-2008 04:21 | |
| anil | 26-Jul-2008 12:59 | |
| Elizabeth Sayre | 02-Jul-2008 16:18 | |
| Judi Hastings | 13-Feb-2008 06:13 | |
| Guest | 08-Jul-2007 16:05 | |
| Tom Briggs | 01-May-2007 10:50 | |
| GoodListener | 07-Jan-2007 18:27 | |
| Mick Seymour | 27-Oct-2006 16:29 | |
| Guest | 14-Oct-2006 06:03 | |
| Dave Beedon | 21-Mar-2006 04:12 | |
| Joe | 01-Feb-2006 08:08 | |
| Guest | 31-Jan-2006 22:41 | |