photo sharing and upload picture albums photo forums search pictures popular photos photography help login
Sony Forums Challenges | all galleries >> Challenge 121: White / technically flawed (hosted by Katherine Kenison) >> Challenge 121: Eligible > edit image
previous | next
05-JUL-2006

A wedding card by Tabrizi

Kuala Lumpur

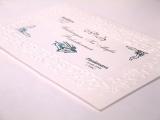
A full shot of my previous submission. I tried to play around in photoshop to get a whiter white but somehow I don't get what I want... Any advice..?

Sony DSC-V3
1/30s f/3.5 at 13.9mm iso200 hide exif
Full EXIF Info
Date/Time05-Jul-2006 17:12:44
MakeSony
ModelDSC-V3
Flash UsedNo
Focal Length13.9 mm
Exposure Time1/30 sec
Aperturef/3.5
ISO Equivalent200
Exposure Bias0.70
White Balance
Metering Modematrix (5)
JPEG Quality
Exposure Programprogram (2)
Focus Distance

other sizes: small medium original auto
comment | share
Tabrizi 07-Jul-2006 01:20
Thanx Zahid... Already seen your version. You've done it really well..
Zahid Niaz 06-Jul-2006 11:48
I have not seen bottle's version of your image ... I am sure it must be execellent.
You can view my version of your image with more white in Demo.
Guest 06-Jul-2006 07:05
Tabrizi and Katherine, glad you found it helpful! Thanks for letting me know that it worked for you.
Tabrizi 06-Jul-2006 04:55
Tried it just now & it works, much much 'whiter'... Thank you again...
Katherine Stanback's Photos06-Jul-2006 02:10
Very nice image - I really like the white pattern on the white paper! It does look sort of pink, though. I tried bottles suggestion - it works! I'm going to have to remember that one - thanks, bottles :)
Tabrizi 06-Jul-2006 01:39
Thank you very much bottles for the tips... Really appreciate it... Will try it soonest as I can. terima kasih...
Guest 05-Jul-2006 23:35
Nice entry Tabrizi but yes it does have a little color cast to it. Looks like the white balance setting may have been off a little. Try this (one of Katrin Eismann's fixes)...

1) You might want to start by duplicating the Background layer in case you need to start over.

2) Use the eyedropper tool to sample an area that is fairly light and contains that pink color. This of course will set your foreground color to pink.

3) Add a new empty layer above the image layer and fill it with the sampled pink color (using the Paint Bucket tool).

4) Change the new layer's Blending mode to "Color".

5) Invert the color by selecting Image > Adjustments > Invert. This will change the offending color into it's opposite, to neutralize the color cast. In this case it should go from pink to a light greenish color (in the image area not on the layer's palette).

6) Now, lower the opacity of that top layer until you get the white (or close to it) your looking for. It will probably be at or near the 50% opacity mark.

7) You can now Flatten the image. You may still want to use something like Curves (adjust the curve or use the "Set White Point" eyedropper) to boost the lightness but now at least you have a good starting point.

Hope this is helpful,

bottles