11-MAY-2011
Apply Lapping Compound
With the grease removed inside the valve body and on the cone/plug you can mix the lapping compound and apply it to the cone. It does not need to be pretty as you may do this three plus times per cone to check your progress.
11-MAY-2011
Re-Insert Cone & Lap Fit
For Lap Fitting:
1- Remove handle from cone/plug by removing the set screw.
2- Find an Allen wrench or other device that will allow you to spin the cone rotationally 360 degrees. I am using an Allen wrench here as the "L" end works great for this.
3- Insert cone/plug and install the dog washer BACKWARDS with the dog facing away from the valve body.
4-Install flange nut and tighten so you can still turn the cone/plug with the Allen wrench.
5- Rotate the cone fully in a 360 degree fashion roughly ten times in the same direction.
6- Loosen flange nut, remove cone, wipe clean and check lapping progress.
7- If more fitting is needed re-apply a light layer of lapping compound and rotate the opposite direction approximately ten times and check again.
*******A Word of Caution********
The instructions from Spartan are very misleading for lap fitting. Folks often assume they want you to use the handle in a simple back and forth motion to lap fit. This is NOT the case and can result in ridges and uneven lapping. Spartan is aware that they need to change their instructions to be more clear and Paul had asked me to "override" their instructions here for anyone who might read them.
Lap fitting should always be done in a full complete 360 degree circular fashion and not a 180 degree "back and forth" manner...
19-MAY-2011
10 Turns
This is the "nasty cone" after 10 full rotations. Still needs some work.
19-MAY-2011
20 Turns
This is how it looked after 20 turns. The second set of ten I do is in the opposite direction. I find that I rarely need to go beyond 40 turns even on real bad ones and 30 seems to be the magic number.
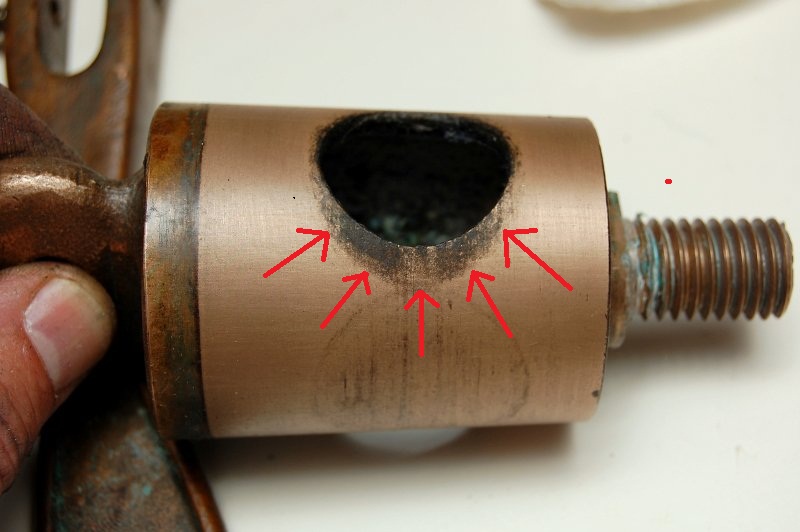
DO NOT try and get any of the deeper corrosion spots out of the circular area left from the valve being closed. You would need to remove a lot more bronze than is necessary to accomplish this.
You are looking to get the most contact area you can without over grinding and enough to keep the valve from weeping in either the open or closed position.
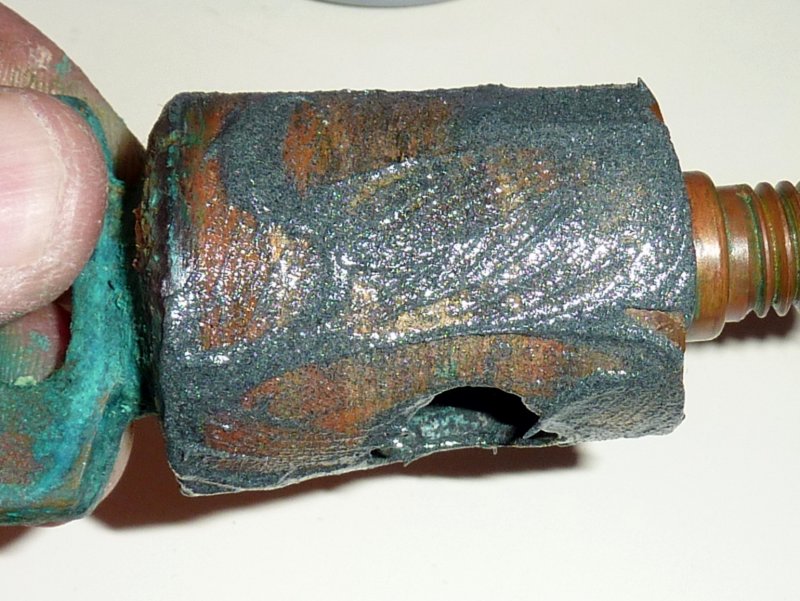
11-MAY-2011
20 Turns Inside a 3/4" Valve
This valve was in very rough shape at 32 years old but it cleaned up well and performs perfectly going on it's 33rd season.
This photo also represents one reason why I dislike white PVC sanitation hose when used below the waterline. That crack was in an area only really visible to the camera. Ouch!!
19-MAY-2011
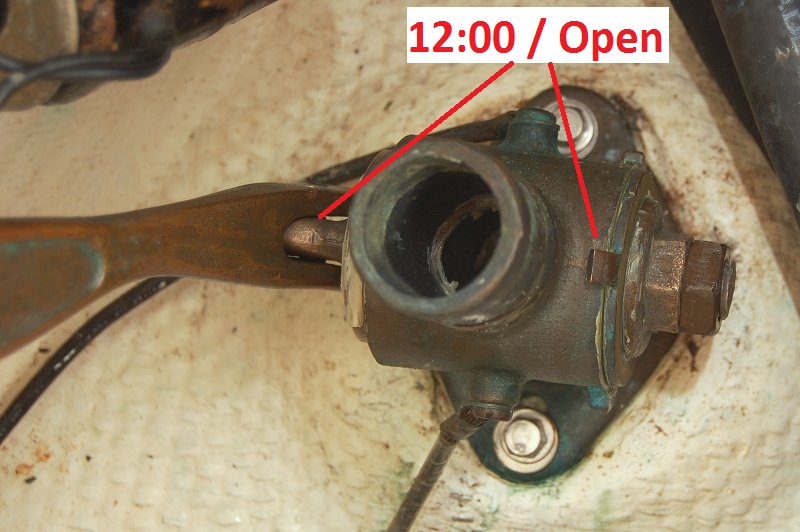
Incomplete Valve Opening
This wear and low spot was caused by repeated incomplete openings of the seacock. This wear or low spot can be avoided if you follow the cone ear and NOT the handle. On Spartans you can simply look at the dog on the washer as your guide. When it is at 12:00 the cone/plug hole is perfectly centered in the hole.
12-MAR-2011
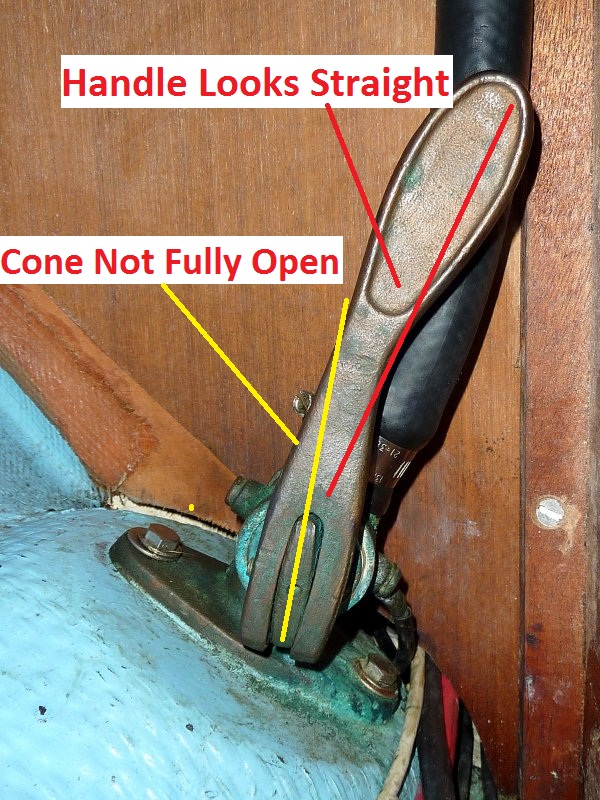
Valve Not Correctly Opened
As you can see in this image the handle feels and may look like it's open but unless you look carefully at the ear on the cone/plug you can't tell that it is not fully open yet.
19-MAY-2011
Properly Opened
As you can see the "dog" is at 12:00 as is the tapered cone/plug ear. The handle makes it look like it is not open but it really is. Don't go by the handle go by the dog, if it has one, or the cone/plug ear that the handle mounts to.
Proper opening can save some wear and tear on these valves.
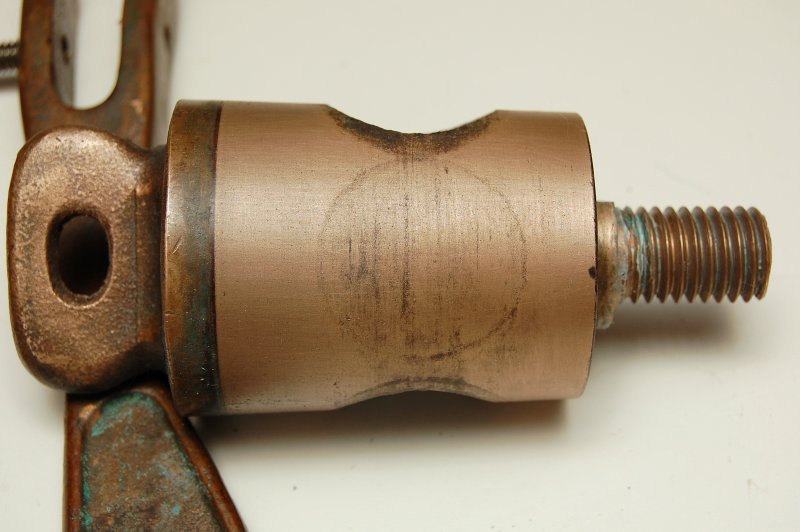
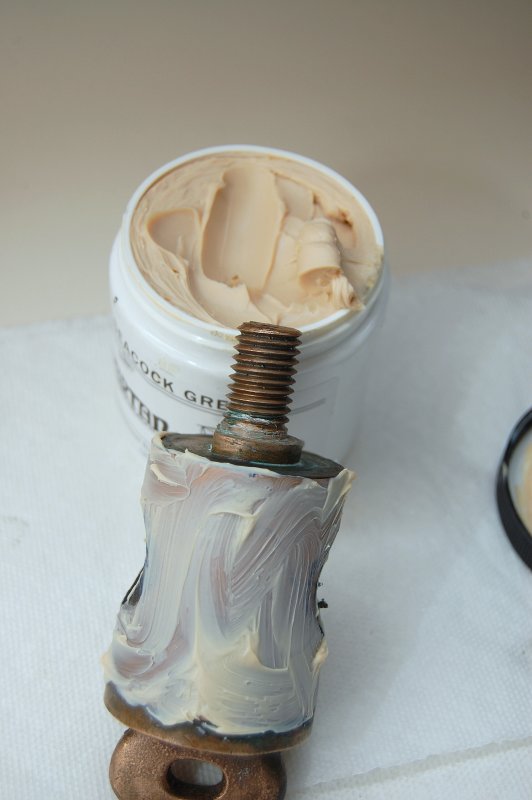
19-MAY-2011
Final Step
This is the final step. What you see here is way too much grease. Smear it on then wipe much of it back off. It is best to coat both the inside of the valve and the cone with grease before assembly.
WARNING ****** WARNING
The cone and valve MUST be free and clear of ALL lapping compound before re-assembly. I find that denatured alcohol and microfiber rags work best for this but terry cloth works too. Reach your finger into the inlet and outlet and wipe them too or the lapping compound will be re-deposited onto the cone. You'll want to clean them three to four times with a fresh rag each cleaning. The lapping compound has a tendency to play hide and seek and you really need to "seek" it out.
1- After cleaning, grease the valve body and the cone/plug.
2- Insert the cone and line up the flat spot on the cone with the flat spot on the large washer. If it has a "dog" be sure the flat spot is facing up so the dog lands at 12:00 when open.
3- Install the flange nut and then the jam nut.
4- Adjust the valve slowly while working the grease in by moving the cone around.
5- Re-Install the handle and make final adjustment.
6- Adjust the tension so the handle needs some pressure to turn it but not so loose that it falls down on its own. This will leave room for any future adjustment that may be needed.
7- If it weeps on launch take very small turns on the flange nut until it stops weeping then lock the jam nut against the flange nut.
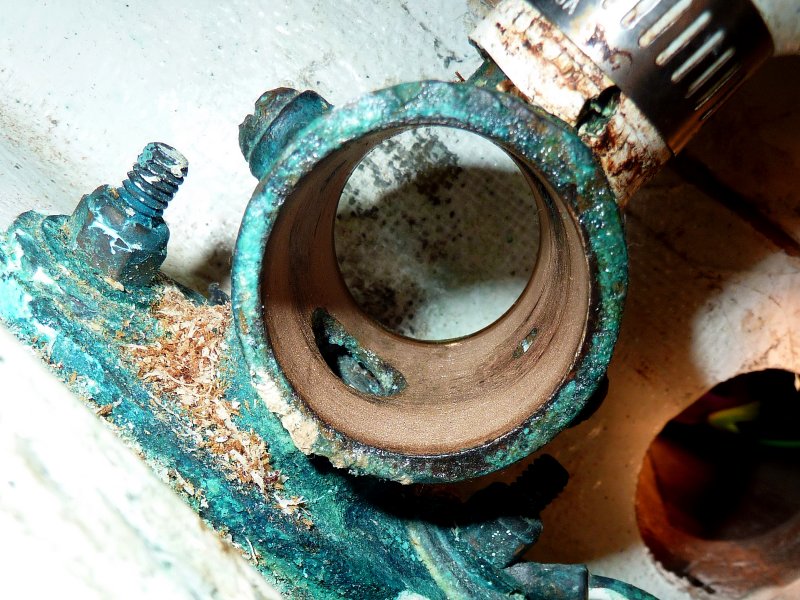
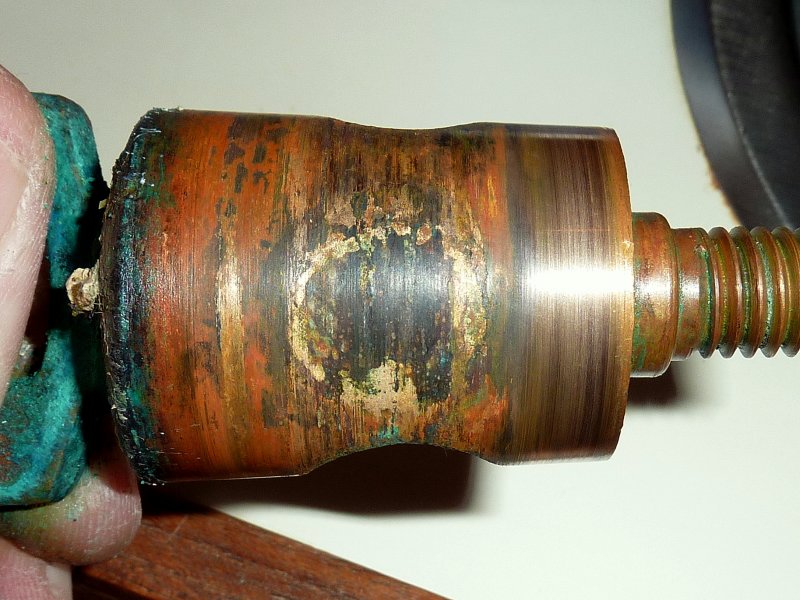
11-MAY-2011
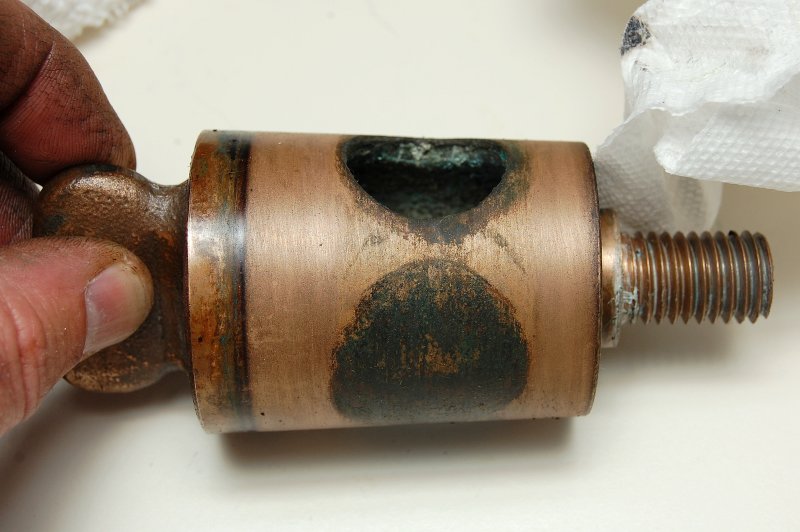
Before
This is just a visual of what can be done with very old tapered cone seacocks. This one was nasty and leaking badly.
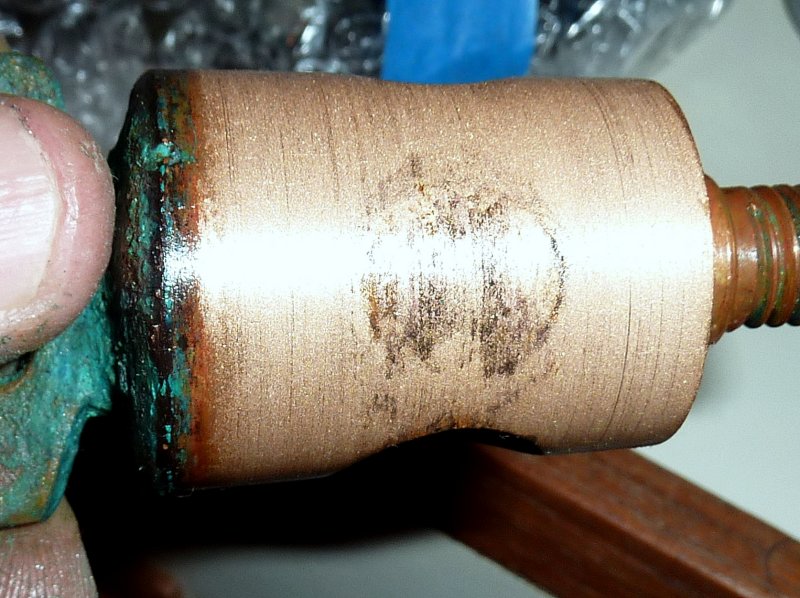
11-MAY-2011
After
About five minutes later it looked like this. I then cleaned it, greased it and put it back into service and it works flawlessly. This seacock had not been serviced or touched in over eight years.
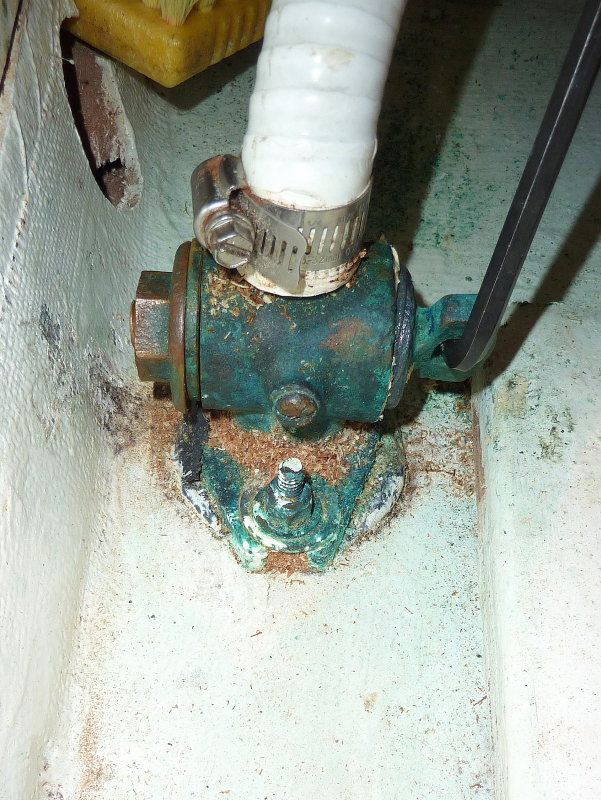
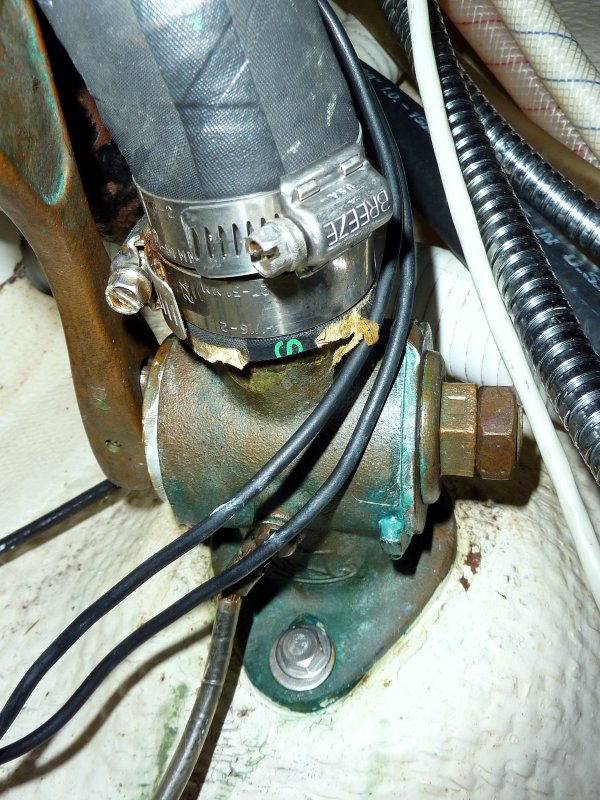
12-MAR-2011
Wiring
This was an actual situation I found under a head sink and these were live 12V DC. One wire had been pinched by the dog ear and the jacket opened up. Please keep any 12V DC or 120V AC wiring away from seacocks. Zip Ties are your friend!!