11-MAR-2009
Thread Sealant
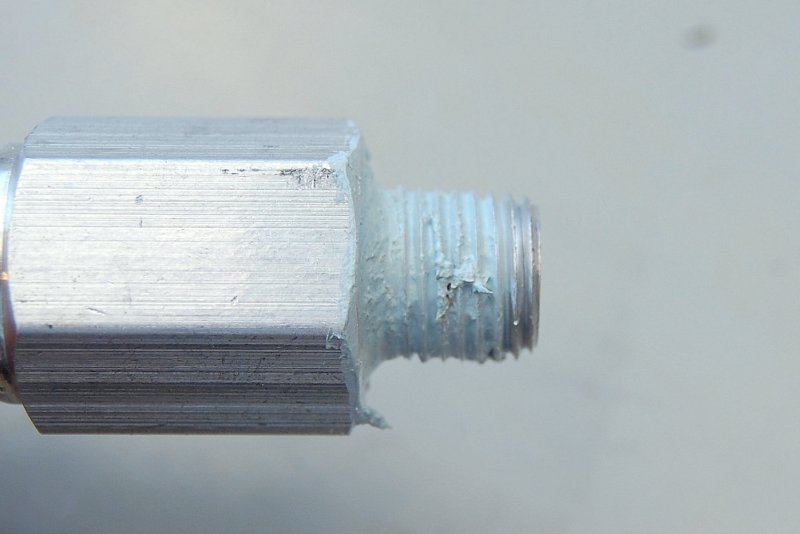
When installing tank fittings it is critically important that you don't get any teflon tape or pipe dope residue into the tank. If you look close you'll see that I have wiped on the thread sealant and then cleaned the first two threads. Doing this prevents getting pipe dope into the fuel tank.
Teflon tape is verboten in fuel systems. I suspect this advisory from Racor and others is more for the common denominator factor than anything else. I suspect it could very well be used, if applied, correctly, but I still don't use it in fuel systems, just dope.
11-MAR-2009
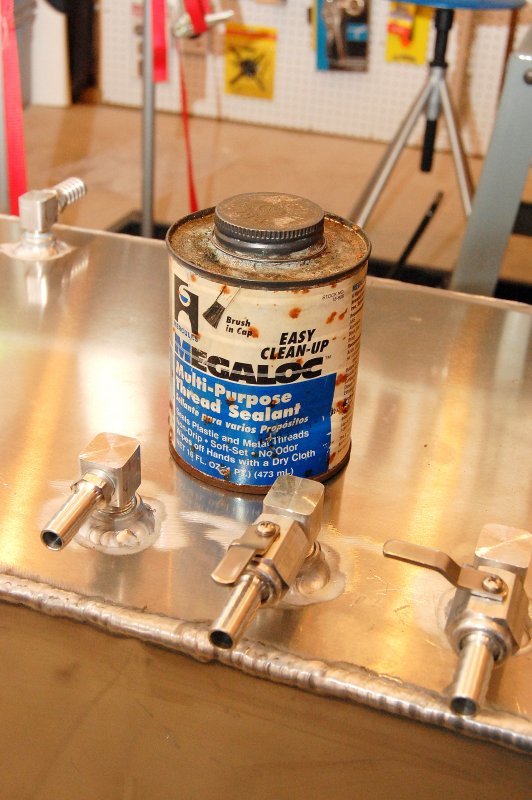
Thread Sealant & Fittings
My preferred thread sealant for diesel or #2 oil is Hercules Megaloc. It is diesel rated and works very, very well and also cleans up easily. It also never fully hardens which makes slight fitting adjustments in the future doable without losing the thread sealing properties. Hercules Megaloc is available at most any good plumbing supply house but there are many diesel/#2 rated thread sealants on the market. The key is to use them correctly and not be sloppy.
11-MAR-2009
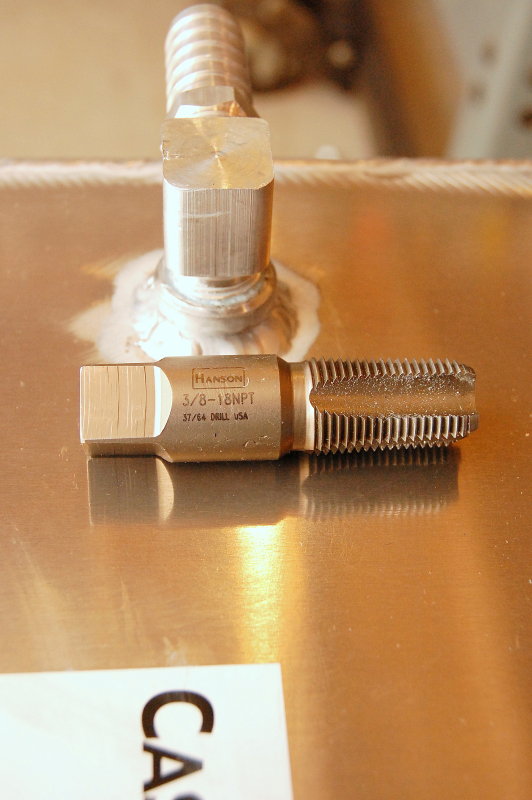
Tap To Clean Threads
With luck any aluminum tank you buy will have been properly pressure tested at the manufacture before delivery. Aluminum is soft and thus the plugs used for pressure testing tend to be harder than the aluminum and can bugger up the threads slightly.
For safety's sake I always chase aluminum threads before installing fittings into an aluminum tank. You will need an NPT tap to match the tank tapping threads for this task. Don't go crazy all you want to do is make sure they are smooth and free oil, debris or shavings. These tappings were all 3/8 X 18 NPT. After you chase and clean the tappings you'll then want to vacuum out the inside of the tank.
11-MAR-2009
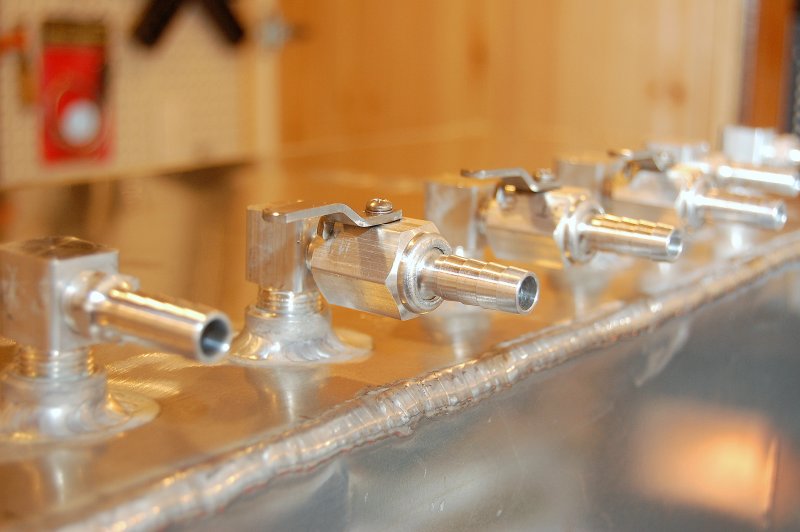
Fittings Installed
In this picture all the tank fittings have been installed and any pipe dope residue wiped clean.
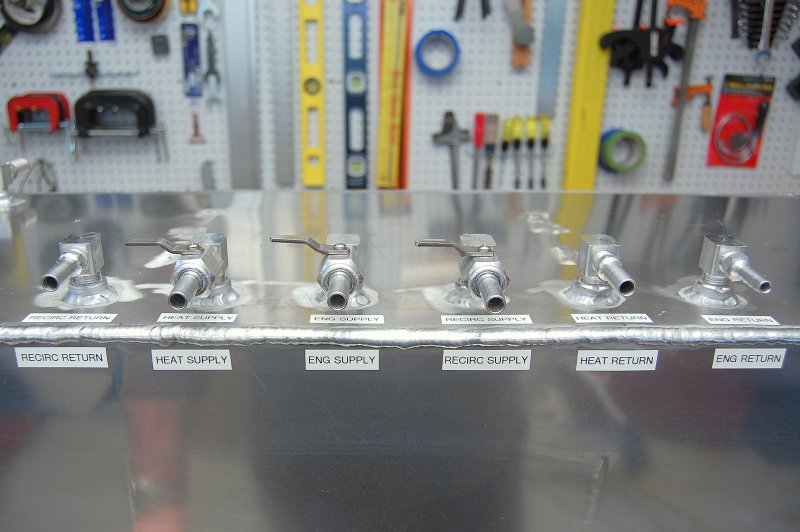
11-MAR-2009
Fittings Labeled
For future reference, or a future owner, I labeled the tappings on both the face of the tank and the top with a label maker. I also had wrote with a fine point Sharpie marker under the labels just in case.
11-MAR-2009
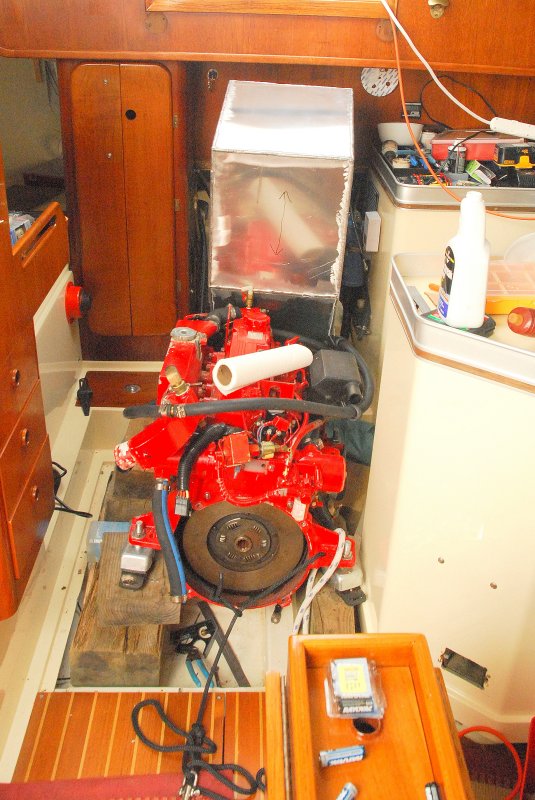
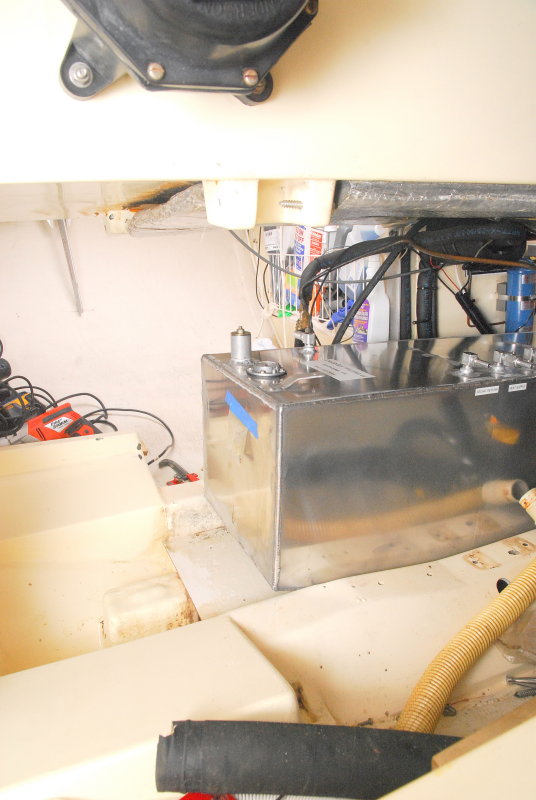
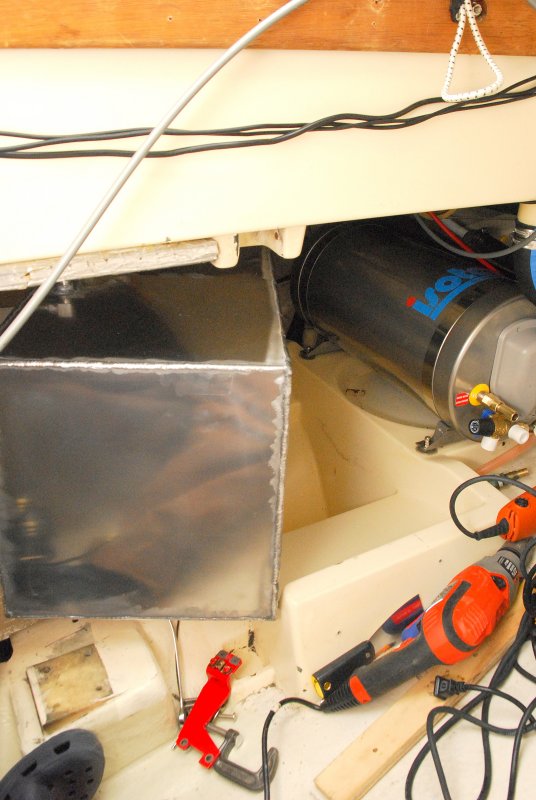
Installing The New Tank
On the CS-36T the tank runs port to starboard behind the engine and under the cockpit. Because of this the engine must be removed to replace the tank. Removing the gear box and using a block and tackle, AKA main sheet, in the companionway made this an easy task. I simply set the engine in the galley on boat yard blocs while waiting for the new tank.
This photo shows the new tank ready to go get buttered up and slid into place. Even with the engine out this was still a tight fit.
11-MAR-2009
Wedging It In
View from inside the engine compartment during the install process.
11-MAR-2009
Just Barely Fits between Engine Bed
The tank just barely fit between the engine bed stringers, which is exactly what needed to be done, in order to get it in & out.
11-MAR-2009
Almost In
Once the tank was in the engine compartment it then needed to be rotated in a port/starboard orientation. I also took the liberty of replacing the hot water heater when the tank was out. I did this under the old "while your in there" justification...
11-MAR-2009
Finally In Place
Once fitted into place I began to re-install the tank supports, hoses and associated hardware.
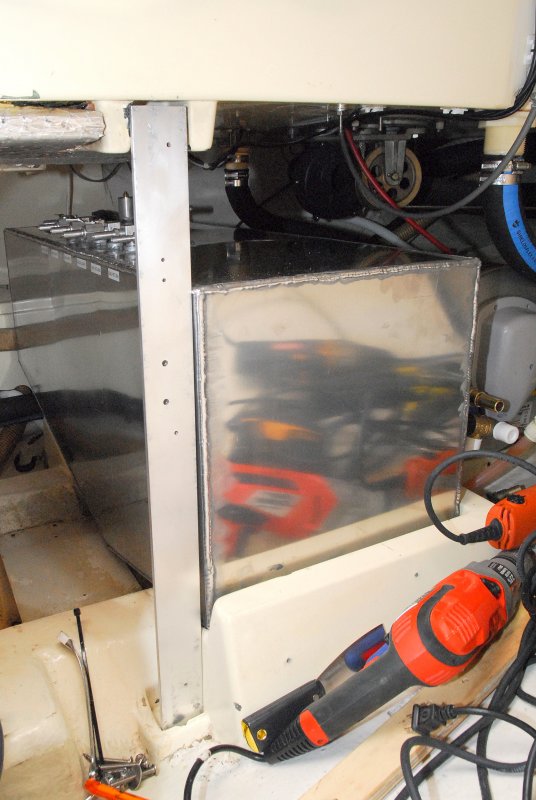
11-MAR-2009
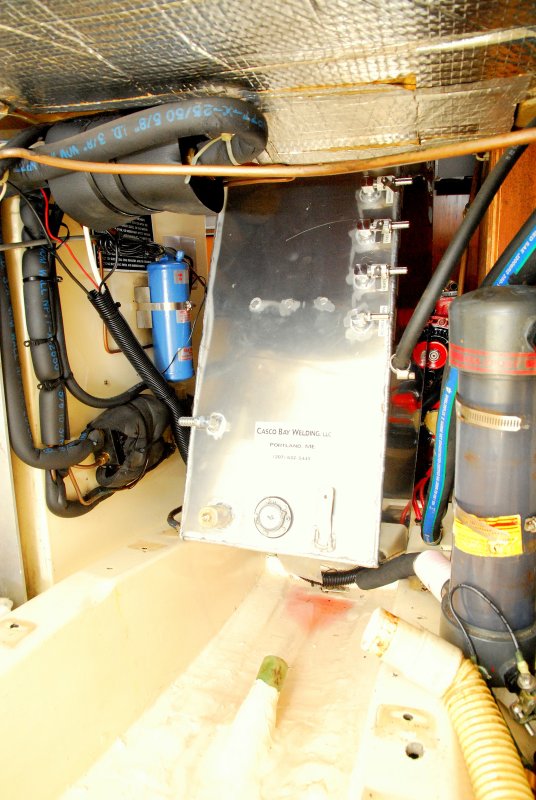
Polishing System Layout
In order to facilitate my polishing system design I made a board to fit across the fore edge of the tank that was bolted to the aluminum tank support brackets. This board holds the polishing pump, Racor 900 polishing filter and the primary engine fuel filter, a Racor 500.
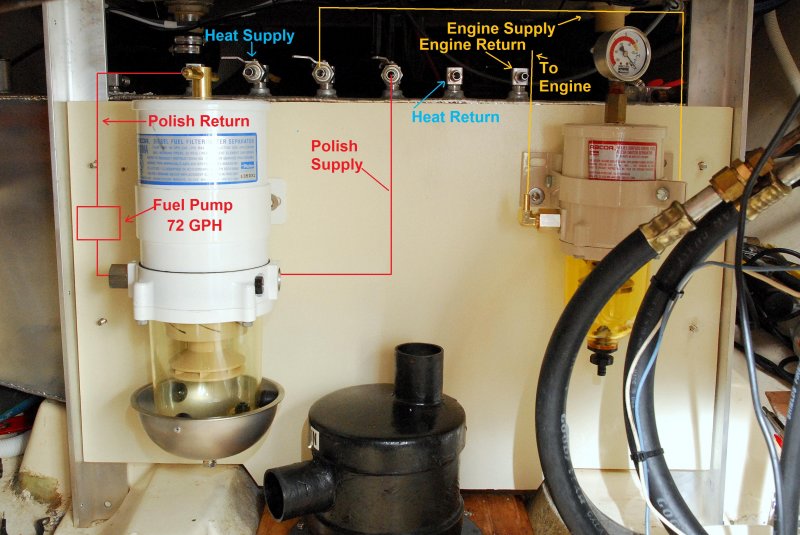
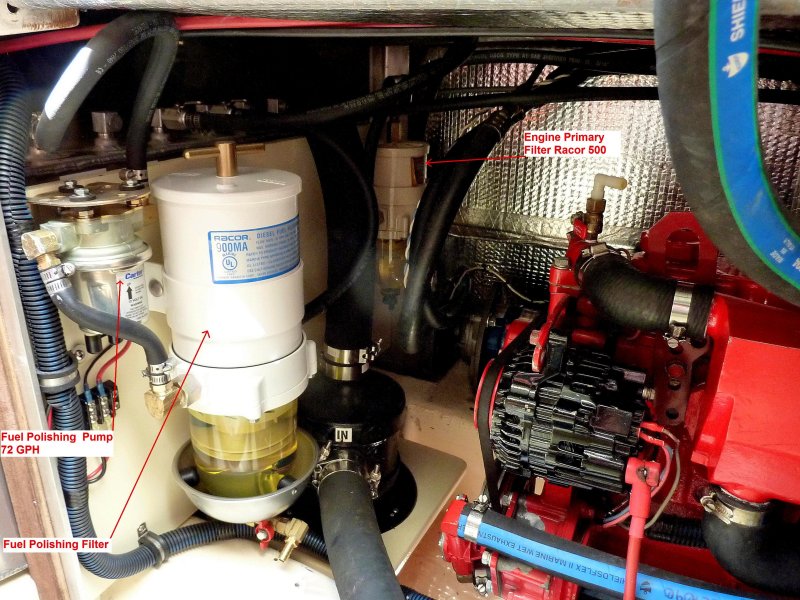
11-MAR-2009
Fuel Polishing System
Here is a good basic view of the entire polishing and primary engine filtration system with the engine re-installed.. The only thing missing from this photo is the vacuum gauge for the polishing filter.
*******CLICK BELOW FOR PAGE 3*******