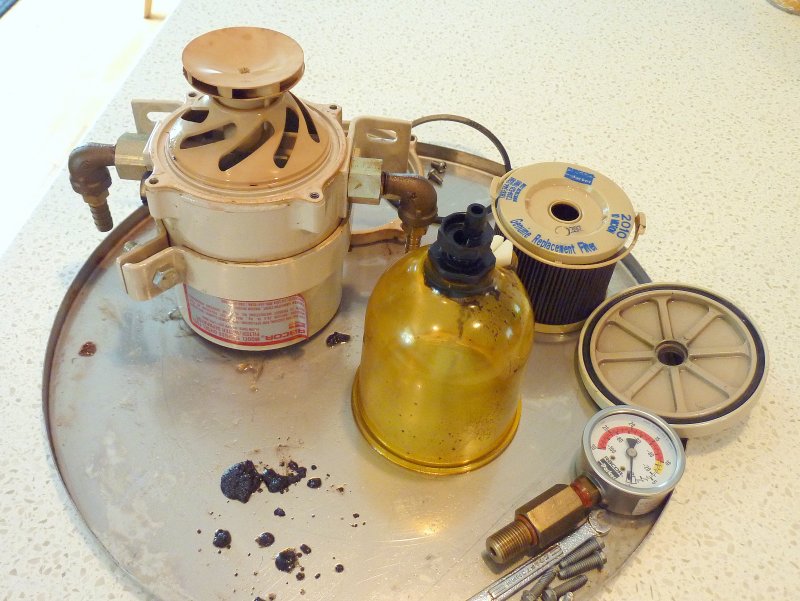
Dirty
The venerable Racor Turbine fuel filters have pretty much become the marine industry standard, but like everything, they may eventually need some attention. The Racor 500, 900 and 1000 models are quite easy to rebuild and Parker/Racor has the rebuild kits available for a reasonable price.
This project takes about 25-30 minutes to complete and once done your Racor will be as good as new.
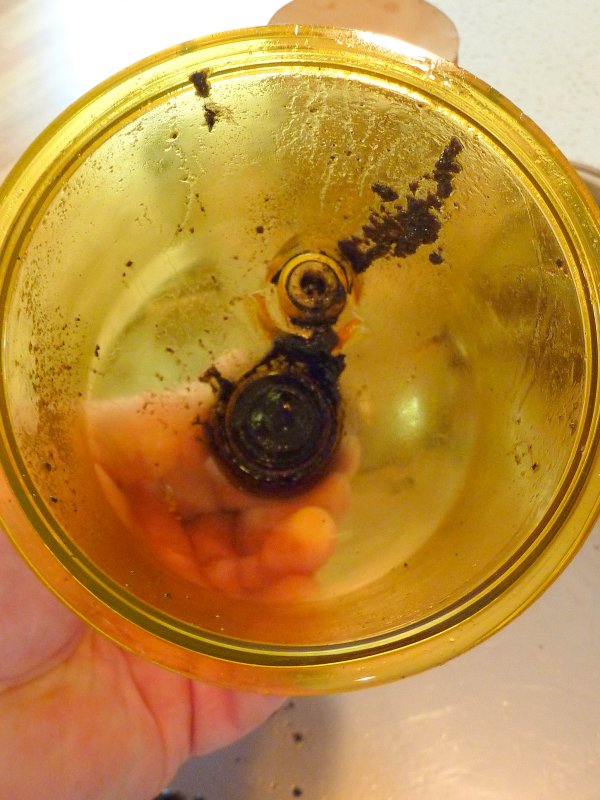
Dead Organic Matter
This is the bowl removed and showing a good colony of dead fuel bugs. I have seen them grow so voraciously that you can't even open the pet cock and get it to drain. If your filter is not draining you are well beyond being due for a good cleaning. If you regularly fill your bowl with dead matter you may want to consider a thorough tank cleaning.
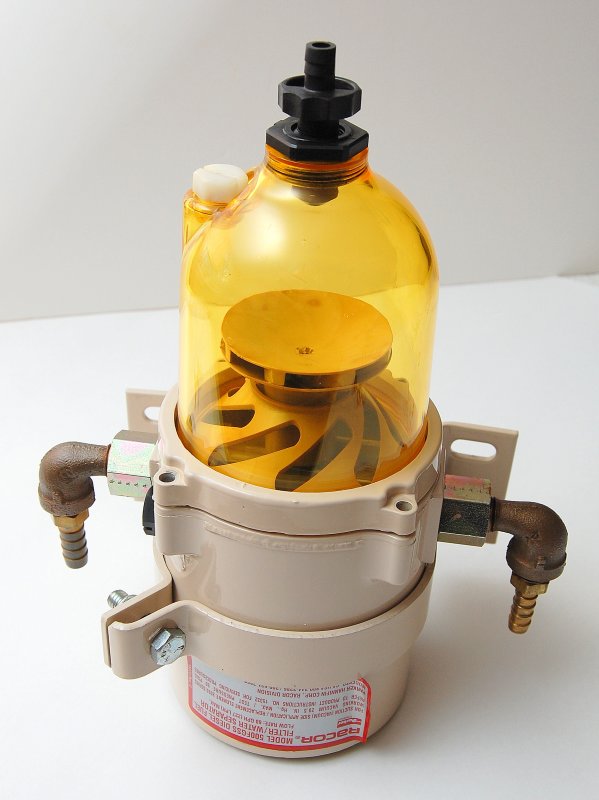
Remove Four Screws
To begin taking the Racor Turbine filter apart remove the four machine screws holding the bowl onto the housing. With the screws removed slide the aluminum clamping ring up and off the bowl then remove the bowl from the housing.
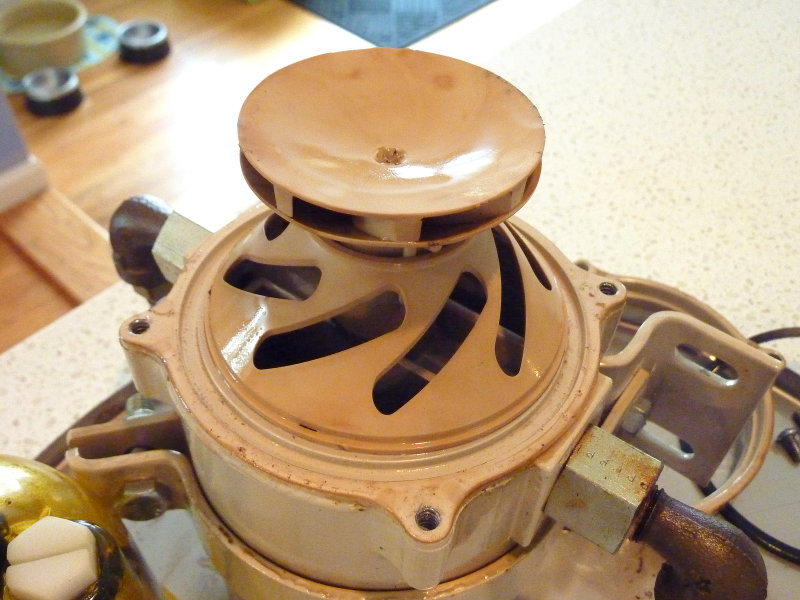
The Turbine
Here you can see the turbine element. This gets the the fuel spinning in the bowl to help separate out water and crud.
To remove the bowl from the housing there are four screws and you can see the screw holes in this photo. Once the machine screws are removed the bowl may not just pop off and may need a little muscle. There is one o-ring between the bowl and the filter housing.
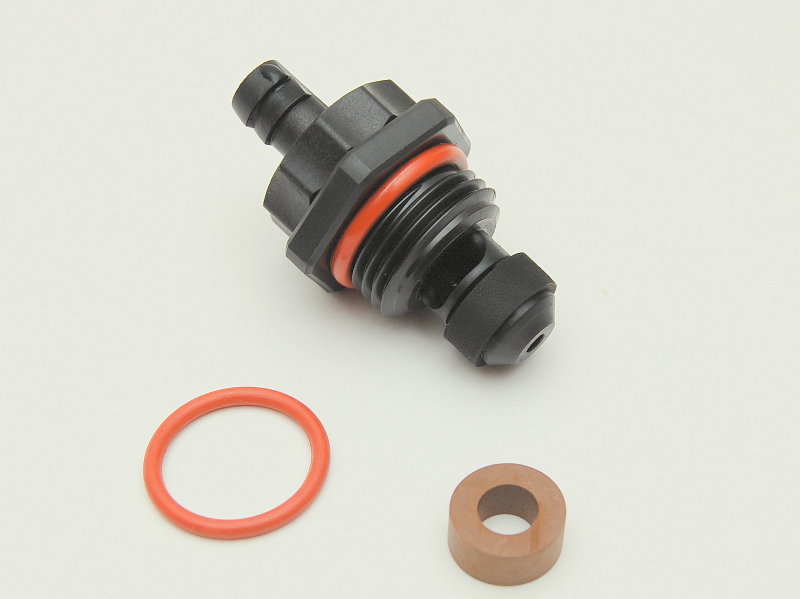
Drain Plug Assembly
This is the drain plug / pet cock assembly from the bottom of the bowl. Use a wrench on the nut closest to the polycarbonate bowl to back it out, righty tighty, lefty loosey. The nut closest to the hose barb is the nut that opens and closes this petcock and is not the one used to back the assembly out of the bowl. Once it is out you can clean it and then replace the gasket and o-ring with the new ones.
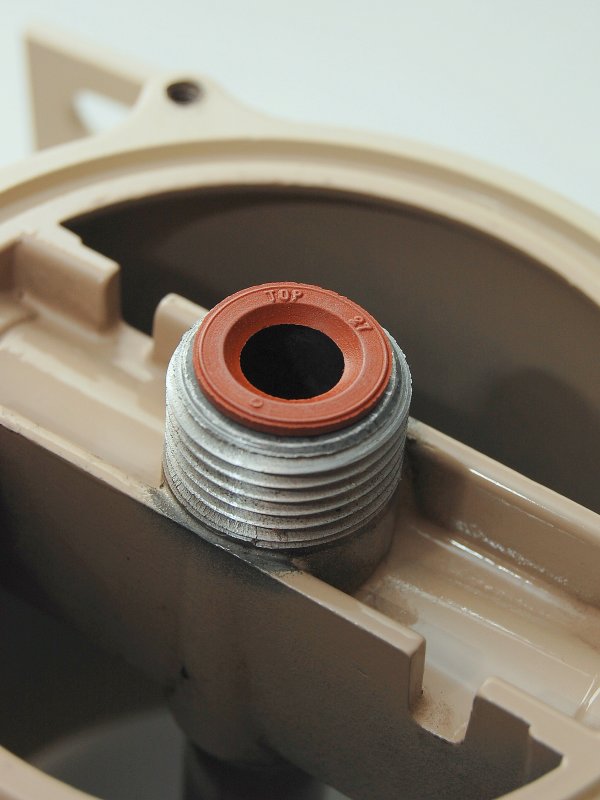
Check Valve Gasket - CORRECT
The Racor turbine filter has a built-in check valve which requires proper assembly for it to do its job. This photo shows the check valve gasket installed the RIGHT WAY!
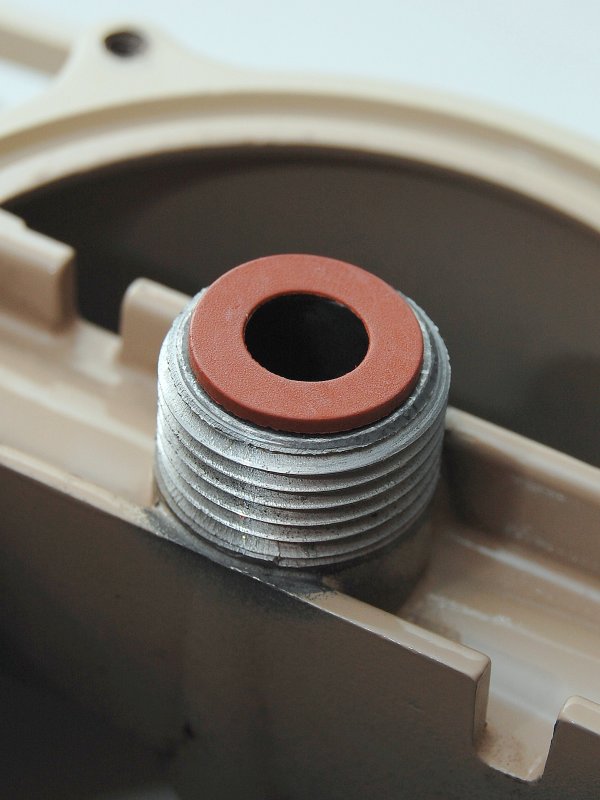
Check Valve Gasket - INCORRECT
The correct orientation for the check valve gasket is with the dished side facing away from the ball or opposite from what is shown here. Flip it over.
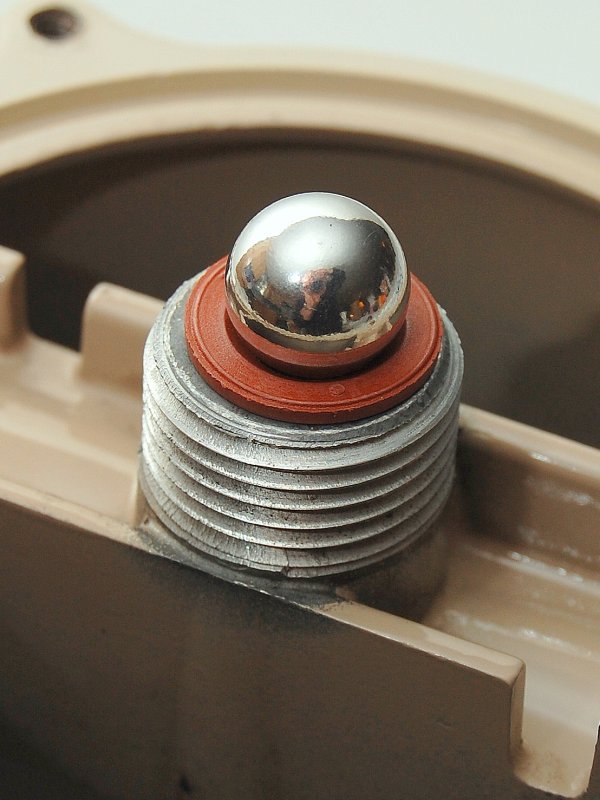
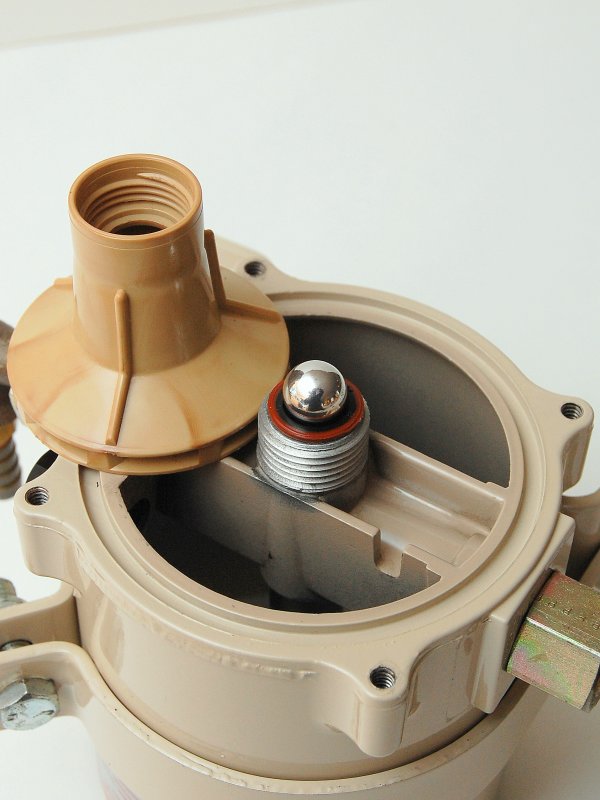
Check Valve Ball
As you can see the check valve ball fits perfectly in the dished gasket and would make you think this is how it should be. It should be installed the other way.
Turbine Threads On Here
Once the gasket has been replaced and the turbine cover and turbine cleaned you can re-install them. Simply place the slotted cover over the ball then thread the turbine (pictured) down through it and onto the filter housing. The turbine holds the slotted cover in place. Do not over tighten, just snug is fine. Note that the check valve gasket is now properly oriented.
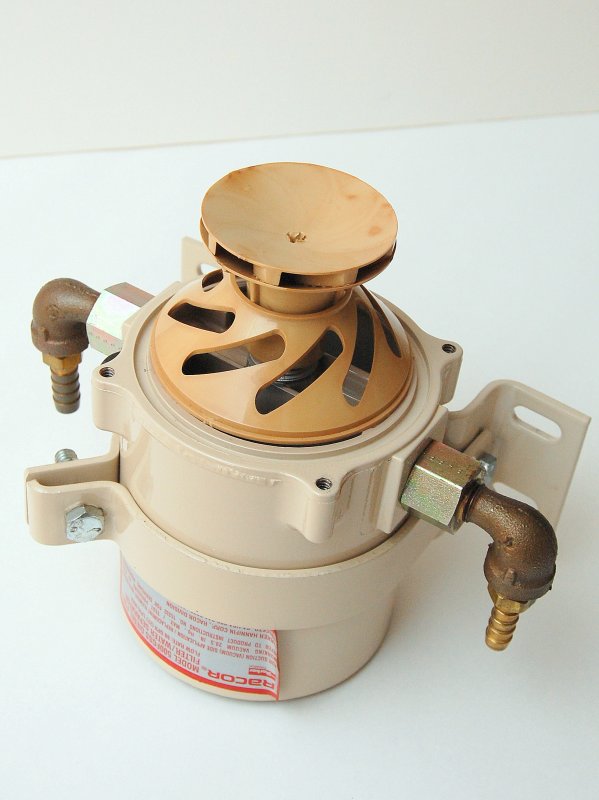
Turbine Back Together
This is what it will look like when you have the turbine and check valve back together.
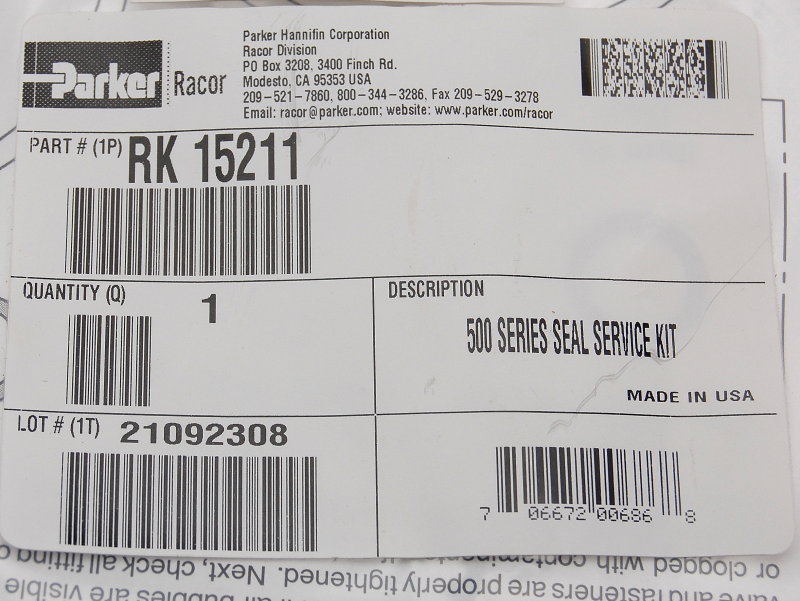
Rebuild Kit Part #
This is the part number for the Racor 500 Turbine Filter Rebuild Kit RK 15211. It is described as a 500 Series Seal Service Kit.
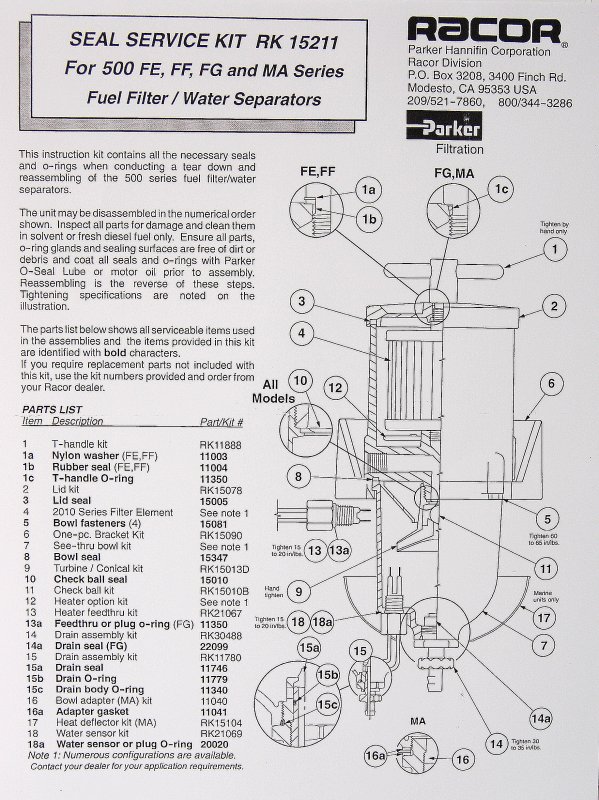
Exploded View
This is the exploded parts diagram that comes with the service kit describing all the parts and showing where they go. Click on the image if you want to make it large enough to read.
*******CLICK BELOW FOR PAGE 2*******