MAY-2006
Introduction
Choosing to install new portlights is a complicated decision. There are many companies out there building poor products that sell for big money and others building beautiful products that sell for a reasonable amount. My decision involved much research and investigation into the minute details of portlight construction. Many of the larger, well known, companies did not stack up when I began to dig into the small details so I chose New Found Metals as my portlight supplier.
This project is not for the boater who barely knows the difference between a Phillips head and a slotted head screw driver and is about a 5-6 on the 1 to 10 complexity scale. The task is straight forward and does not require "artist" like skills akin to blending and color matching gelcoat but it is a long and time consuming task.
Our boat has 8 ports and I figure this project took me a little over 45 hours of time. Hopefully this article will save you some time and you can learn from my mistakes and time saving tips. I figured each port would take about two hours but I was a little off.
I do hope this article helps someone considering new ports or who needs some guidance installing NFM portlights.
As always click on any photo and it will get bigger and offer more resolution. This article is quite LONG and totals four pages and more than 40 photos so don't forget to click "next page" when you get to the bottom.
MAY-2006
Phase 1 - Measuring Exterior Offset
Before you can even order your New Found Metals ports (NFM from here on) you need to know the thickness of your cabin sides. All NFM bolts are metric therefore I used my calipers in metric mode to determine an accurate bolt size.
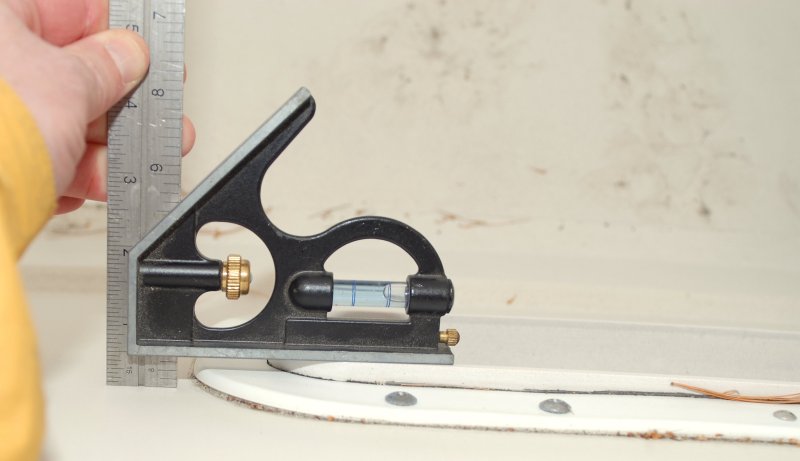
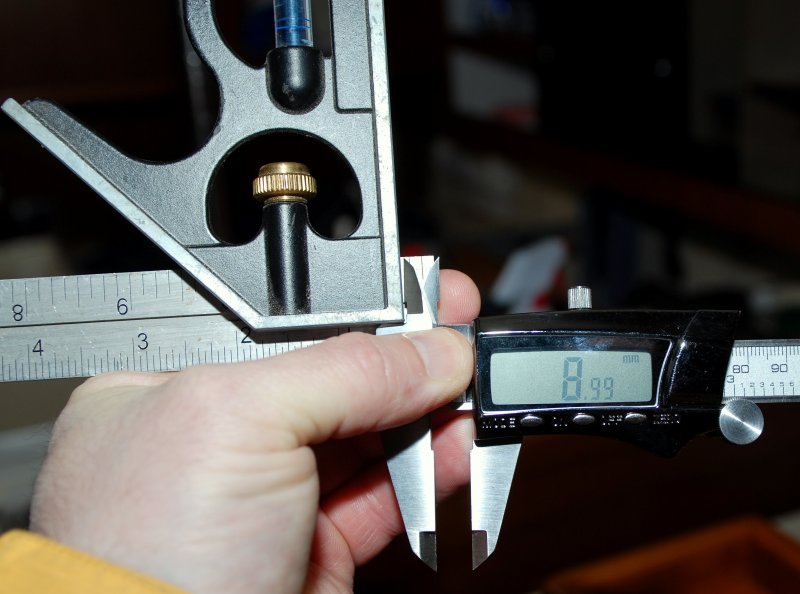
You need to measure the exterior off set from the widest point of the old port to the cabin sides. To do this I used my adjustable carpenters combination square as in the picture. Once I had the measurement I locked the set screw.
MAY-2006
Reading Exterior Offset
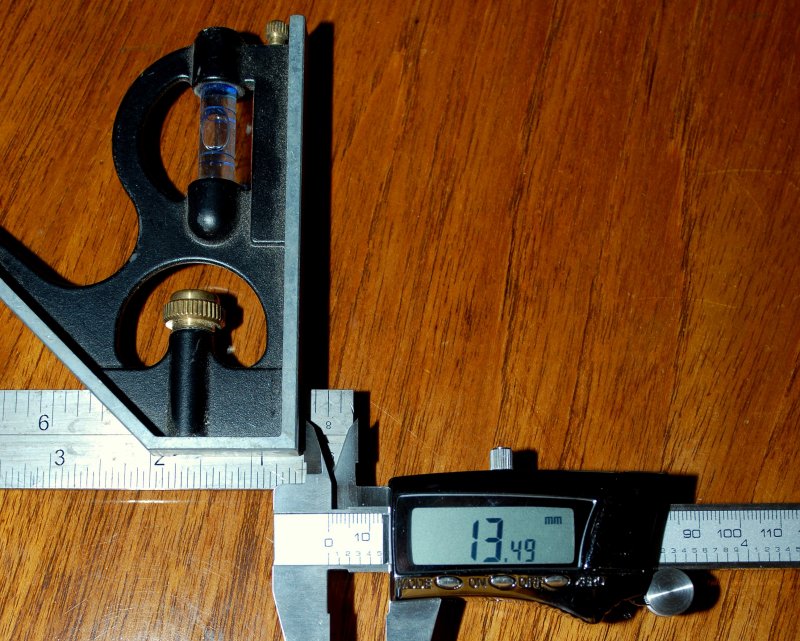
Before moving on to the next measurement you need to write down your measurement or transpose it, as I did, to my calipers. The exterior offset reading was rounded up to 13.5mm.
The picture shows the accuracy a little bit off but it was hard to hold the caliper and square in one hand and the large Nikon DSLR in the other and keep it perfectly in place..
MAY-2006
Measuring Interior Offset
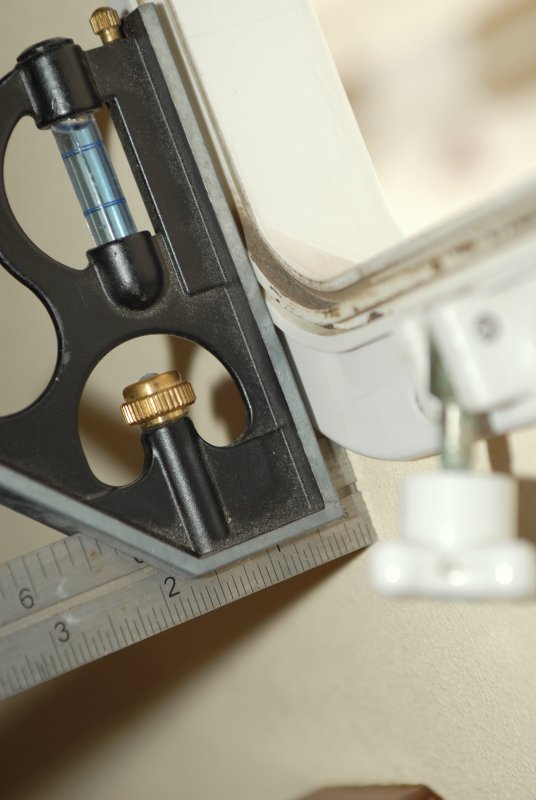
You also need to measure the interior offset. I did not want the gasket compressing under the square, and throwing my reading off, so I removed the gasket/seal on the Beckson ports to get a more accurate reading.
Note the gasket grove or slot on the port and the staining & grime from leaking. I had totally cleaned each of these slots or groves last spring and installed new gaskets, yet a few of these ports continued to leak. I guess plastic, in the marine environment, has a useful lifespan that had been surpassed..
MAY-2006
Reading Interior Offset
Do the same for the interior offset and write this number down. I rounded this up to 9mm.
MAY-2006
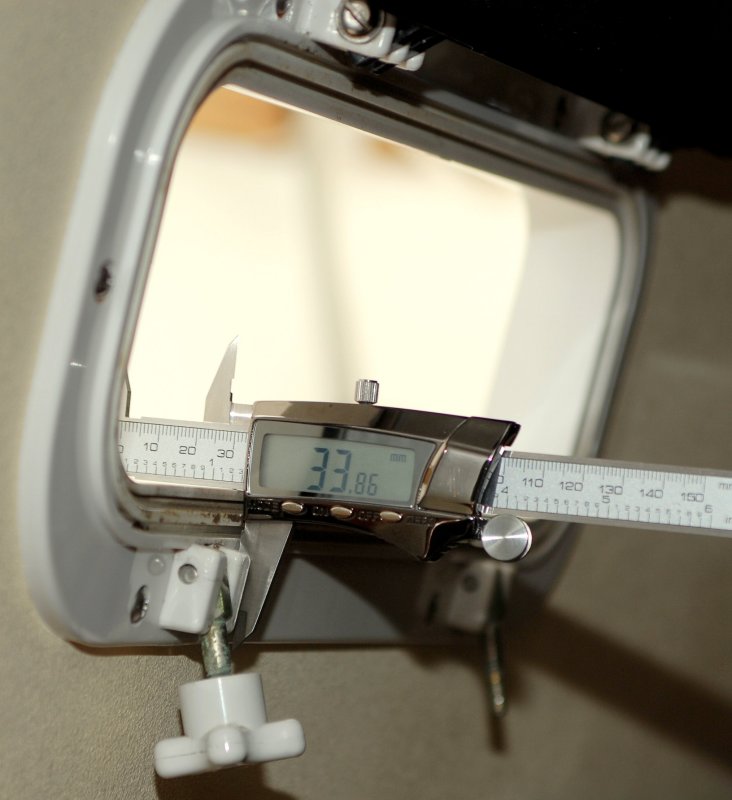
Measuring Port Total Thickness - Interior View
Now you need the ports total thickness as measured from the widest/thickest point on the interior of the frame to the widest/thickest point on the exterior. I rounded this number to 34mm.
The math is now very easy. Simply add the interior and exterior offset numbers together. It looks like this:
13.5mm + 9mm = 22.5mm.
Next, simply subtract the offset totals of 22.5mm from 34mm. It looks like this:
34mm - 22.5mm = 12.5mm.
The cabin sides of our boat were roughly 12.5mm thick which translates to 0.4921 or roughly 1/2".
This is the number you call NFM with so they can calculate your total bolt length for you. It is very important to know this number before placing your order as it will save lots of time later. Physically cutting eight + bolts per port is a tedious and time consuming task! Trust me..
On a cabin with solid fiberglass sides, as my boat is, you will also want to order interior teak spacers or the spigot will protrude further than necessary. More on this bellow..
MAY-2006
Measuring Port Total Thickness - Exterior View
You can see my calipers clamped to the widest point of the port in this exterior view.
MAY-2006
Trim Ring Thread Depth
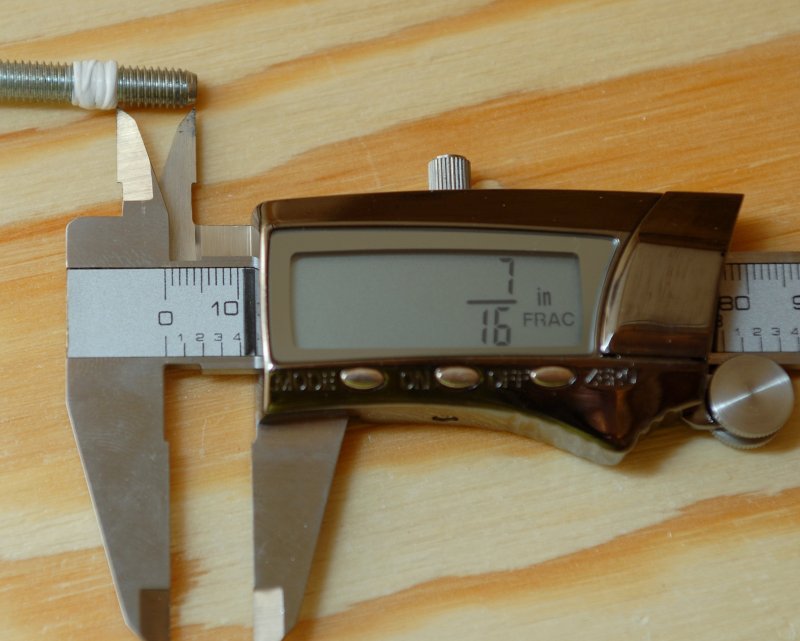
I had this metric bolt kicking around and decided to illustrated why proper cabin thickness is a must. I inserted the bolt until it bottomed out then wrapped some Teflon tape around it and backed it out.
MAY-2006
Actual Depth
My caliper shows this hole at 7/16 but most of the others were 5/16 just as NFM says they are. Plan on a quarter inch of room, as a safety margin, and you'll be fine. This bolt depth obstacle is kind of a tedious but it prevents any screws visible on the out side of the portlights which could leak and it looks better.
MAY-2006
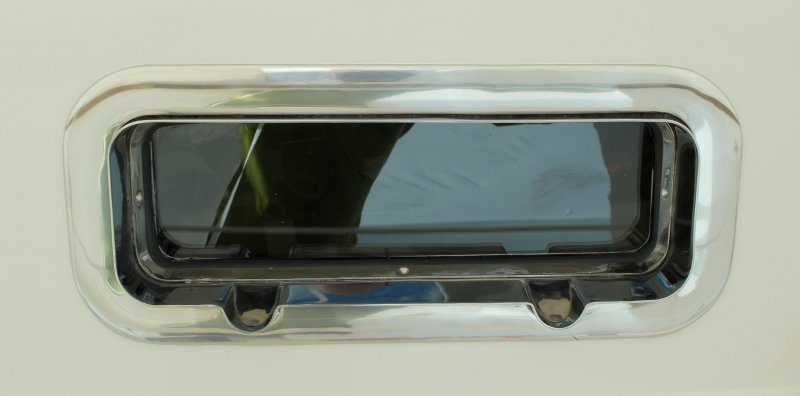
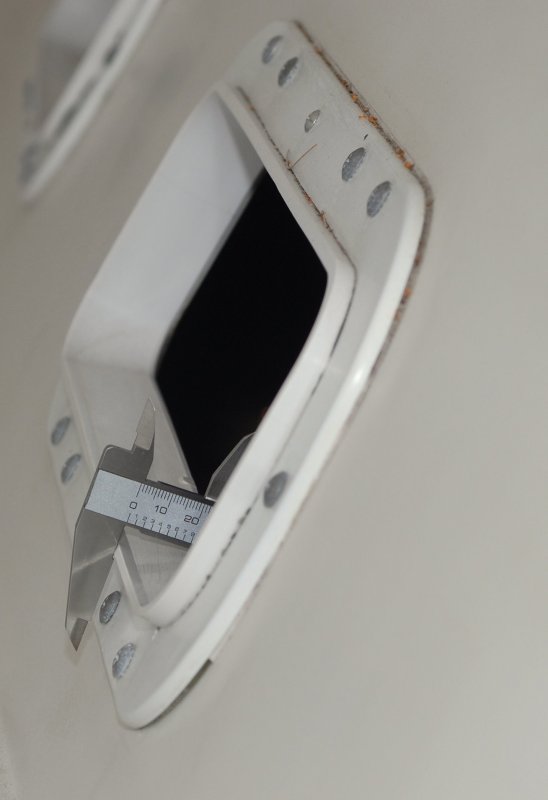
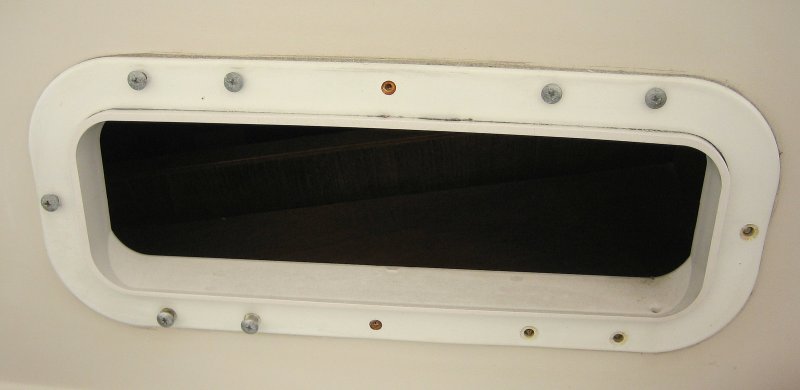
The Old Ports
As you can see these ports were not very attractive. To make matters worse the barrel nuts used to hold the trim rings on were chrome plated brass not stainless. I'm guessing stainless barrel nuts were not available back in 1979..
MAY-2006
Phase 2 - Removing The Old Ports
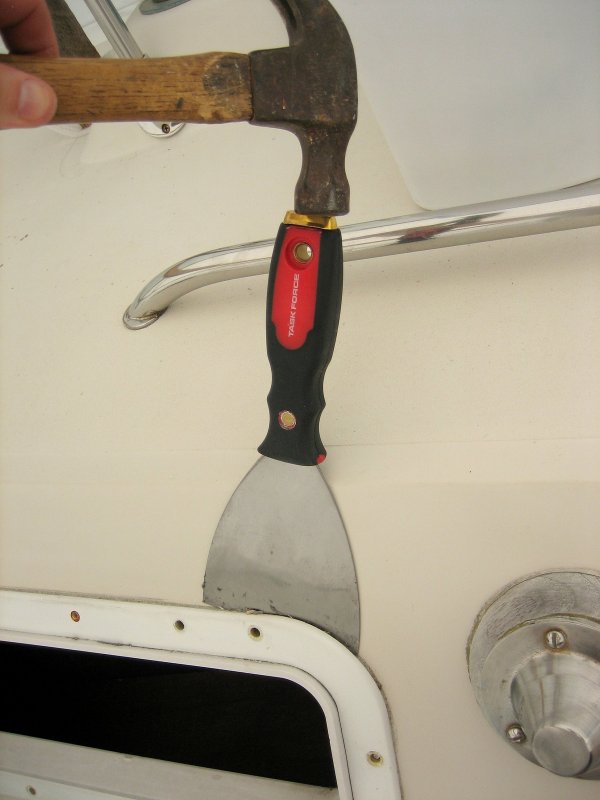
Lucky for me, the Beckson ports had been installed with butyl tape and a double sided foam weather stripping, and not one of the high tenacity polyurethane sealants like 3M 5200. All I needed was to pry the trim rings off the cabin sides and then apply a constant pressure to slowly stretch the butyl and remove the ports.
I used my heavy duty putty knife, that I have properly dulled, so I don't scratch the cabin sides.
If your ports were installed with 3M 5200 please be very, very careful removing them. The tensile strength of 5200 is 700 PSI and the fiberglass to gelcoat bond is roughly 400-500 PSI. What this means is that if you try to force the ports off the boat you can literally tear the gelcoat clean off the substrate. In my opinion, garnered over many years of removing this stuff, 3M 5200 has no place on a boat! Use 5200 at your own risk and remember NOTHING ON A BOAT IS EVER PERMANENT NOT EVEN A KEEL.
If you're at a loss with 5200 try products such as De-Bond to soften it. Sometimes heat will help to soften the 5200 but do be careful using heat guns. They can burn the gelcoat if not used carefully, at safe temps, and kept moving at all times.
MAY-2006
30 Year Old Butyl Tape - Still Very Flexible
For those who doubt the utility of butyl tape on boats, and who chose to use polyurethane products such as 5200, for installing ports, this photos speaks for itself.
As you can see, after nearly 30 years the butyl tape still had elongation before break of more than 2000% at a minimum. The butyl tape on all 8 ports never failed and my leaks were from Beckson port gaskets, even after replacements had been installed.
I also had a couple of fasteners, that went through the foam weather stripping gasket used on the trim ring (not butyl), also leak.
*******CLICK BELOW FOR PAGE 2*******