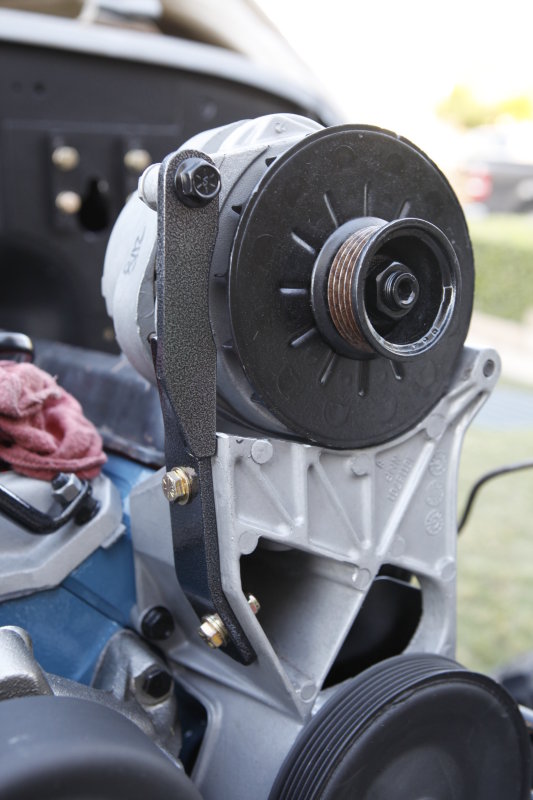
29-APR-2014
Alternator bracket
The new alternator bracket mounted and both up tight is a good fit and hold the alternator in place firmly. With the addition of the York compressor and this larger alternator, a longer belt is a must.
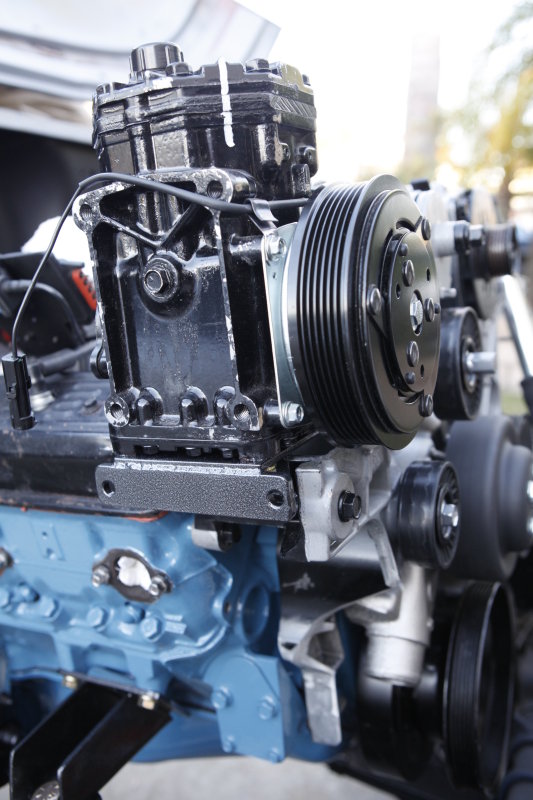
29-APR-2014
York on-board air compressor
The bracket was a perfect fit for the big York air compressor. I've mounted it vertical so that when the compressor is used no oil will get into the air.
One problem with this modification is that the pulley diameter is larger on the York compressor as compared to the factory AC compressor so a longer belt will have to be used.
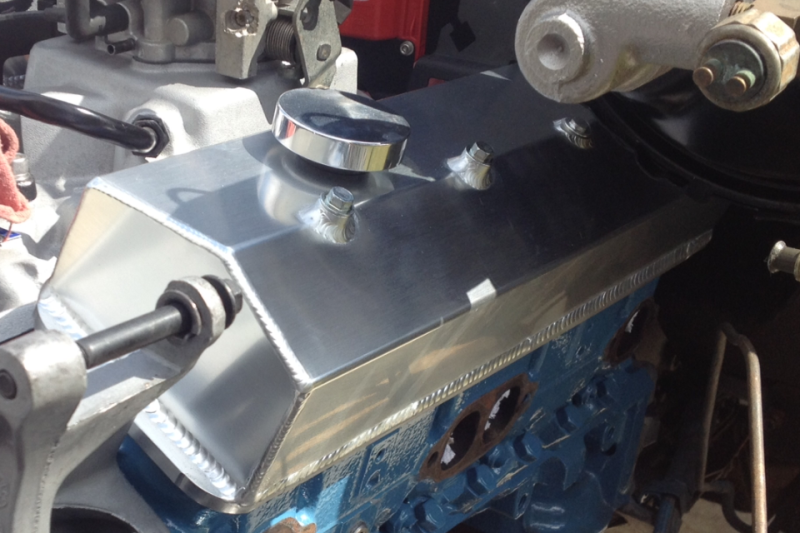
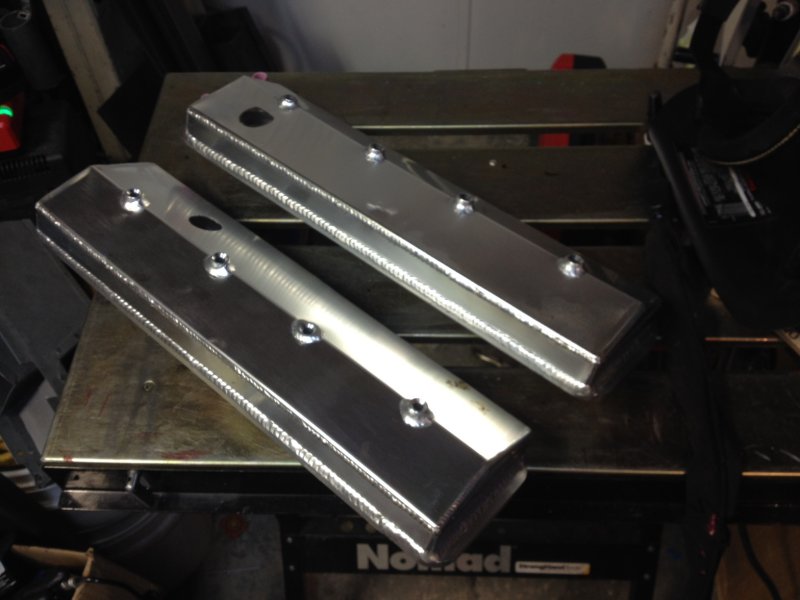
Tall valve covers
I knew that i didn't want to put the OEM valve cover back on. I came across these valve covers pretty cheap but they are really tall and was unsure if they would fit. After installing them I found that they were very close to the bottom of the brake booster and were going to hit the alternator and York compressor.
So now it was a matter of making them fit with the other components.
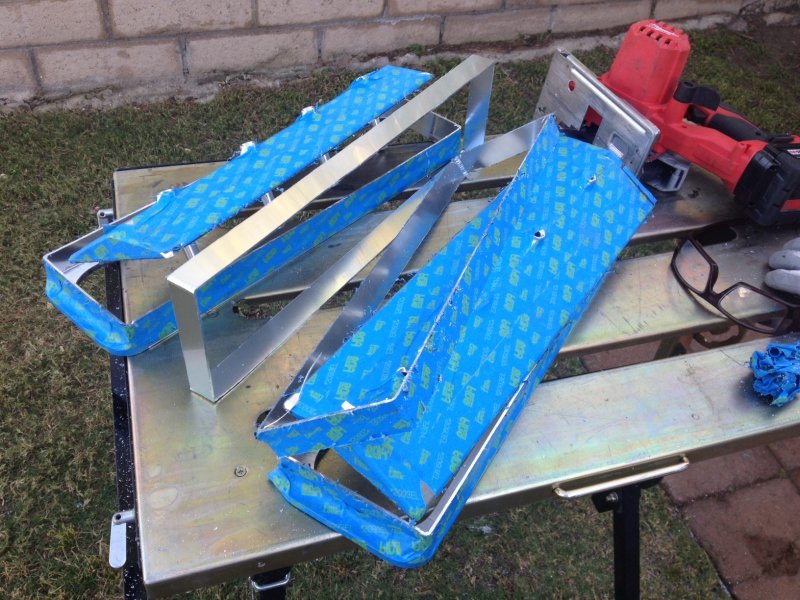
01-MAY-2014
Chopping the valve covers
In order to make the valve covers work I needed to shorten them by 1 1/4" to clear the brake booster and some other clearance work would be needed to clear the alternator.
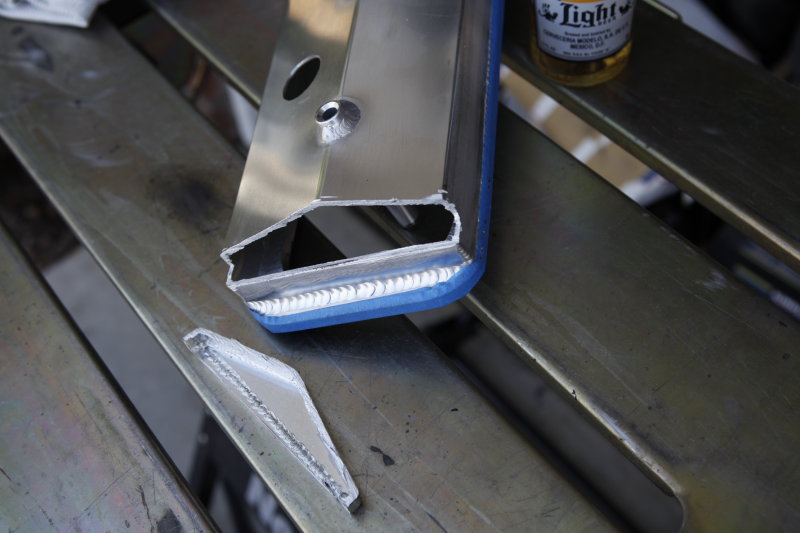
01-May-2014
Shortened and ready to weld
I used the Milwaukee saw to cut the valve covers nice and straight. Now it's just a matter of welding these 1/16" thick valve covers back together.
01-May-2014
Valve covers welded back together
I welded the valve covers back together but fought the cheap Chinese aluminum the whole time I was welding! This was probably the dirtiest aluminum I have ever welded.
11-MAY-2014
Clearance for the alternator
I needed to make some room on this valve cover for the alternator so I threw this on the band saw and made a cut. I bent a piece of aluminum to 90� the cut it to size and welded it in place.
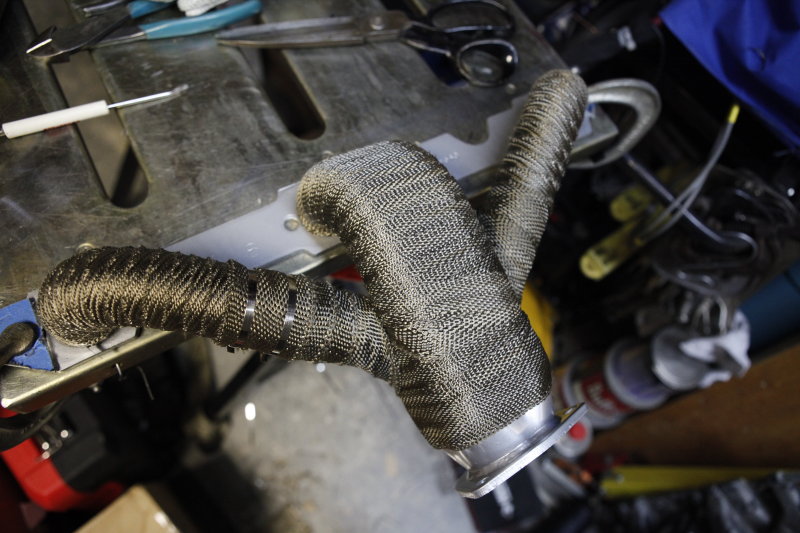
29-APR-2014
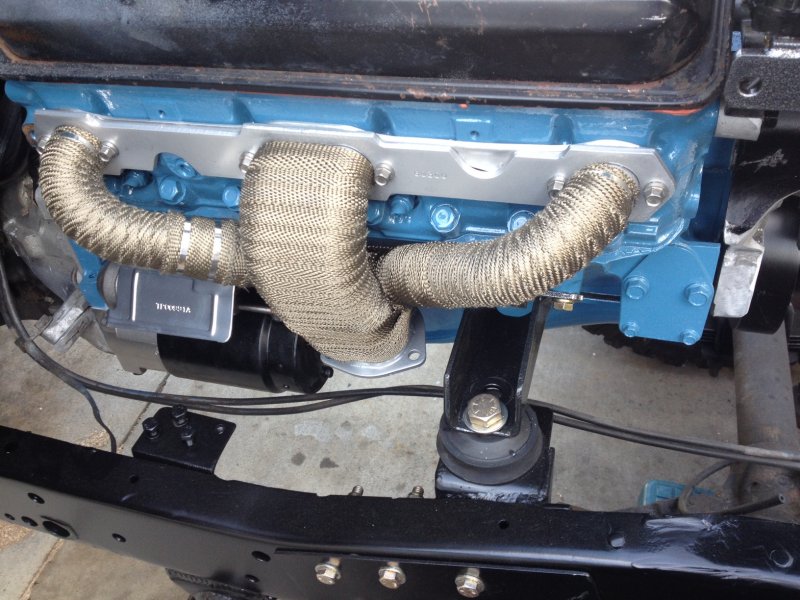
Headers wrapped
I had my headers ceramic coated and got rid of all of the rust. I wrapped them with the high heat "lava" wrap to try and keep some of the under hood temps down.
27-Apr-2014
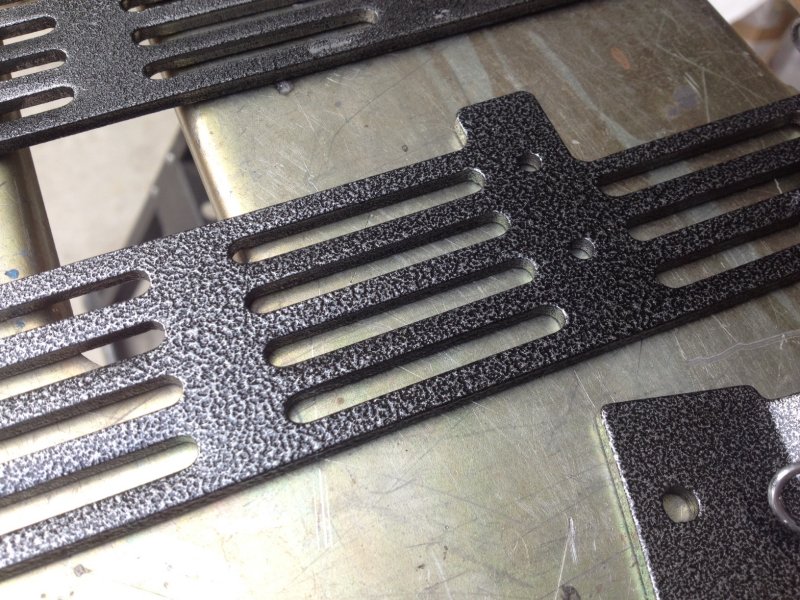
Plug wire separators
I blasted and powder coated the spark plug separators that came on the motor. They're we're in pretty good shape other than the thick coat of grease and dirt on the aluminum.
27-Apr-2014
One of my favorite colors
I really like this color and texture of powder, it flows good in the oven and looks good with a clear powder on top.
01-May-2014
Headers installed
Headers are now installed and I can see that running the exhaust is going to be a pain in the butt because it is real tight under there!
15-MAY-2014
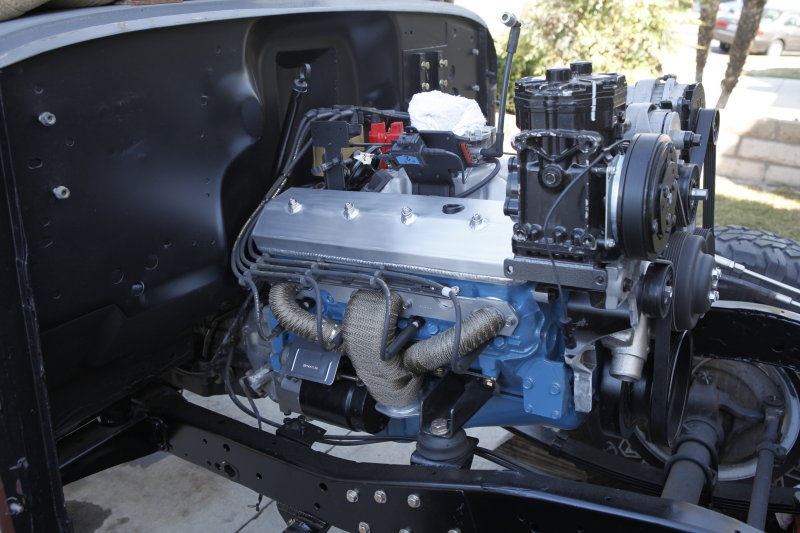
Motor together
The repaired valve covers are installed, I dropped the distributor in, installed the spark plugs, installed the wire separators, and I ran the new plug wires.