17-OCT-2013
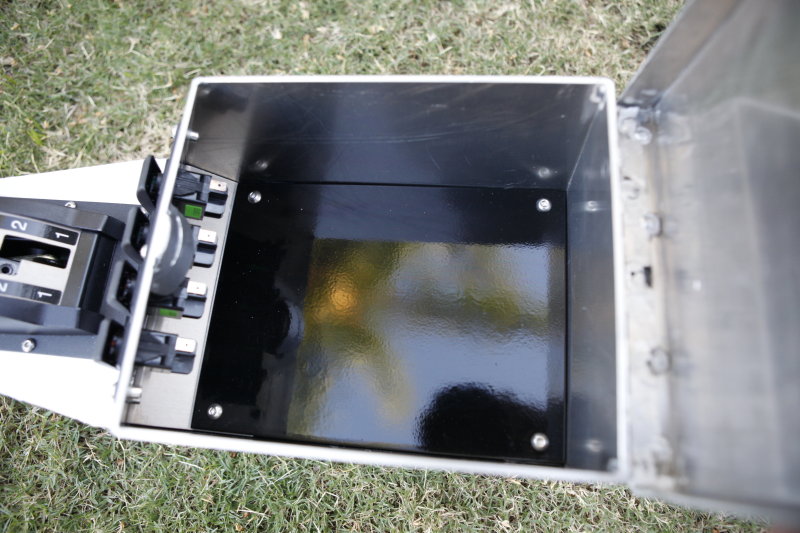
Inside plate
I powder coated the inside plate of the glovebox section but I think that I will probably have to line the whole inside with rubber or something to quiet the noise of keys and stuff. Plus I don't want my sunglass rolling around in there getting all messed up bouncing off the aluminum.
17-OCT-2013
Locking slot
Here's a closeup of the slotted locking bracket that I welded on the console to keep the lid closed.
17-OCT-2013
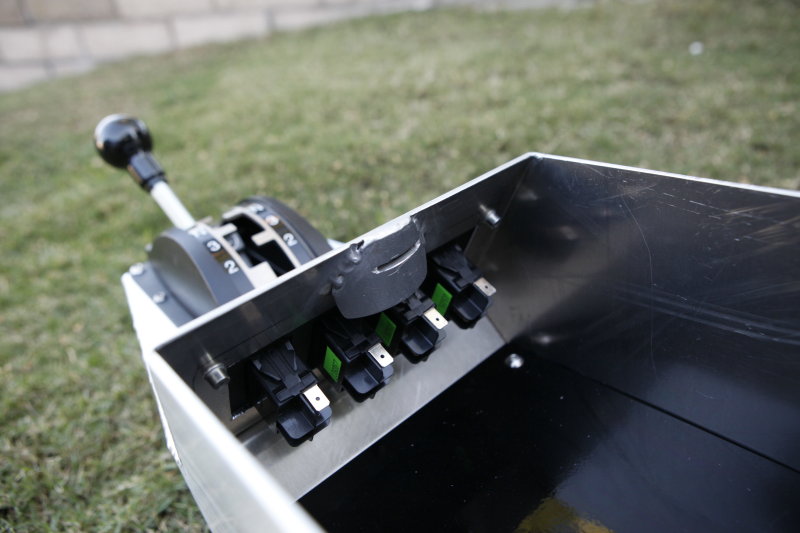
Console lid locking mechanism
I used a locking mechanism that has a stainless steel lock face. None that I found were very strong or heavy duty so this is just really to lock it but it's not bomb proof.
I have another that is keyed alike to use on my new aluminum glovebox door.
17-OCT-2013
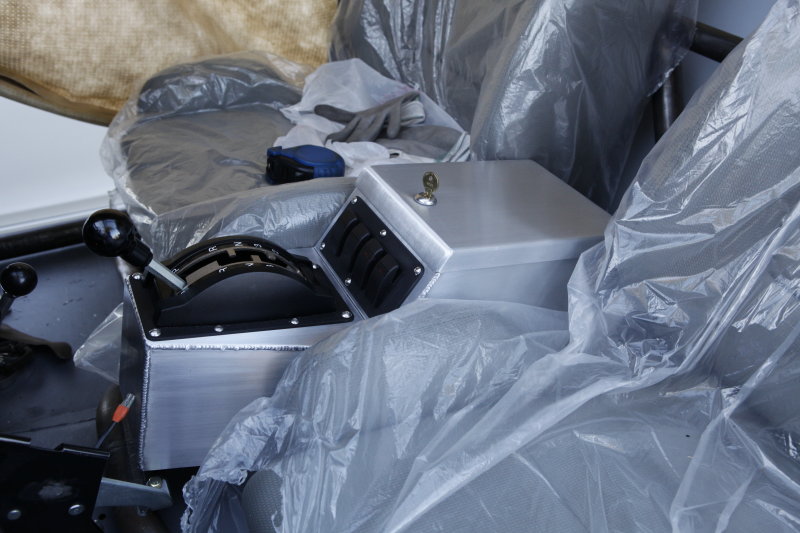
Console sitting in place
The console turned out good and the height is perfect.
I still need to connect the shifter linkage to the transmission.
20-OCT-2013
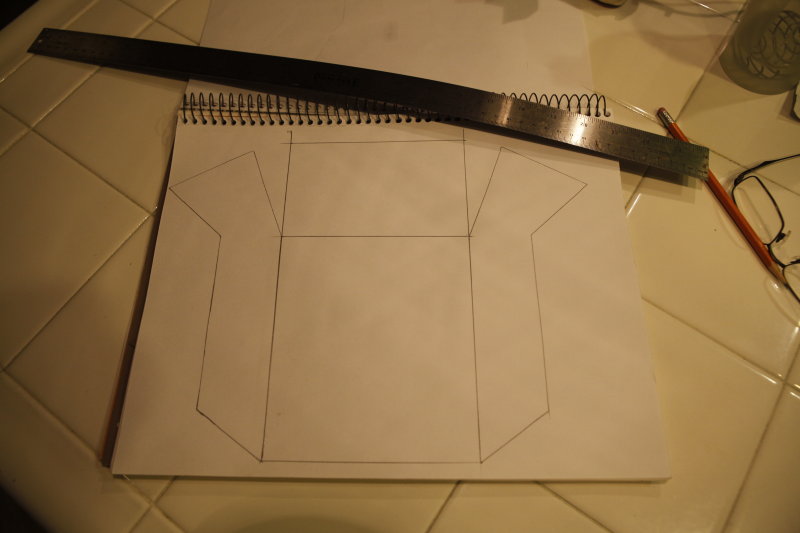
Overhead console
I wanted to build an overhead console that would incorporate some switches for auxiliary lights (or whatever), an interior light and possible my CB radio. Well my CB is too large to fit into the console, sure I could buy a smaller one but this one is a good older "tweaked" one so it will have to mount somewhere else!
I made this pattern and will use some 1/8" aluminum to make it out of then head to my buddies shop to use his brake.
26-OCT-2013
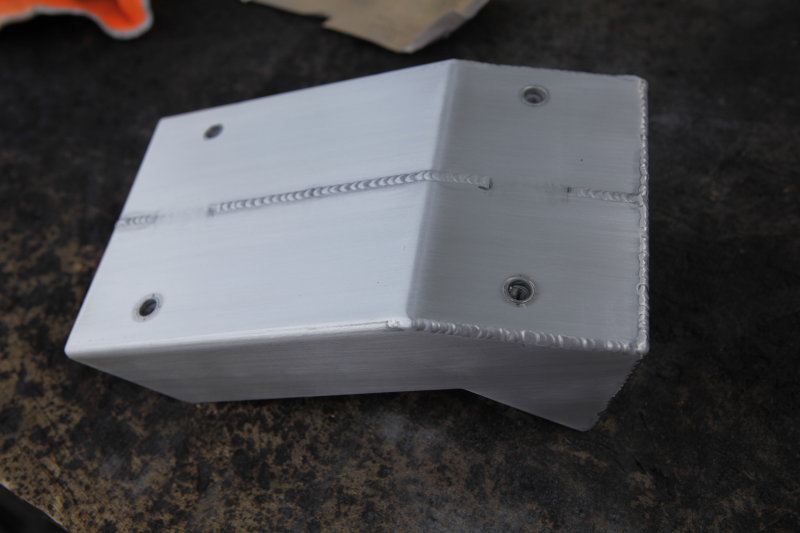
Overhead console housing bent and complete
After cutting the aluminum to the pattern that I made I took the pieces to a friends shop to use his brake to bend it all up. Unfortunately since I don't use his manual brake very often I make a slight mistake in my bends and my overall width was about 1/8" too wide. I ended up having to cut the whole piece in half, taking 1/8" off the halves, then welding them back together.
I installed nutserts on top to mount the console to some brackets that I'll weld to the cage. I then installed nutserts to hold on the face plate.
26-OCT-2013
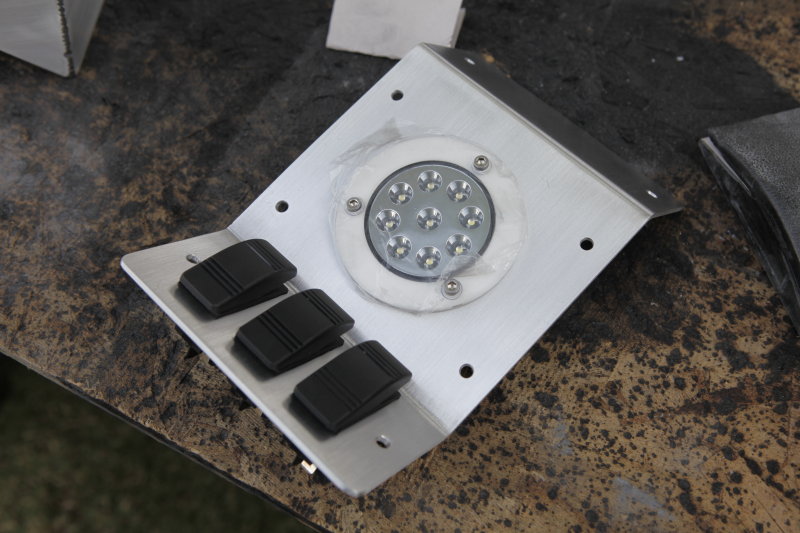
Faceplate complete
I bent the faceplate to match the angles and contour of the console base. I cut rectangle holes for the switches and a round hole for the LED light that will light up my interior at night.
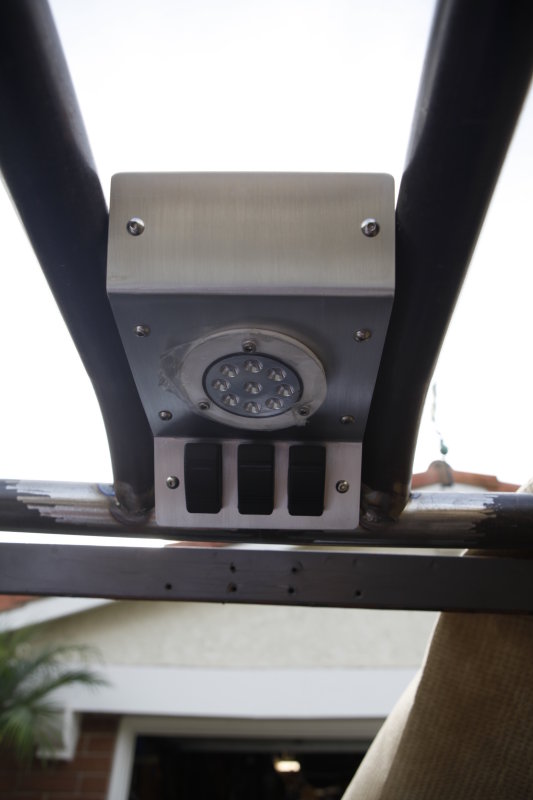
26-OCT-2013
Complete overhead console
I sanded the grain into the aluminum and then I used the SharkHide to seal the aluminum from oxidation and corrosion. The LED light should provide good light for the driver and passenger at night when needed. I still need to find a light switch to install that I will use for this LED and a twin LED in the rear of the Jeep.
26-OCT-2013
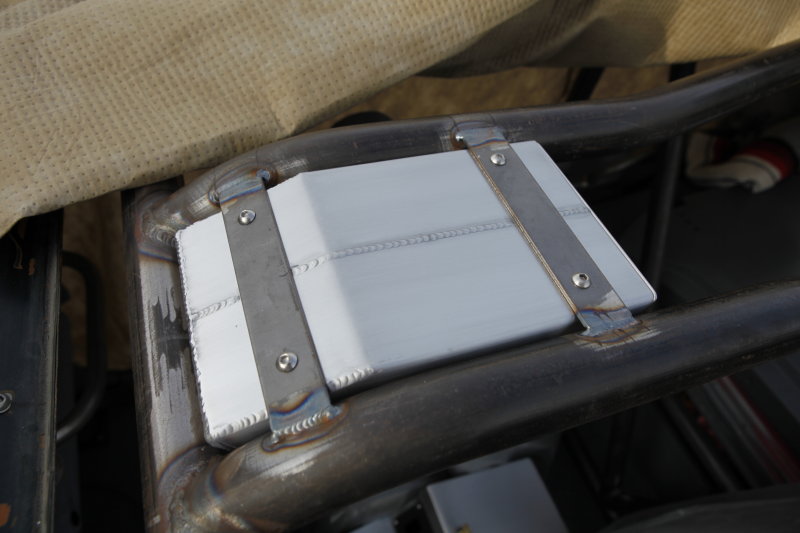
Console mounting brackets
I welded some 1/8" flat stock between the tubes of the cage to mount the console flush and below the bars.
26-OCT-2013
Overhead console mounted
The console mounts up high and tight and out of the way.
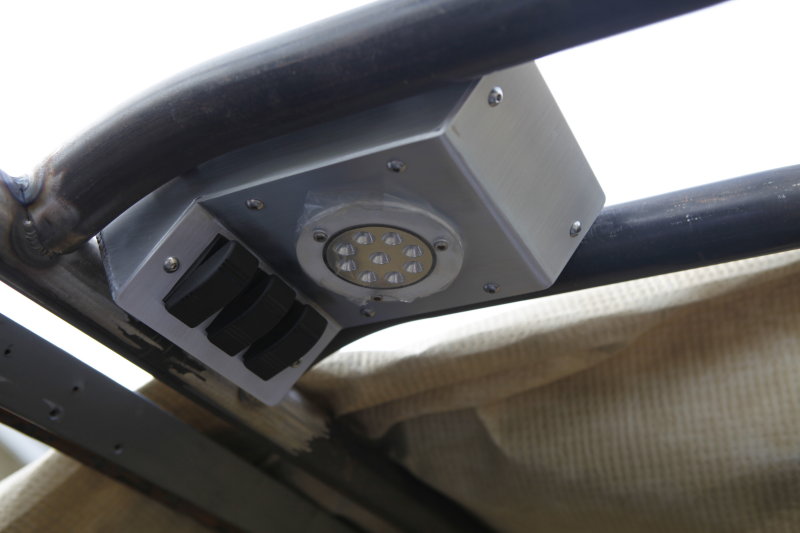
26-OCT-2013
Side view of console
Side view of console shows the profile of how the console mounts.
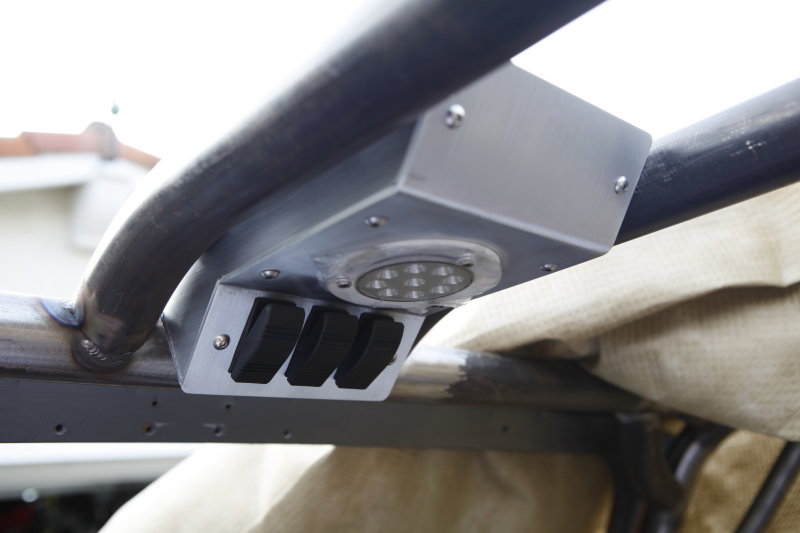
26-OCT-2013
View from drivers seat
This angle was shot from the drivers seat and shows the "up and outa the way" console. The switches are an easy reach for the driver (or passenger) to operate. I'm just not sure yet what the switches will power? Remember I also have four more switches on the center console to use for something?