13-JUL-2013
A to B pillar lower bars
I wanted the A to B pillar bars as wide as possible and also as low as possible so the answer was to put some bends in the tube to achieve the results I needed.
13-JUL-2013
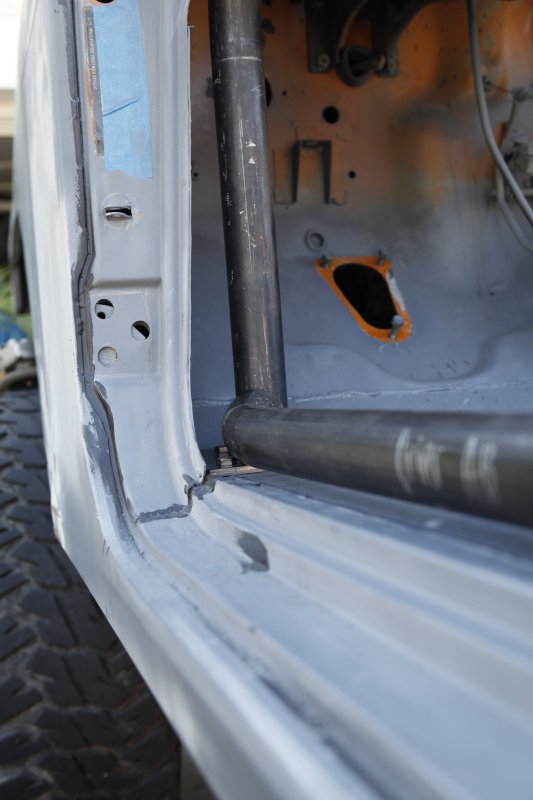
B pillar lower tube
Since I offset and angled my B pillar support bars, I had to deal with some crazy notch angles on the A to B lower tubes. Once the fit was was finalized the end result was better than I hoped for.....
.....except for one slight problem!
13-JUL-2013
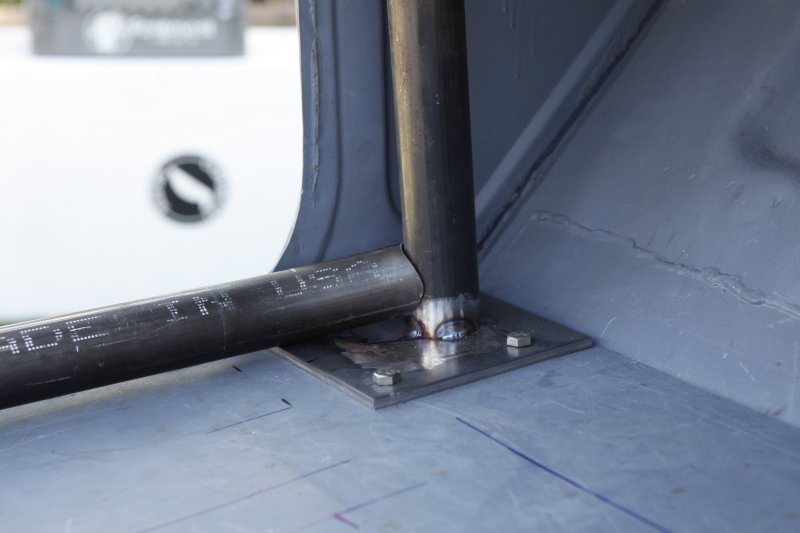
Lower tube nice and low
This shot shows how I rolled the tube over to be able to get the tube low as possible without sitting on the tub floor. Figuring out the angles to notch the tubes was a whole different story! But if you look closely you can see my "slight" problem. On both floor mounting plates for the A and B pillars my tube now slightly covers one of the mounting bolts on each plate.
Before I tacked these in place I needed to do two things, I need to weld the A and B pillar tubes complete under the area where these tubes will sit and I need to figure out how I am going to get the bolt out of the plate one the tube is welded in place. The welding part is the easy part!
23-JUL-2013
The solution to my problem
Since the Notch Master has the ability to notch a saddle in a tube I set the notcher up with a 1" hole saw and marked my tubes.
23-JUL-2013
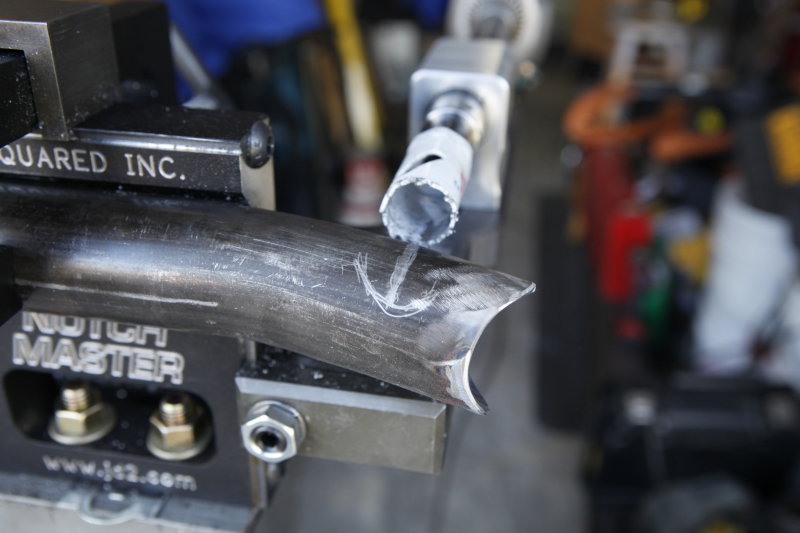
The saddle feature in action
The hole saw blew through the tubes easily. Now I will be able to tack these in place and get my mounting plate bolts out.
24-JUL-2013
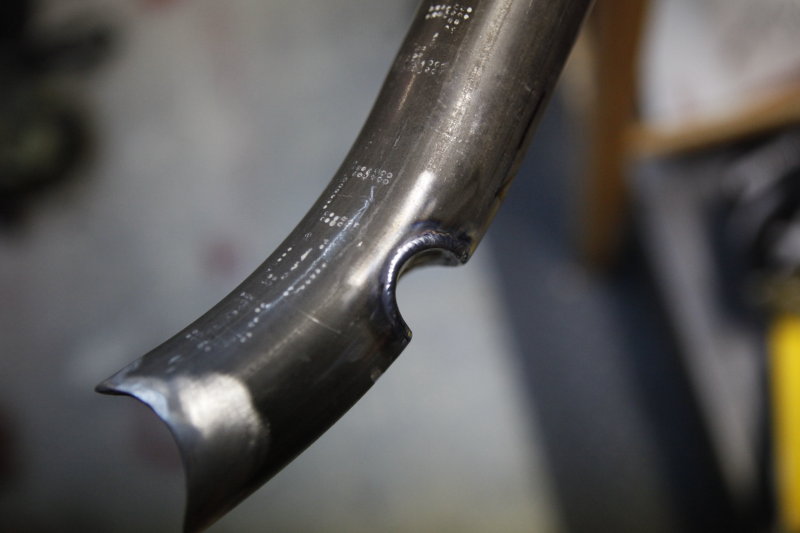
Saddles strengthened
Of course I didn't want to have an open hole in the tube and in order to keep some of the integrity of the tube I cut and fit some 1" tubing in the saddle.
24-JUL-2013
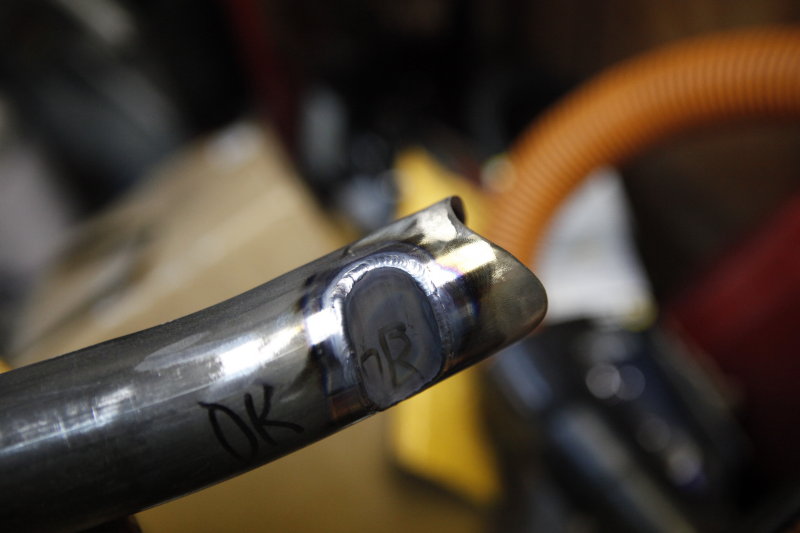
Another view of the saddle
Here's another view of the welded up saddle piece. The fit of both tubes with the saddles in place to allow the mounting bolts to be removed worked out great.
28-JUL-2013
A to B pillar lower bars tacked
I welded the tubes to the mounting plate in the area underneath where these A to B tubes fit. I was able to tack the bars in place and now the plate mounting bolts can be removed and re-installed.
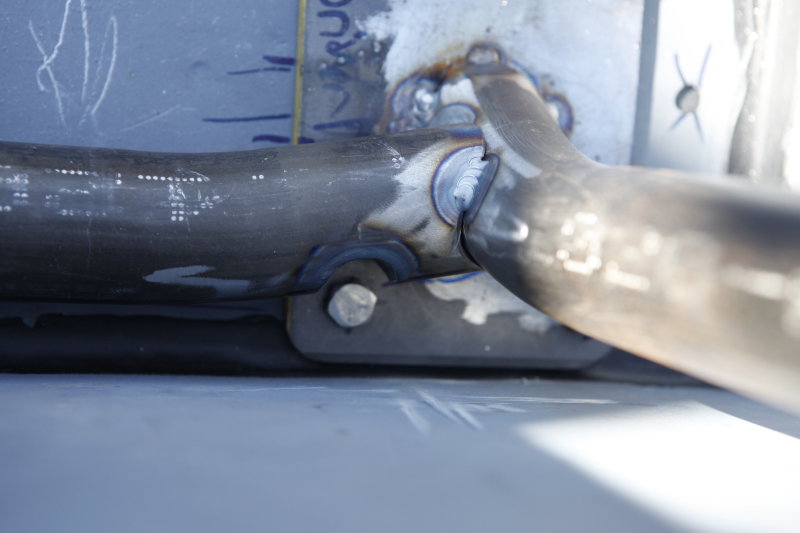
28-JUL-2013
Another shot of the A to B notched
The B pillar end of the tube fits just as well as the A pillar end. The 1" tube worked out well with plenty of room to remove or install the mounting bolts as well as plenty of room for a deep socket.
28-JUL-2013
Front and top view of cage
I needed headroom in the design of this cage and the results after bending all of the main parts were great! A test fit of my front seats with the tubes in place gives me lots of headroom.
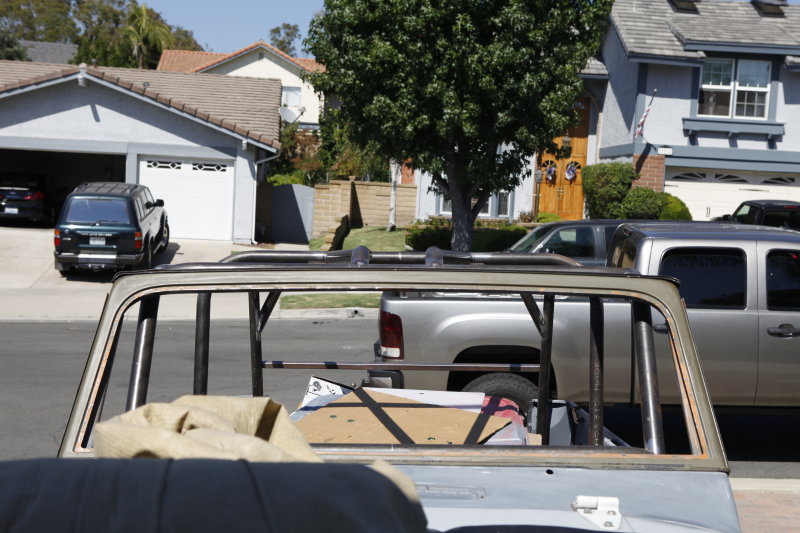
28-JUL-2013
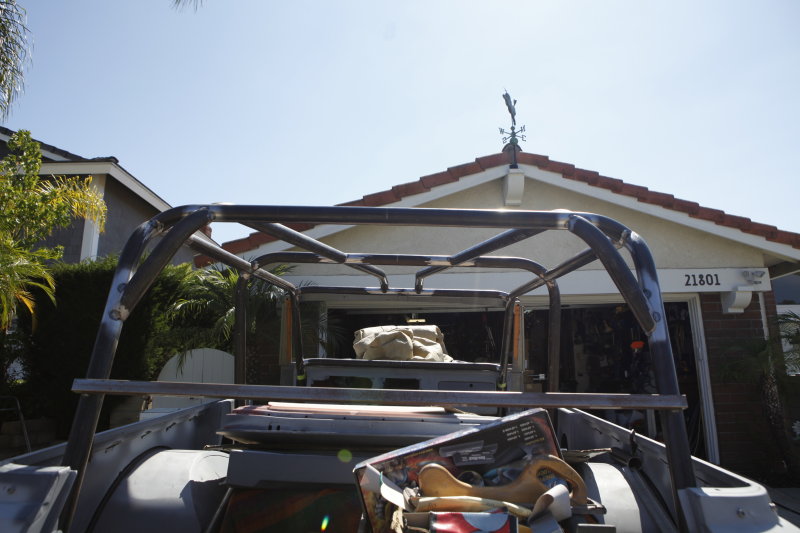
A view through the windshield
Here's a view of all of the top tubes shown from the front. I carried the angle from the A pillar all the way back to the C pillar. The A pillar starts straight and then angles outward.
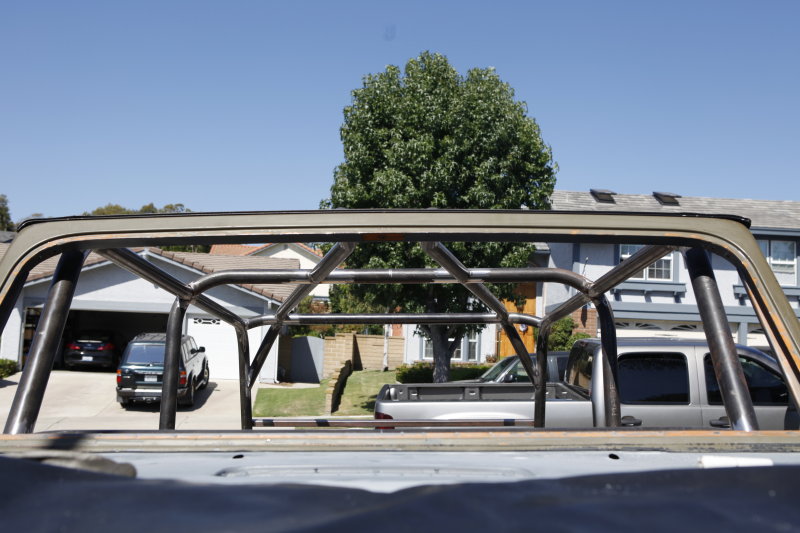
28-JUL-2013
A view from the back
This view shows the angle rise in the C pillar that will give a little extra headroom for any passengers in the rear. The triangle gussets were a real PITA to make partially because they have a 30 degree bend in them and the C pillar is angled as well so getting the notches correct was a bit challenging.