


|
|
|
|
|
|
| |
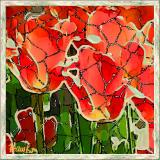
| Hawk | |
Difficulty: Not too hard - but not for beginners
PS 7:
1. Bill Miller's Batik action
down load Actions from this page
The file with the batik action is "billM DPR ver07."
(run the action on your picture to get it ready for the crack mask.)
Now the realism mask part.
1. Create a BLANK WHITE new page 800x600 is good.
2. Xenoflex - Baked Earth filter
-select Tile Floor
-crack length 60
-crack width 3
-variation 100
-random seed 23
-sharpness 100
-brightness 100
(this will give you craggy uneven cracks)
3. PS7 Liquify filter
-choose turb tool
(the object is to make jaggy uneven cracks not smooth watery swirls)
4. PS image adjust
-brightness 95 (don't completely wash out the cracks - but don't leave then solid)
-contrast 100
5. Invert the image
6. Magic Wand EACH little jigsaw puzzle piece.
(check your work with the Quick Mask tool to see what you missed)
7. Inverse all your Magic Wand work
8. Copy to the clipboard
9. PASTE directly onto your already Bill Miller Batik'd action picture.
10. Flatten layers and you are finished.
11. Go back and save your Batik crack mask as a PSD file you can use over and over by using the image distort menu to make the mask different sizes and shapes. No need to create the mask again from scratch for future projects.
Happy Batiking
All images are the property of the artist, please don't copy without permission.