


|
|
|
|
|
|
| |
| 14-APR-2006 | Isabel |
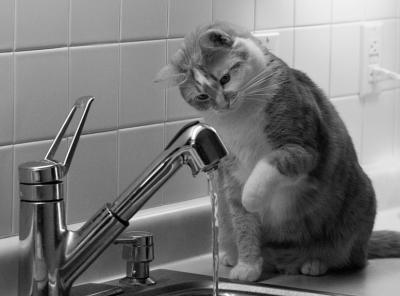
Debbi called this method to my attention and after watching the NAPP video during which Tapp described the methods and taking notes, I converted this image following the directions. Please note: I used no noise reduction. I sharpened the whole thing was I was finished...ordinarily I would sharpen just the cat, since sharpening the entire images emphasizes the noise in the background. I also lightened the eyes, which were quite dark by selecting them and making a levels adjustment. I darkened the right side of the wall, which was quite bright because of the lamp I keep on the counter. All in all, I think the results are quite good. Here are the directions )for Photoshop)which I jotted down:
1. Convert to Lab color (Image>Mode>Lab Color
2. Channels Palette - Click on Lightness Channel
3. Select All>Edit>Copy
4. Edit/Convert to Profile: Adobe RGB 1998
5. Channels Palette - Click on Red Channel>Paste
6. - Click on Green Channel>Paste
7. - Click on Blue Chennel>Paste
8. - Click on RGB
That's it.
By the way, I did not convert this RGB image to sRGB. The "next" image has been converted to sRGB and I really don't see any difference between them.
Picture copyrighted by author - May not be used without permission