12-JAN-2013
81122944.jpg
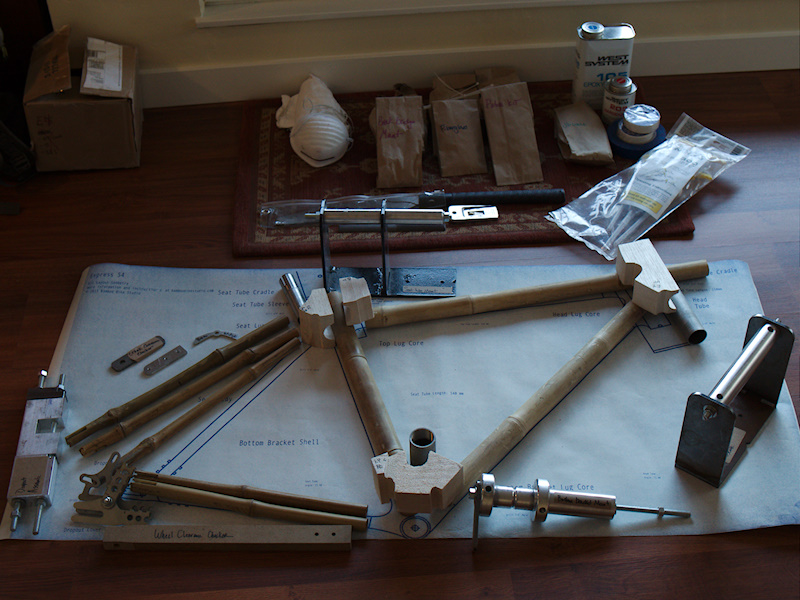
The kit contents all laid out on the custom frame plan. Nearly everything needed is included, save for some wrenches, gloves, power drill etc.
19-JAN-2013
81192946.jpg
Day 1: jig setup on a 2'x4' flat board (fiberboard from local hardware store). Balsa blocks mounted to jig points using epoxy to become frame lug cores. Bamboo cut to length, then roughed according the BBS's video instructions. Bamboo is then tacked inplace on the balsa core lugs, again using an epoxy adhesive. Seat post sleeve is also permanently epoxied into the pre-bored bamboo seat post. I used a high quality West Sytstem G-Flex epoxy with high density filler rather than the JB Weld included in the kit.
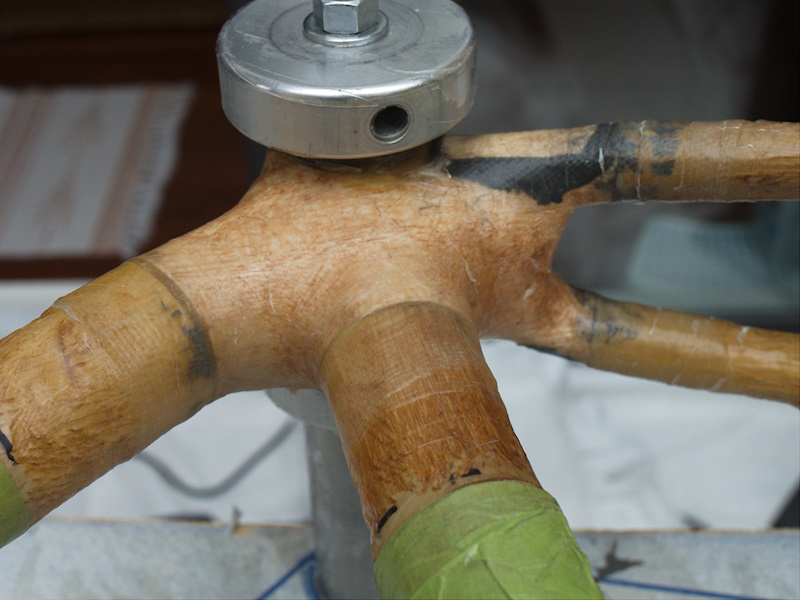
19-JAN-2013
81192947.jpg
Day 2:
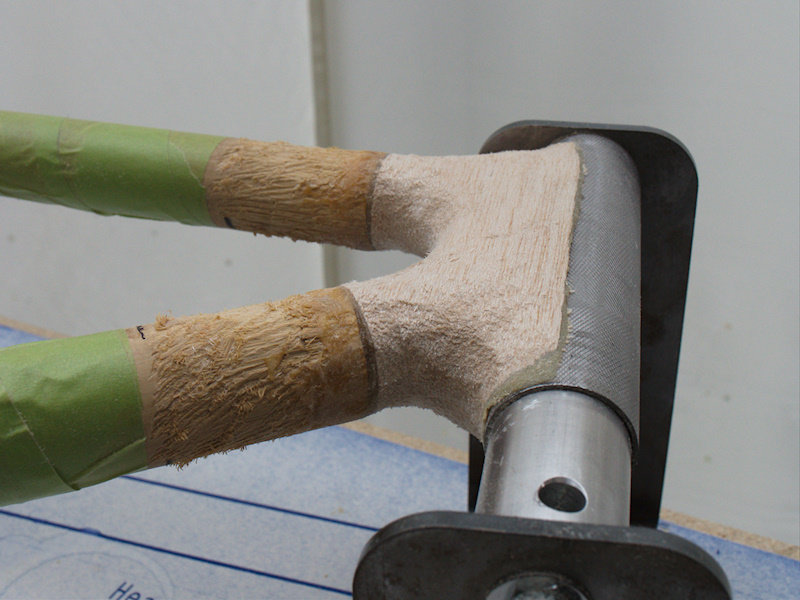
Head tube balsa lug core after shaping. Goal is to make smooth transitions from the bamboo tubes to the steel head tube. Fiberglass will first be applied to these joints before the frame can be lifted from the jig, remounted vertically prior to carbon wrapping. Note the roughed bamboo end...with lots of exposed fibers to enhance bonding strength. There is a definite technique needed with the pull saw to achieve this...I practised on a spare section of bamboo. According to BBS website, you should aim to complete epoxy bonding within 48 hours of perfoming this roughing to reduce drying out of the fibers...which reduces bonding strength.
19-JAN-2013
81192948.jpg
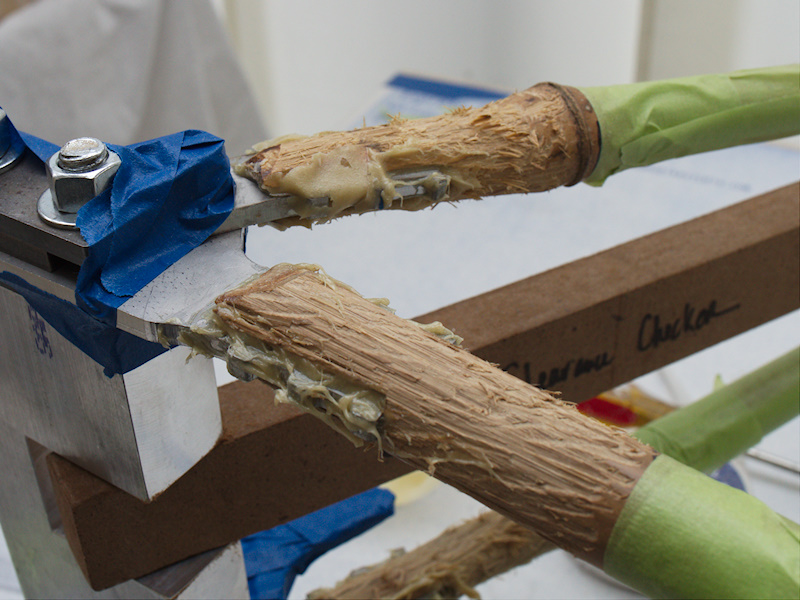
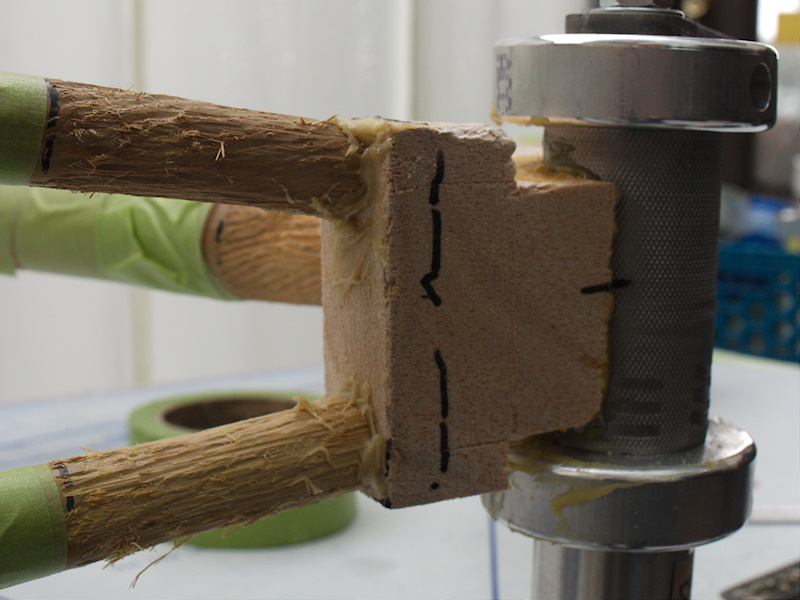
Bottom bracket balsa lug core prior to shaping with the included file. The frame tubes are tacked to the core "landing pads" and marker lines indicate the first areas to file down...forming 1 cm rasied pads filed circular & flush with the bamboo ends.
19-JAN-2013
81192949.jpg
Seat lug core nears completion of filing...still needs area between the seat stays faired out.
19-JAN-2013
81192950.jpg
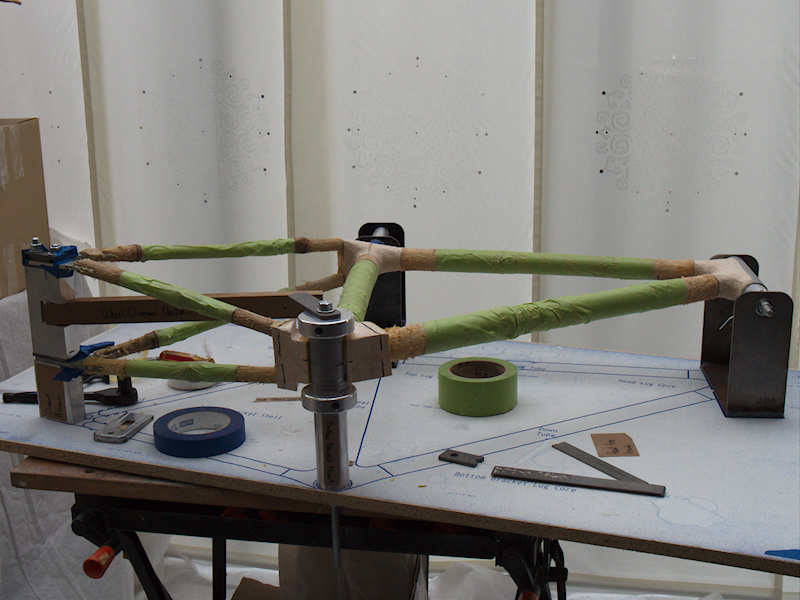
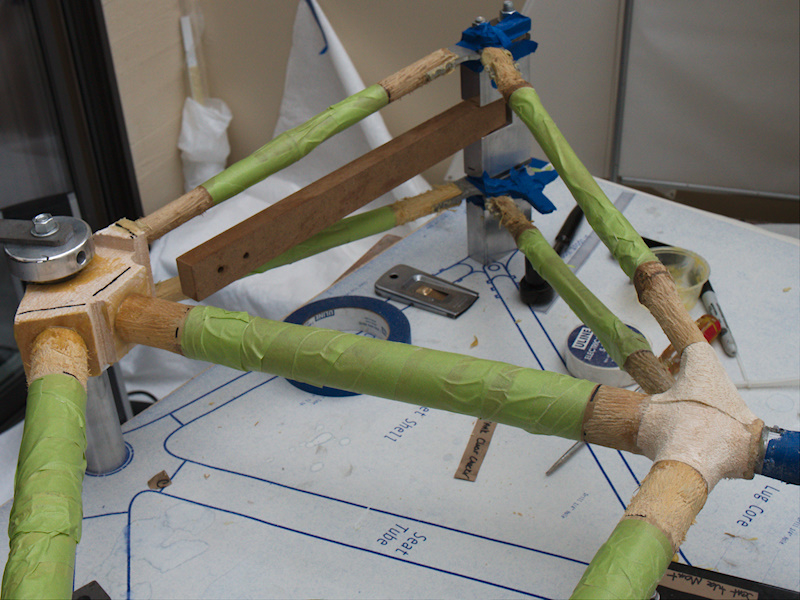
Rear dropout brackets supported at the maximum 130mm spacing of the jig. Bamboo Seat Stays & Chain Stays epoxied to the dropout connection points. Note the Wheel Clearance Checker arm between the stays.
19-JAN-2013
81192952.jpg
Bottom Bracket lug core from below prior to fairing. Marks indicate landing pad fairing zone (1cm deep circular & flush to each stay). A mark is also indicating approximate centerline of bottom bracket.
I used a high quality G-Flex epoxy (4-7 hrs set time) thickened with a high density adhesive filler...although kit comes with 5-minute JB Kwik for this work. In hindsight I would go with a faster curing epoxy next time...as I basically lost most of a day waiting for it to set. None of these bonds (except seat post sleeve) are structural at this point...all strength comes from glass & carbon work later.
19-JAN-2013
81192956.jpg
View of the rear triangle area. Note the wheel clearance checker now positioned between chain stays.
20-JAN-2013
81202960.jpg
Day 3:
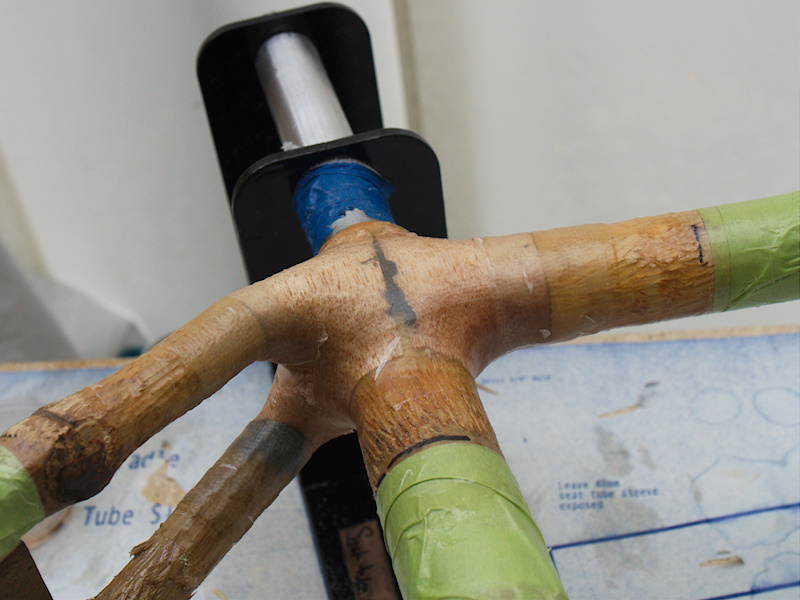
Bottom Bracket faired & glassed, ready for carbon wrapping. I followed the BBS instructional video recommended glassing steps for all the lugs. It worked out pretty well.
20-JAN-2013
81202961.jpg
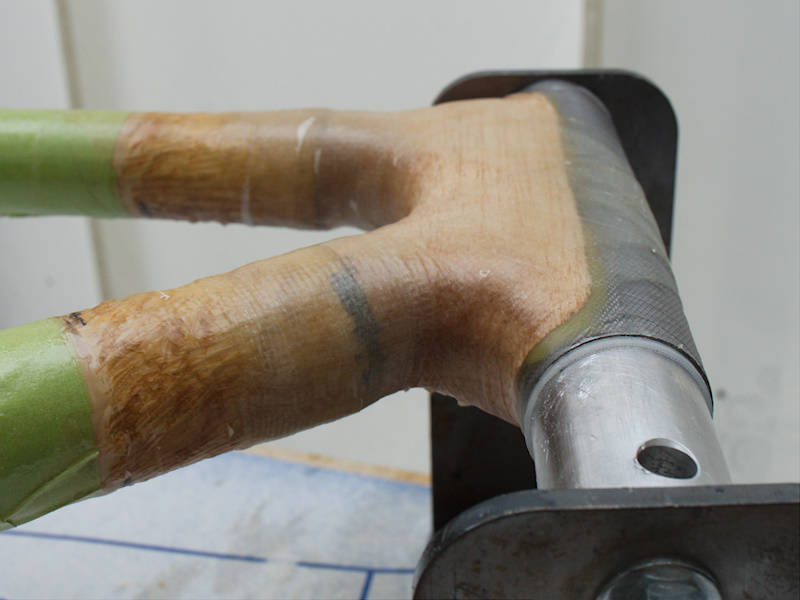
Head tube lug core faired & glassed.
20-JAN-2013
81202962.jpg
Seat lug core faired & glassed.
20-JAN-2013
81202965.jpg
Bottom Bracket faired & glassed. After all the glass work is completed, the frame is strong enough to support its own weight and is removed from the jig. After re-configuring the jig, the frame is mounted vertically, spupported from the bottom bracket and rear dropout. This allows for better access for rough filing/sanding the glass work and then for the carbon wrapping phase.