photo sharing and upload picture albums photo forums search pictures popular photos photography help login
Rolf | profile | all galleries >> Galleries >> DIY Toner Transfer Paper & Techniques for making PCB,s tree view | thumbnails | slideshow

DIY Toner Transfer Paper & Techniques for making PCB,s

11/22/10

This page is contain information pertaining to the easy way of making PCB (Printed Circuit Boards) with DIY toner transfer paper.
Please post any comments or suggestions,


This DIY toner transfer paper is a good cheap alternative to commercial papers for all but the most critical applications.

Take a close look at the pictures, you need just four items:
1. Magazine paper.
2. Plastic squeegee
3, Clip board, the hard plastic type is preferred.
4. Elmer's Washable School Glue, there are no substitute that works as far as I know.

My total cost was less than $6.00! And it is enough glue to make dozens of 8"x10" sheets of transfer papers.

How to make the toner transfer paper:

1. Clip one sheet of magazine paper into the clipboard. Mark the paper with a magic marker so you will know which side is coated! (It is almost impossible after it is dry)
2. Squeeze a bead of glue across the full width paper just below (½") the holding clip.
3. With one stroke of the squeegee you should be able to evenly cover most of the page. Touch up if needed.
4. Remove paper from clipboard and place in a convenient place to throughly dry.

Why not make several while you are at it?

WARNING! Do not use until absolutely dry! The wet glue WILL damage your laser printer!

When the DIY transfer paper is thoroughly dry print your PCB design on a standard piece of paper, then cut a piece of your DIY transfer paper that is a little larger than the design and tape it by the top two corners to the design you just printed. Run it through the printer again and you are ready for the ironing process,

Make sure the PCB copper is squeegee clean (bright & shiny). If not use copper cleaner / polish and rinse with plain water. Dry with a paper towel and blow off any dust.
Many problems using the iron on system can be contributed to the rough edges of the PCB (from cutting), make sure to burnish them! Or file them smooth.

You can not expect success if the irons temperature is not correct, so it is best to check. Use an oven thermometer, put some insulating material underneath. I am talking about the type that has the probe extended out from the scale. Place the iron on top and adjust the temperature setting so that the temperature swings around 300̊F. (149̊C) . The temperature will go up and down as the thermostat turns on and off.

My ironing setup consists of a clipboard (Masonite) with a section of newspaper folded up for heat retention and a clean sheet of copy paper on top. The PCB and the transfer paper goes underneath the copy paper.
Since the everything is held in place by the clip on the board there there is little change of anything slipping.
To further reduce the chance I jut put the iron on top for about a minute then i rotate it 90̊ and let it sit for another minute, then I do a little "ironing" for a minute or so.

The transfer paper will slip right off after a little soaking in hot water, the hotter the better!

Cheap and good PCB etching solution.....
The etching solution I use is made by adding 1 part Muriatic Acid (the common kind that's sold in hardware stores, about $5.00 gal.) to 2 parts Hydrogen Peroxide (the common 3% kind that's sold in dollar stores & drugstores for $0.50 a pint)

Warning!!!!!!!!
Mixing is a hazardous process (add acid to the peroxide, not the other way around!)

Use only in a well ventilated area, preferably outdoors and do not breath the fumes!
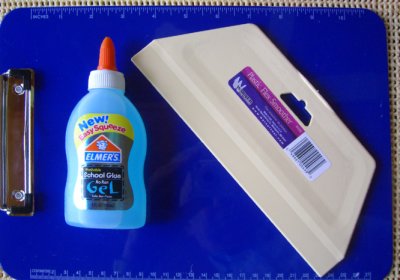
DIY Toner release agent and applicator
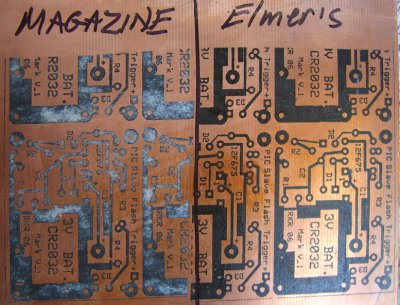
My Elmer's Home made transfer paper test.
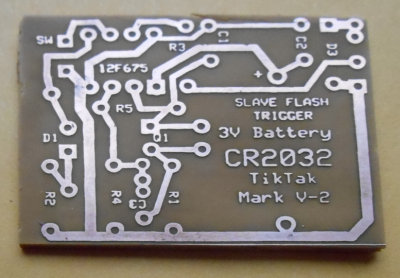
Toner Transfer DIY PCB