


|
|
|
|
|
|
| The Sigma Users Group Galleries | profile | all galleries >> User Galleries >> Other Galleries >> Sensor Cleaning for the SD9 and SD10 | tree view | thumbnails | slideshow |
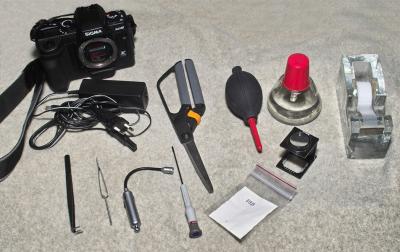 What we use to clean the sensor in an SD9 or SD10 |
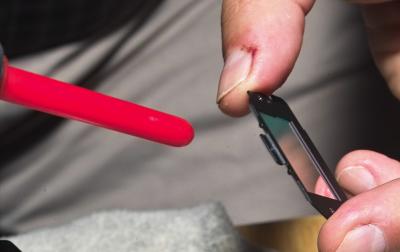
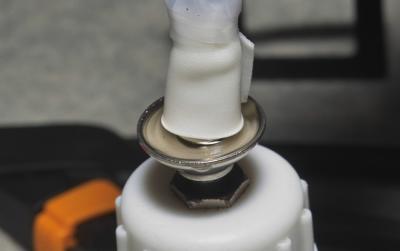
 Remove the screw at the bottom of the dust protector. |
 Carefully lift out the screw using the screwdriver and tweezers. |
 Note the position of the top edge of the dust cover, |
 Blow dust off dust protector and set aside; |
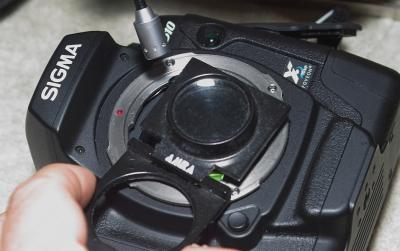
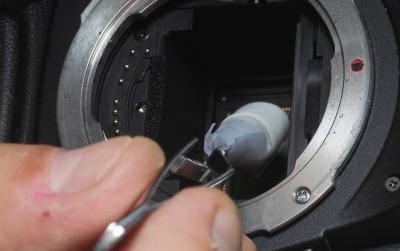
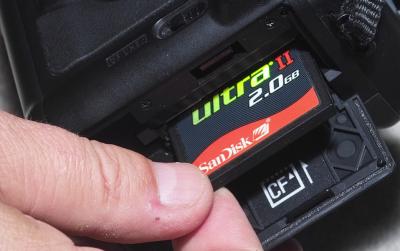 Remove the CF card. |
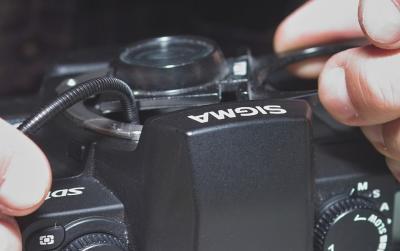
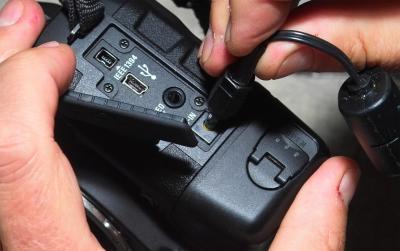 Attach the AC power cord to the camera and plug it into the wall. |
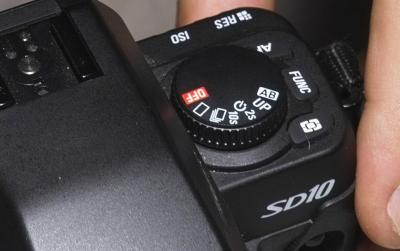
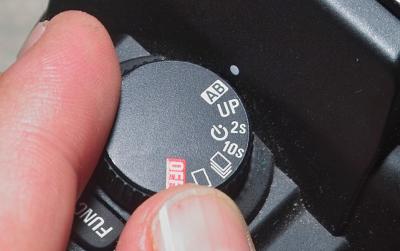 Set the camera’s left dial to AB. |
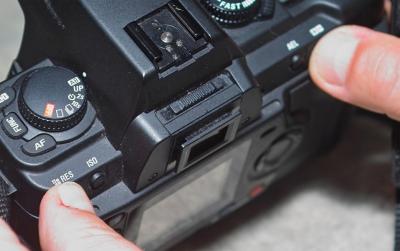 Hold the RES and +/- buttons. |
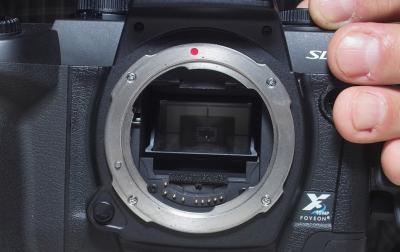
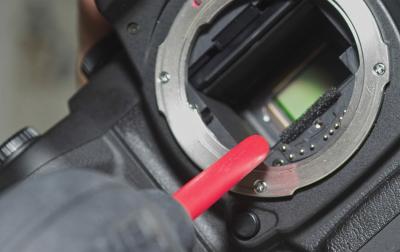 Blow out any obvious dust from the mirror chamber. |
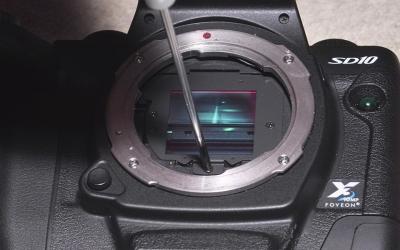
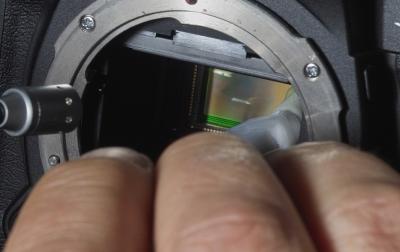
 Using the lamp and magnifying glass, |
 Do not touch the sensor surface with the lamp. |
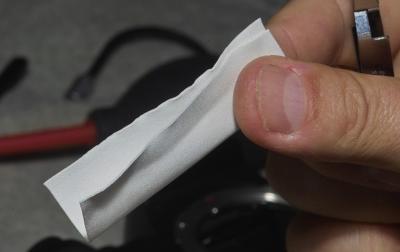
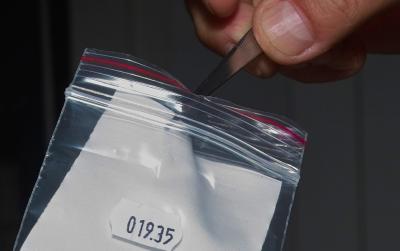 Remove the white cloth from its plastic holder. |
 Dry: To make a dry cleaner, |
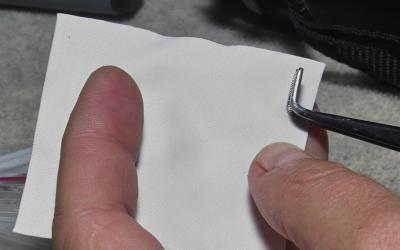
 Dry: Cut off a strip wide enough |
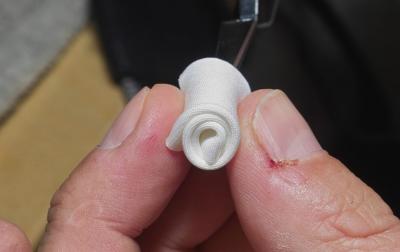
 Dry: Pinch the cloth between the right-angle tweezers. |
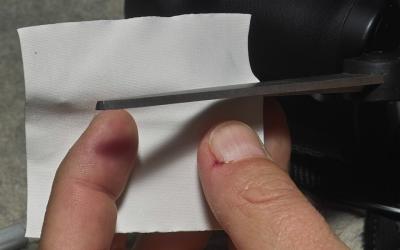
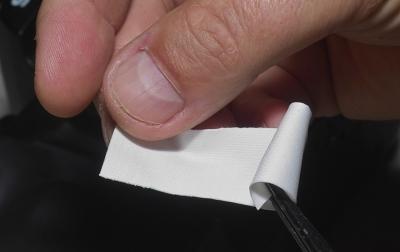 Dry: Wrap the cloth around the end of the tweezers. |
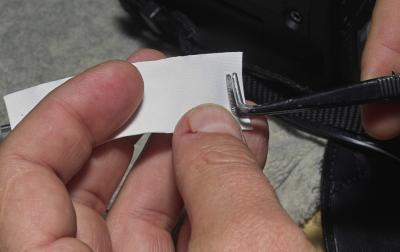
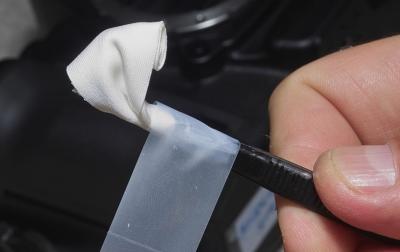 Dry: Tape the end of the cloth around the tweezers to hold it in place. |
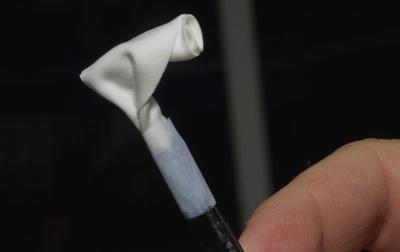 Dry: This is the finished dry cloth. |
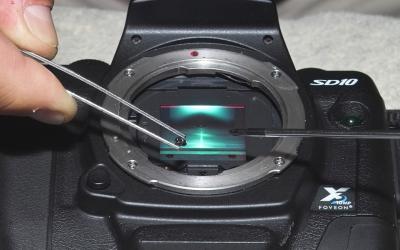
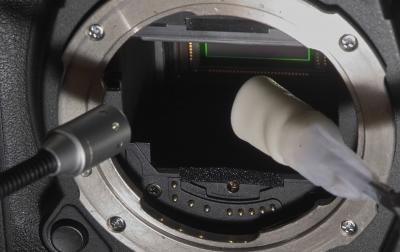
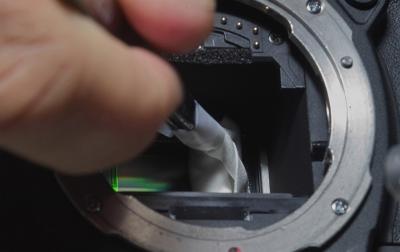 Dry: Gently wipe the dry cleaner back and forth across the sensor. |
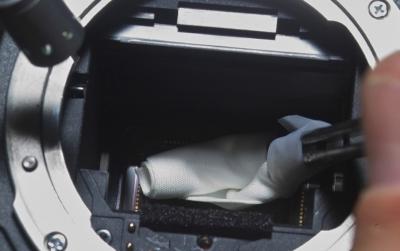 Dry: You can also go top to bottom. |
 Wet: To make a wet cleaner, fold the white cloth in half. |
 Wet: Pinch one end of the cloth between the straight tweezers |
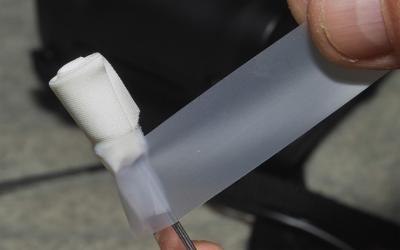 Wet: Tape the top of the cloth around the tweezers to hold it in place. |
 Wet: Dip the wet cleaner into the alcohol. |
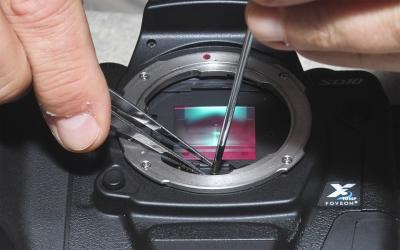
 Wet: Pass the cleaner over the sensor. |
 Wet: Check that the sensor has dried. |
 Wet: Use the lamp to see better. |
 Check your work with the magnifying glass and lamp. |
 Turn the camera dial to OFF. |
 The shutter is now closed and the mirror dropped. |
 Blow dust off dust protector again. |
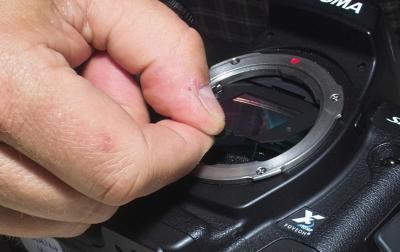 Hold the dust cover near the screw hole |
 Using the tweezers and screw driver, |
| comment | share |
| Ted | 14-Mar-2012 06:20 | |
| Charles | 21-May-2009 12:06 | |
| Michael Wu | 01-Nov-2005 03:20 | |