Explore Scientific On CGEM
Here's my latest rig...an Explore Scientific Comet Hunter 6" f/5 Mak-Newt on a CGEM mount.
Celestron C6S-GT Imaging Setup
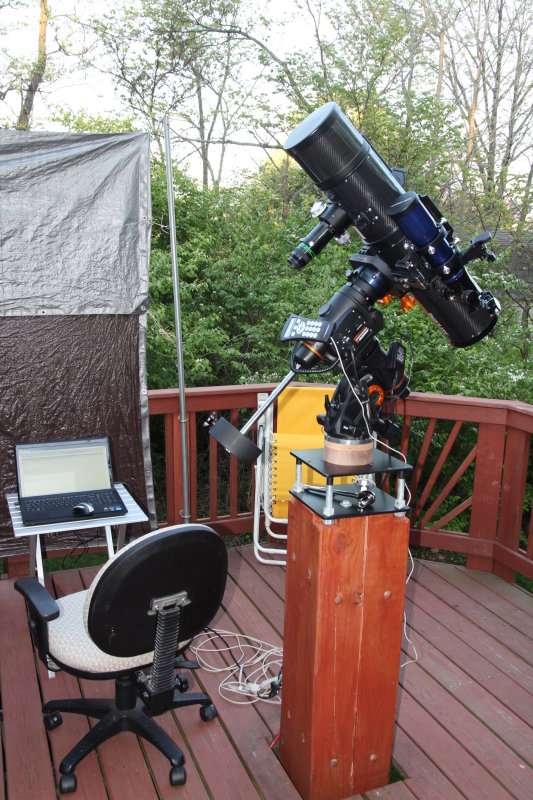
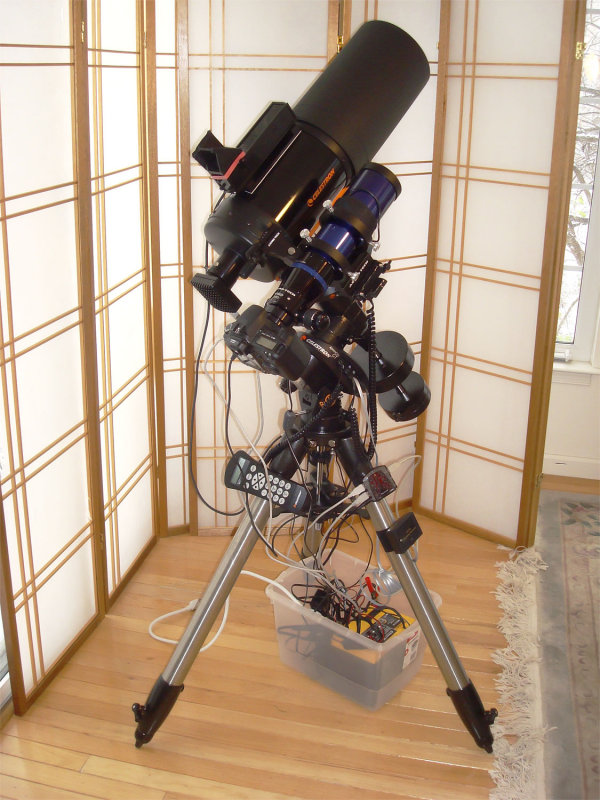
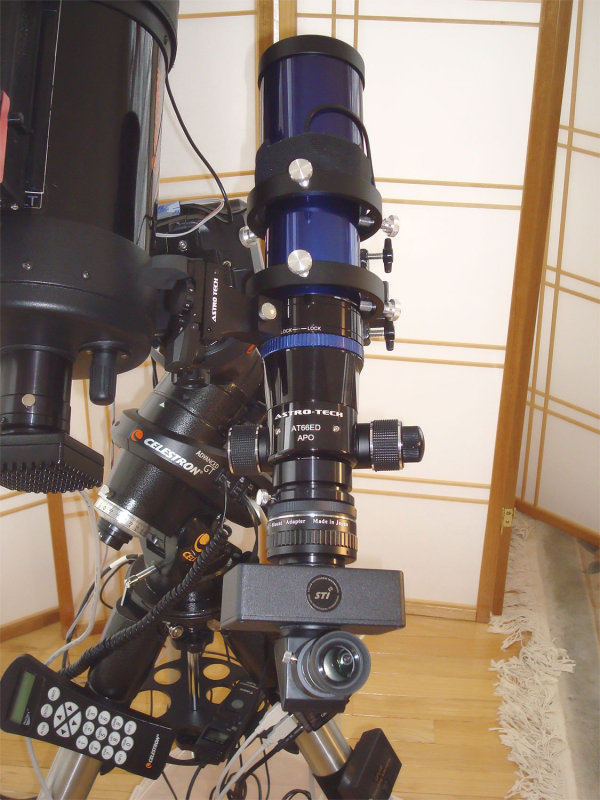
This is my "low cost" imaging setup. The foundation of the setup is the Celestron C6S-GT which is a 6" SCT sitting on a Celestron CG5-GT goto mount. The C6 SCT is my main visual observing scope, but also doubles as my guide scope and a lunar and planetary imaging scope. My primary imaging scope is the AT66ED 66mm APO refractor which is mounted side by side with the C6. The side by side mounting bracket is a Ken's Rings standard duty saddle plate.
My primary imaging camera is a Canon 30D DSLR. My guide camera is a Meade DSI color CCD camera.
The advantage of having a scope with a larger aperture and longer focal length coupled with a smaller APO refractor is added versatility. The SCT can be used as a planetary scope, a visual scope, and a medium length imaging scope as well as a guide scope. The AT66ED can also be used as a guide scope as well as a portable grab and go scope.
Celestron C6S-GT Imaging Setup
Power for the mount is usually provided by the AC power adapter. For dew control, I use a 12 volt 35 amp hour battery. The mount can also be run on the 12 volt battery, but since I'm powering a computer and my Canon 30D, I still like to have an AC power source available for imaging, if possible.
Celestron C6S-GT Imaging Setup
Here's a fairly complete list of all my imaging gear:
Scopes and Mounts:
C6S-GT 6� SCT and CG5-GT mount
Astro Tech AT66ED APO Refractor
William Optics 0.8 Field Flattener
Telrad
Shoe String Astronomy GPUSB Cable
2� Visual Back for SCT
2� Diagonal for SCT
Astro Tech 90mm Guide Rings
Dual Dovetail Saddle Plate
Mount AC Power Adapter
Extra Mount Counterweight
Reticle Eyepiece
Cameras and Camera Control:
Canon 30D DSLR Body
Meade DSI Color CCD Camera
Canon AC Battery Adapter
Canon TC80N3 Remote Control
Stiletto Knife Edge Focuser
Misc Cables & Adapters
Computer and Software:
Sony Laptop Computer
Extra Harddrive
Images Plus Software
Guide to DSLR Astrophotography
Noel Carboni Astro Tools
Dew Control:
Astrozap Dew Shield
Dew Buster Dew Heater Controller
Telrad Dew Heater
APO Dew Heater
12 Volt 33AH Battery
Battery connectors
Celestron C6S-GT Imaging Setup
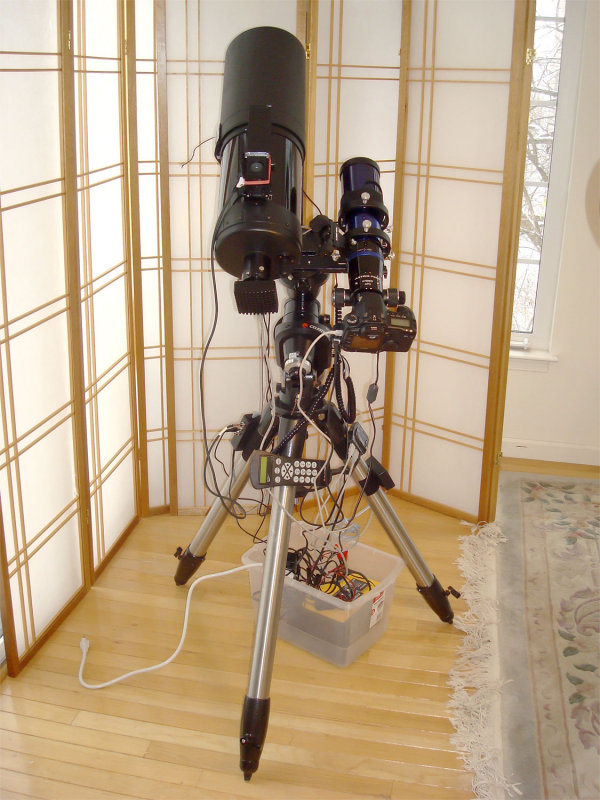
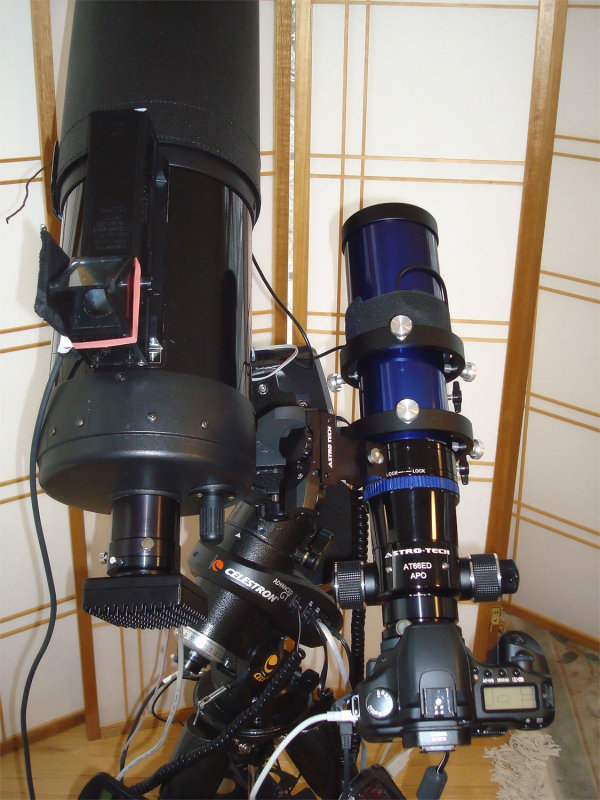
My primary imaging scope is the AT66ED to which I attach a Canon 30D DSLR. In between the AT66ED scope and the DSLR is a William's Optics 0.8 focal reducer/field flattener. Without the field flattener, spherical aberrations at the corners of the image become a problem. With the field flattener, the focal length of the scope is reduced to about 320 mm. As can be seen in the photo of the Andromeda galaxy in the Astrophotography Photo section, this produces a very wide field of view.
The C6 is fitted with a Meade DSI color CCD camera and is used for autoguiding.
The AT66ED is held onto the saddle plate with a set of Astronomy Technology 90mm Guide Scope Rings. The guide scope rings allow me to easily adjust the scope to be exactly parallel with the C6 or to put it off axis. This makes it easier to find guide stars with the C6 and still put the AT66ED directly on target.
Also seen in this image is the heating pad attached to the Telrad on the C6. I finally broke down and added the dew heater after finding nothing else worked to keep the Telrad functional thru the night.
Celestron C6S-GT Imaging Setup
For focusing the AT66ED, I use a Stiletto knife edge focuser. The Stiletto replaces and simulates the Canon 30D while focusing and then is removed once focus is achieved and replaced by the Canon DSLR. I've found the Stiletto to provide quick and easy focusing.
Celestron C6S-GT Imaging Setup
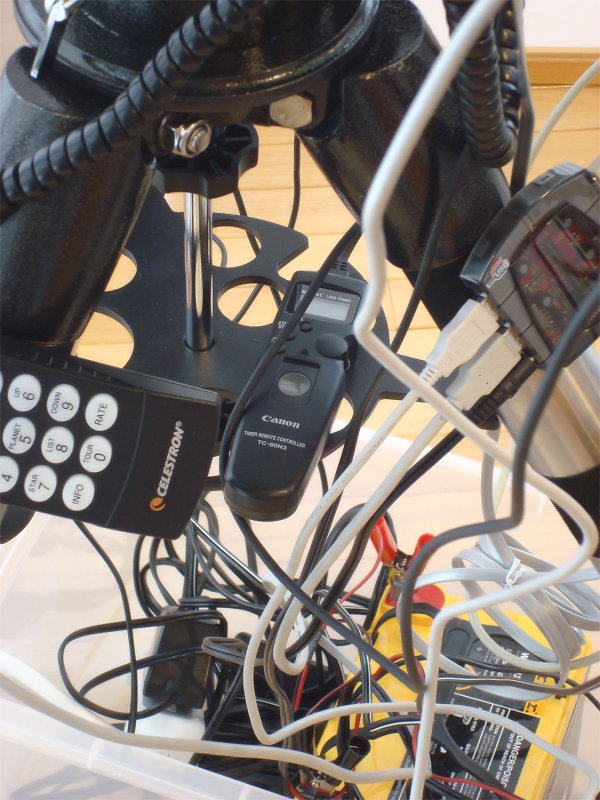
This is a shot of the Canon TC80N3 camera remote control. This is a great little device that allows control of the camera's shutter speed and number of exposures. For example I can program 20 exposures at 2 minutes each, hit the start button and walk away...nice on sub-zero evenings.
Celestron C6S-GT Imaging Setup
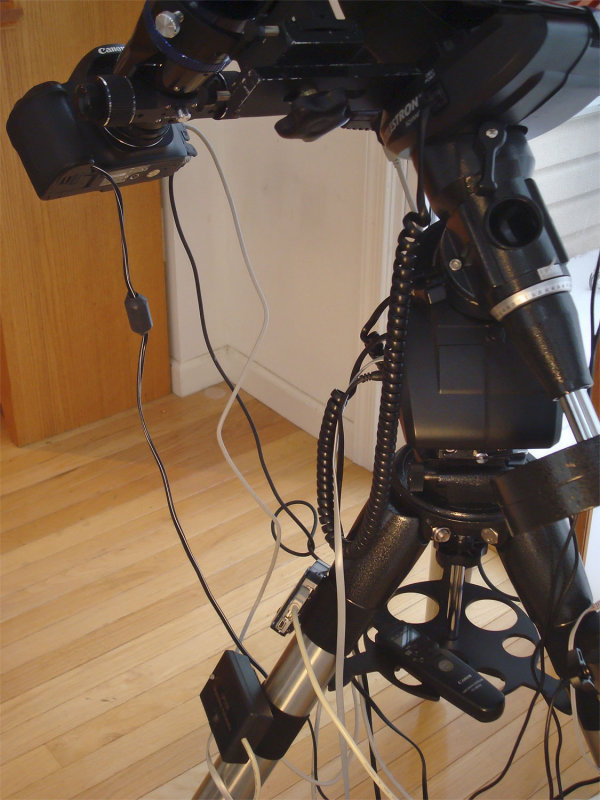
I recently added an AC adapter to run the Canon DSLR. It's very easy to burn thru a camera battery when taking 30x5 minute sequential shots.
Celestron C6S-GT Imaging Setup
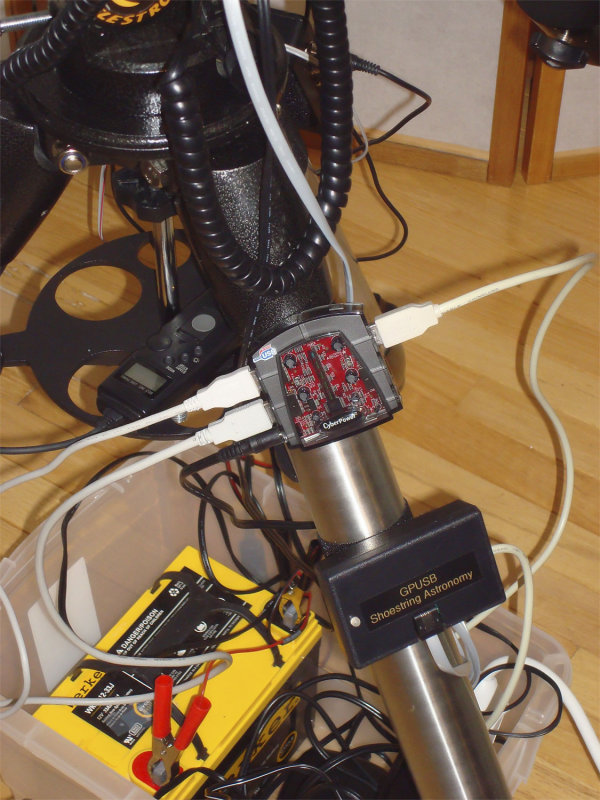
This is a picture of the USB hub I've recently added to try and tame the cord nightmare. I can now run a single USB cable to the computer rather than 4 cables. Also attached is the GPUSB box. One end of the GPUSB plugs into the mount's autoguider port and the other into the USB hub. This connects the computer to the mount for the purpose of autoguiding with PHD Guiding software.
Also visible in the photo is the battery box. I use the battery to power the Dew Buster and all the dew heaters. I can also run the mount with the battery when I'm offline from the electric grid.
Celestron C6S-GT Imaging Setup
This is a picture of the Dew Buster dew heater controller. Dew can quickly bring an end to an imaging session and the only real way to fight it is with a dew heater. I have dew heaters on my C6, the AT66ED and on the Telrad. The C6 uses an Astrozap dew shield with built in dew heater. The white cable on top of the Dew Buster is actually a temperature sensor which helps regulate the amount of power the Dew Buster applies to the heaters.