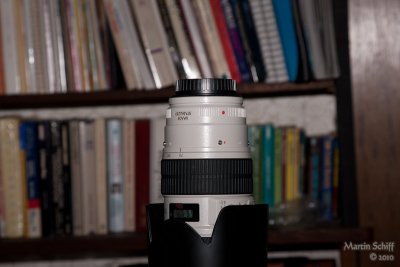
Here is an explanation of how Flash Exposure Compensation works with a Canon 580 EX II flash mounted on a 40D camera with an EF 24-105L lens at 85mm. The books were about 5 feet behind the lens.
First the ISO100 gallery:
Notice that the exposures are virtually identical for all of them, yet every one
was taken with different apertures and shutter speeds at ISO100 in a dimly lit
room, on ETTL with FEC set at zero. The last two are a bit different, simply
because they were taken beyond the sync speed, so high speed sync came into play
and change the color temperature slightly. In this case, the flash overpowered
the room light in all cases, and the exposures are identical.
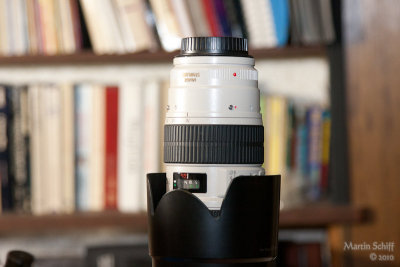
Now the ISO1600 gallery:
The books were illuminated with a fluorescent photoflood for this gallery.
Notice that no matter how the exposure is changed (either with shutter speed or
with aperture), the results are virtually the same at the same EV for the room
light, until the flash gets to the point where it overpowers the room light.
Here, we are balancing the ambient light with the flash by changing either the
shutter speed or aperture. Notice that except where the ambient light shined on
the side of the lens a bit and changed the exposure, that the lens is exposed
the same in every image. It was illuminated primarily by the flash.
This is how ETTL works. You set the camera to expose correctly for the ambient
light any way you like, and use the flash in ETTL mode to vary the light amount
to match your settings. It's just a creative decision as to how much depth of
field, or how much motion you need to stop. You can use the camera in P, Av, Tv
or M mode and it can give you correctly exposed images for both the ambient and
the flash (assuming the flash is in high speed mode, in case the shutter speed
exceeds your sync speed). I recommend using manual mode, but that's a personal
preference so that I have complete control over the ambient exposure.
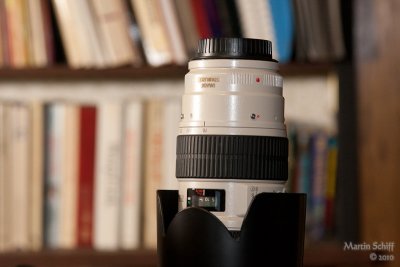
Finally, the folder with the flash exposure compensation test. First I set the
camera exposure manually to 1/60 sec at f5.6 which was the correct exposure for
the background, according to the meter. Then I took an image at FEC -2, -1, 0,
+1 and +2. Notice that the first 3 don't look that much different, because all
are illuminated by both the flash and the room light, but the other two show the
lens as overexposed. Then I set the ambient exposure down two stops at 1/125 sec
and f8, and did the same test at FEC -2, -1, 0, +1, +2 and +3. Notice that the
background is quite dark in the first and stays dark for the first few images,
until the flash level starts to illuminate the background as well as the lens.