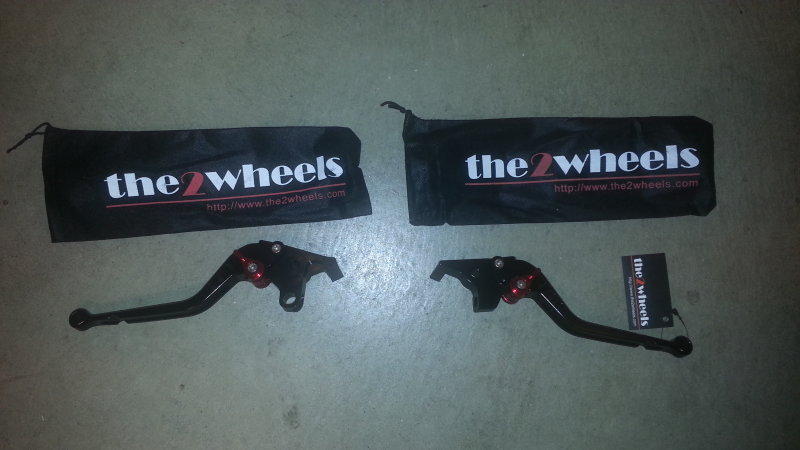
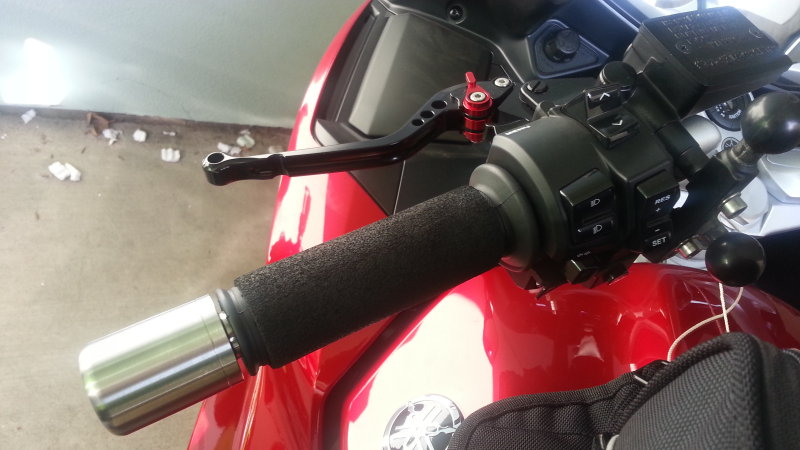
11-AUG-2014
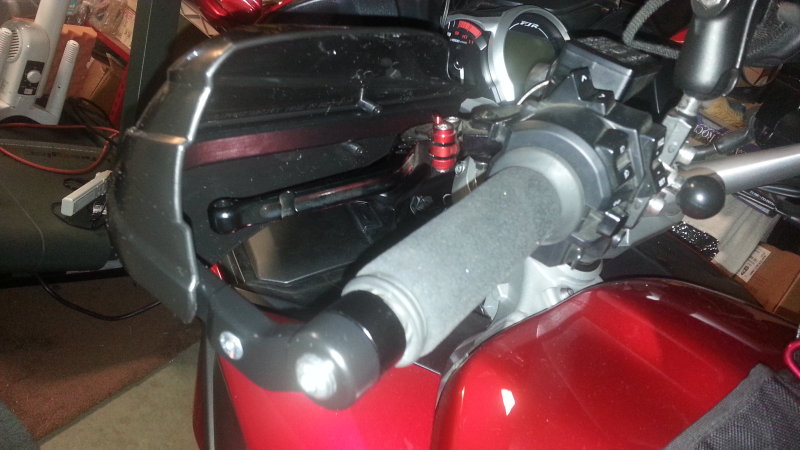
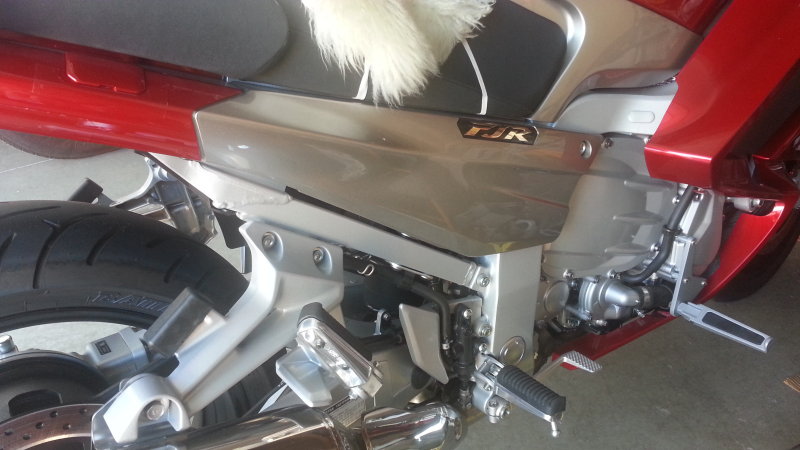
Aluminum levers
These are $35 a set, brand new from eBay. It has 6-click adjustability for reach and are more comfortable than the stock pot metal levers.
12-AUG-2014
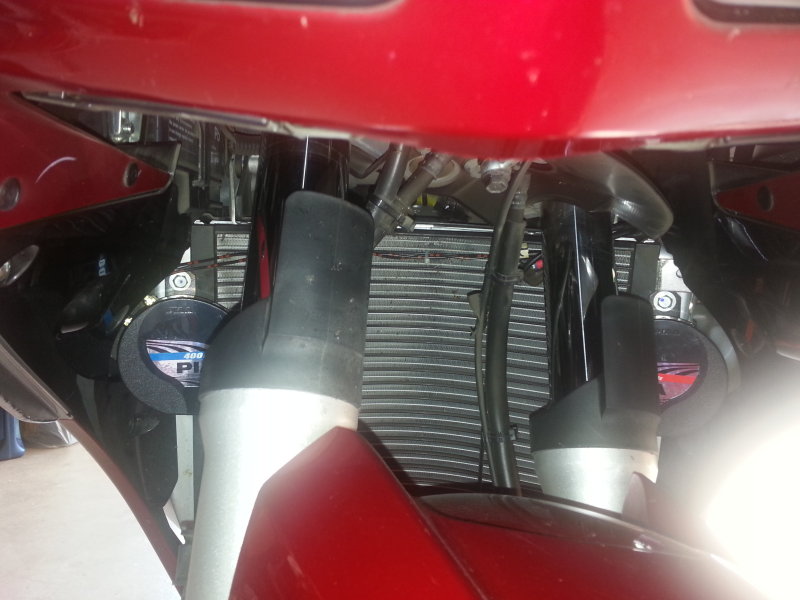
Left side and HVMP $62
Also, I installed a set of stainless steel heavy bar end weight by HVMP. They are 3/4 lb each and helps to dampen the handlebar vibration (just by a bit though.)
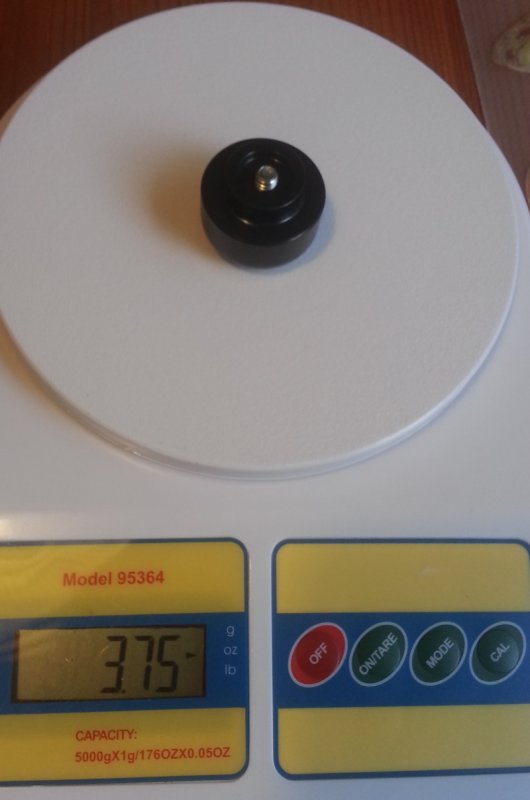
24-AUG-2014
Yamaha FJR stock bar end weights
The stock OEM bar end weights are metal and weight 3.75 oz.
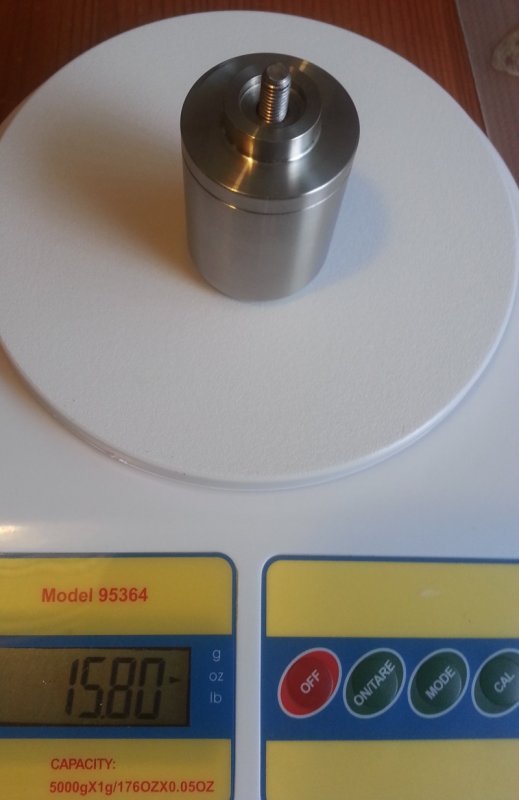
24-AUG-2014
HVMP Extra Heavy Weight bar ends
The HVMP Extra Heavy Weights is 15.8 oz each. That's almost 1 lb. However, I can't say that they dampen the bar vibration at all. Not for me at least. They do look good though.
Beside, may be the Yamaha engineers knew something.
If it's that easy to tame the vibrations, they would have done it at the Yamaha factory.
After using it for 3 weeks, I reinstalled the stock bar end weights and they are much better.
17-AUG-2014
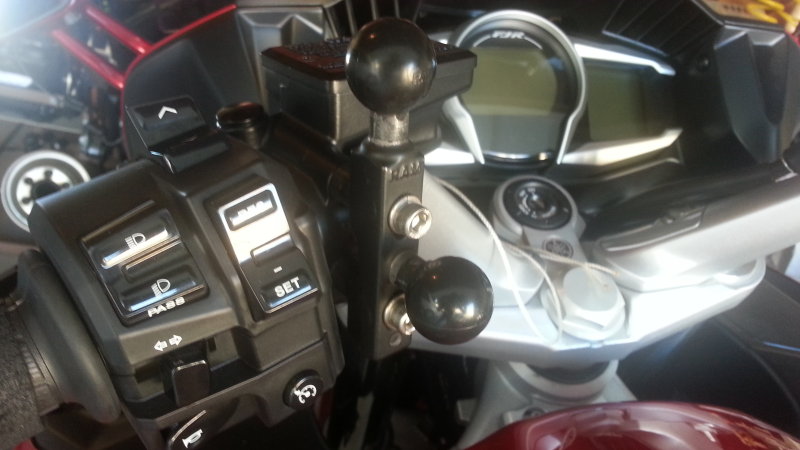
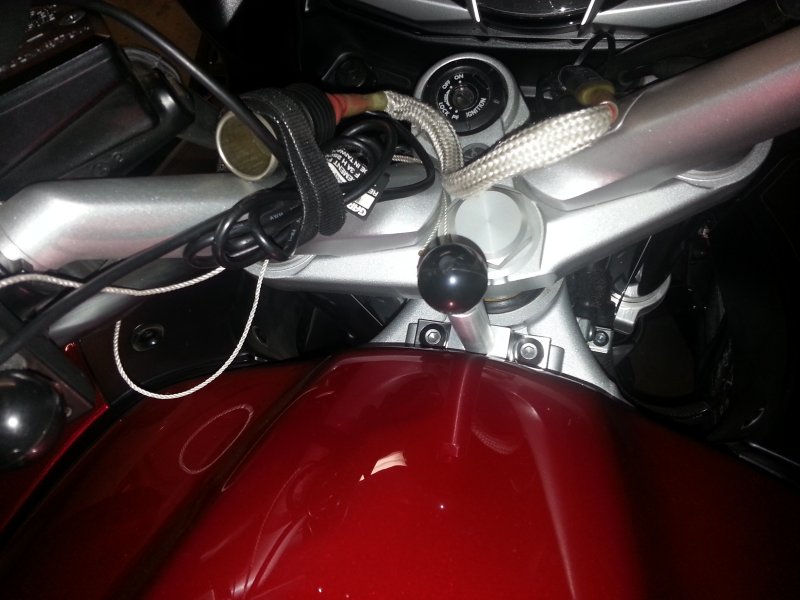
RAM ball mount - $30
I installed a set of dual RAM balls for my GPS and camera. It uses longer bolts to mount on top of the left side clutch holder.
24-AUG-2014
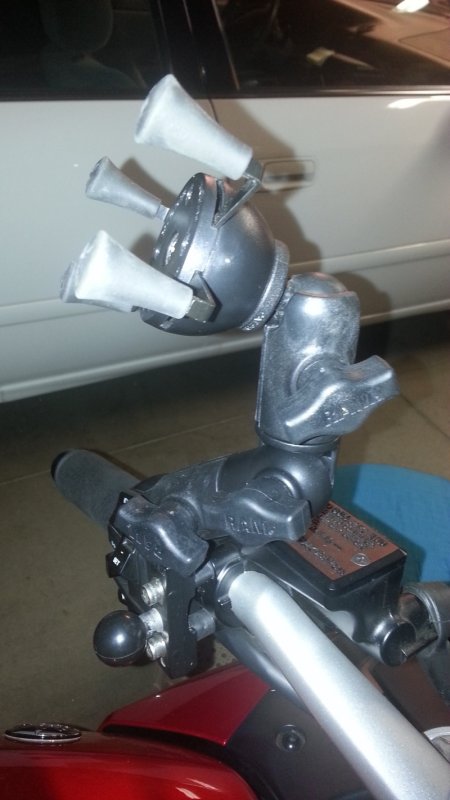
Ram Mount double socket arm
The Ram Mount double socket arm offers more flexibility in positioning any mounted device than the straight arm. I like it.
11-AUG-2014
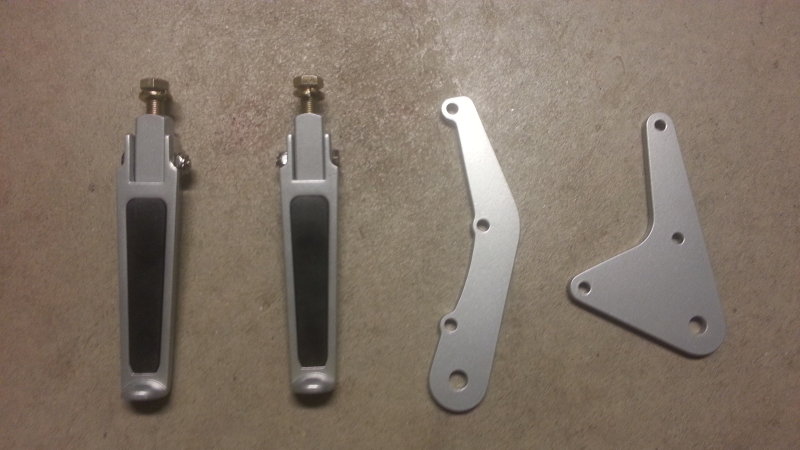
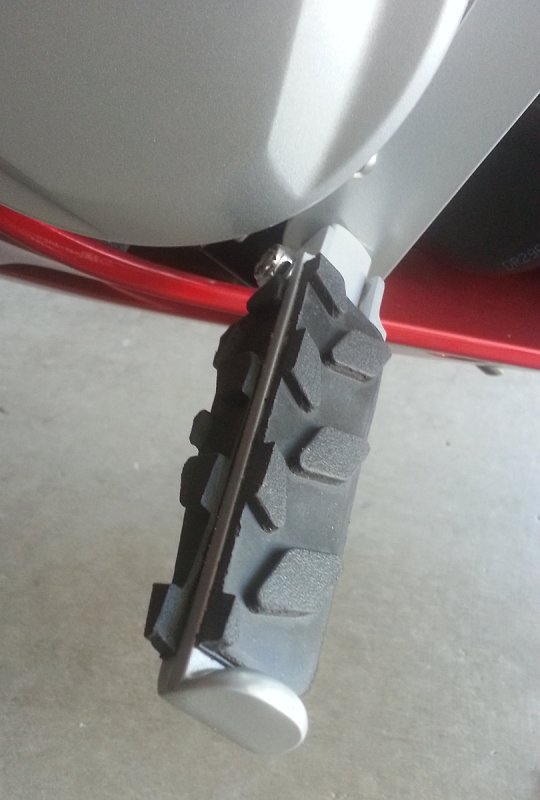
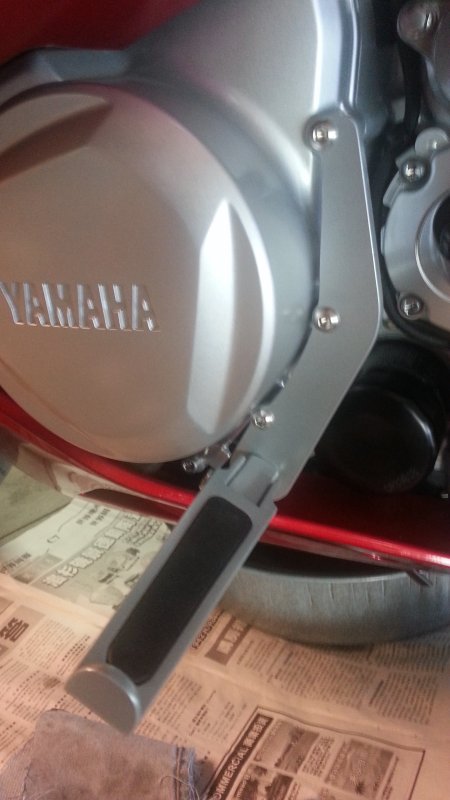
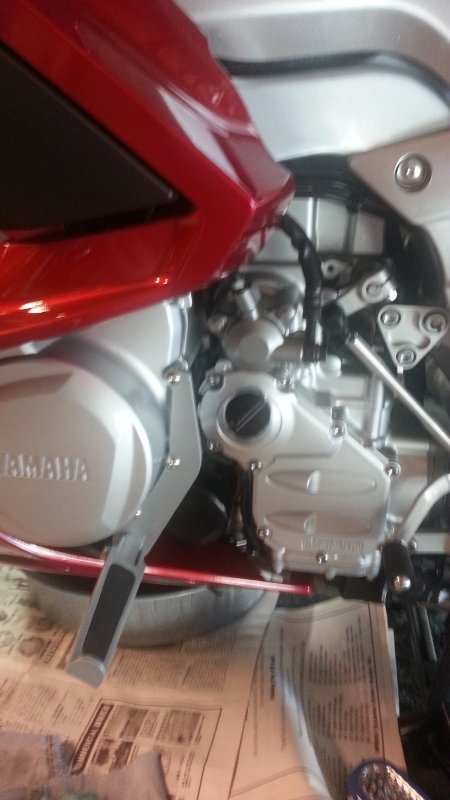
Garauld Highway Pegs
Gary Crowley on fjrforum.com hand made these highway brackets for the FJR. I ordered a set together with the pegs, for $90. It will make my long trip more comfortable by being able to change my legs position.
15-AUG-2014
Left side
The pegs fold up, of course.
19-APR-2014
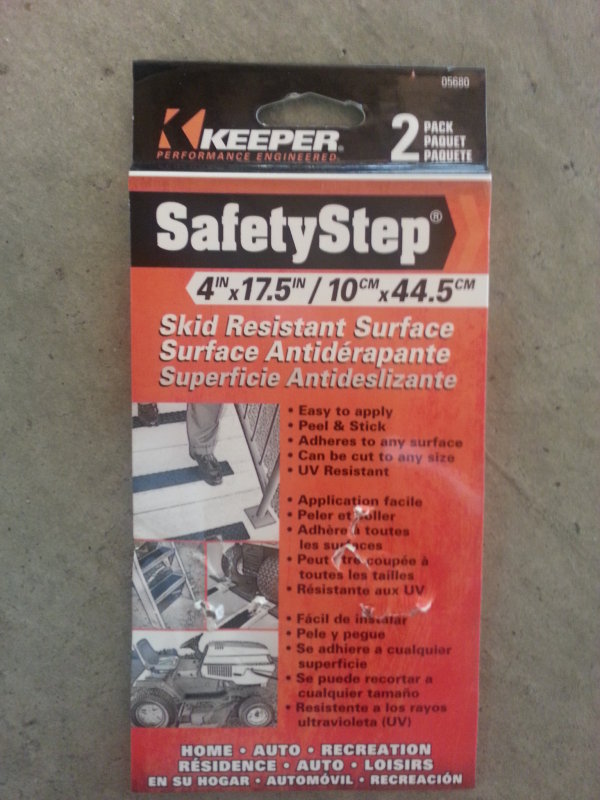
Homedepot special...
I didn't like the smooth texture of the highway pegs so I went to Homedepot to buy a pack of these...
06-SEP-2014
Pegs
They have adhesive backing. I cut them to fit on top of the original texture.
14-AUG-2014
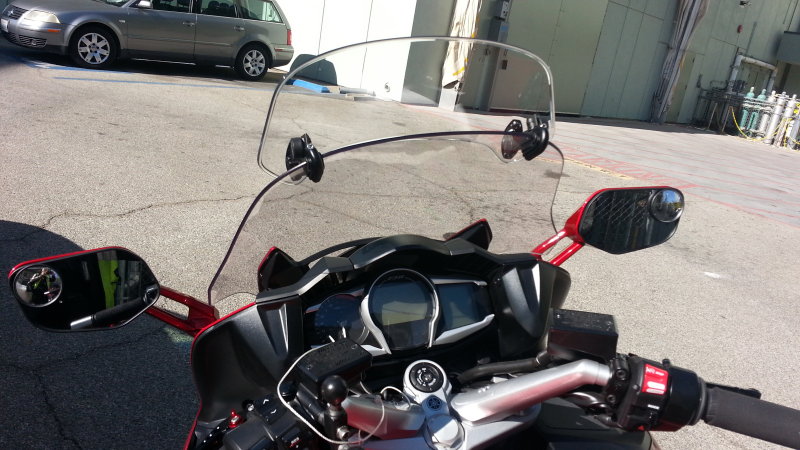
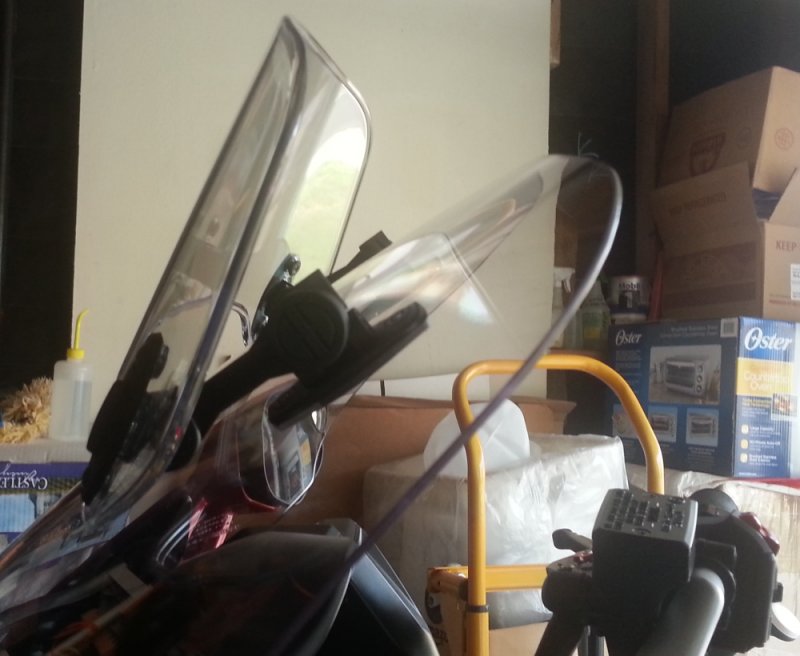
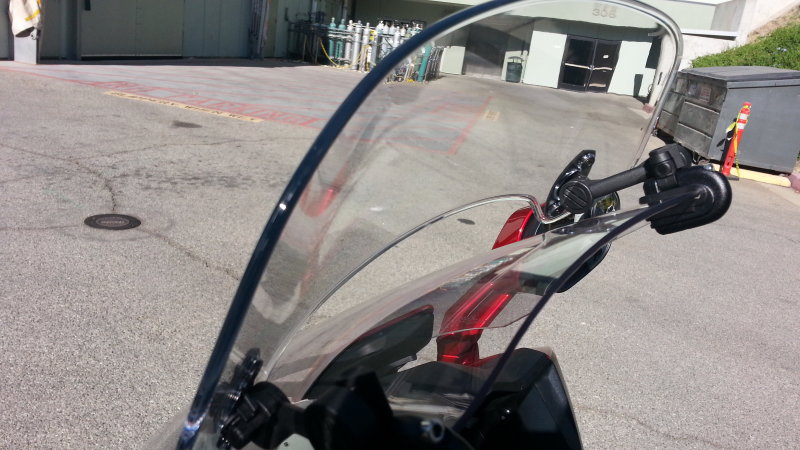
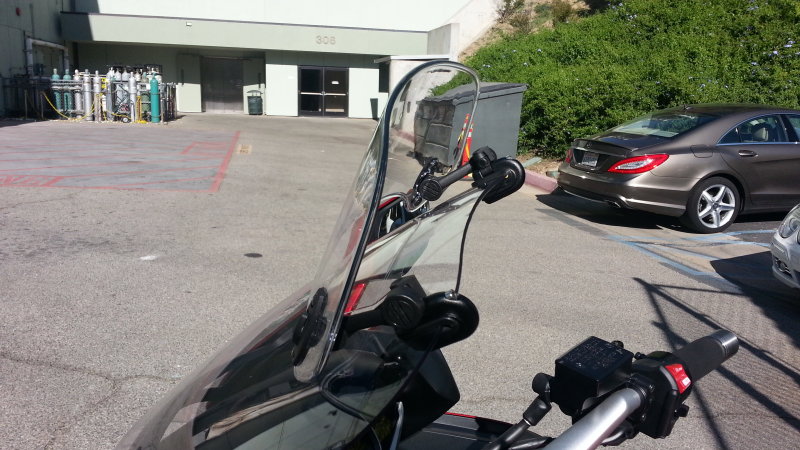
German-made MRA X-Creen Spoiler - $157
Even though I'm only 5'8, but the wind still hit me at around my forehead. I like to have it over my head to quiet things down, so I ordered and installed a MRA X-Creen Spoiler. It's 15" long x 6" high and is fully adjustable for height and angle.
I ordered one with both bolt-on and clamp-on mounts. The one here is the clamp-on mount that requires no drilling. However, the top of the spoiler is at about 3" above the stock windshield at its lowest setting. With a bolt-on mount, we can install it anywhere we like. For example, we can have it flush with the stock screen at its lowest setting.
16-AUG-2014
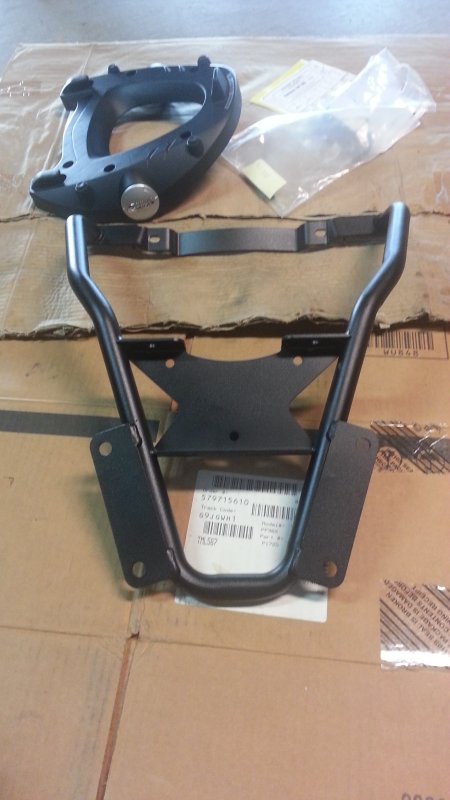
Italian Givi SR357 rear rack - $150
I have been using Givi cases for the last 15 years on my Honda CBR-1100XX. They are solid and waterproof. I order a Givi rear rack specifically designed to fit the Yamaha FJR-1300. Then I will just transfer my Givi case to it.
The stock rear rack is just plastic and it was just for look as there is a sticker on it that said "Max load 3 lbs". The Givi rack has a 10 kgs (22 lbs) max load.
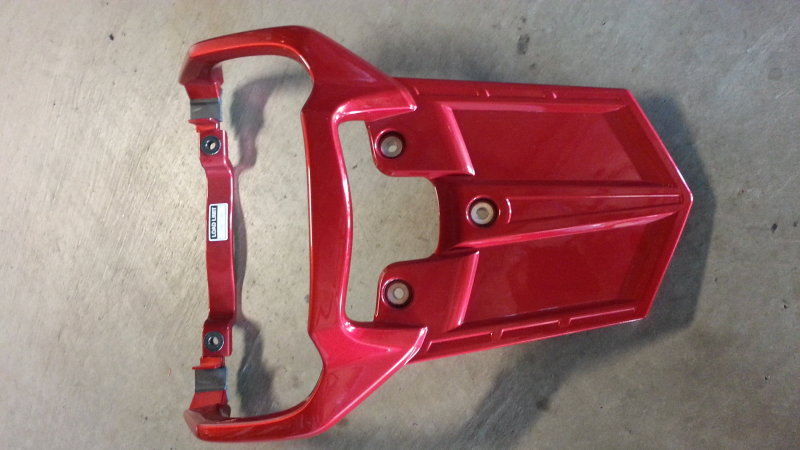
16-AUG-2014
Stock rack
The stock rack seems to be made with some kind of ABS plastic. It was so light and flimsy.
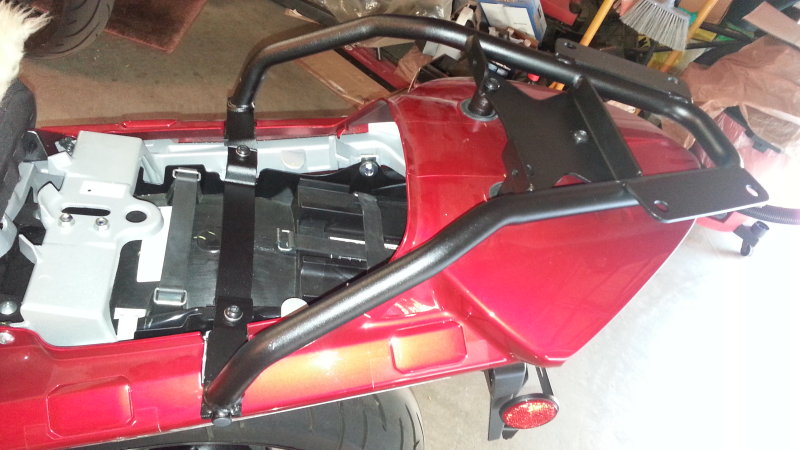
16-AUG-2014
Stock rack removed
It was only 5 bolts: 3 in the back and 2 in the front and it was off easy.
16-AUG-2014
Givi rack installed
Everything lined up properly as expected. The rack was made with all metal and is so much stronger.
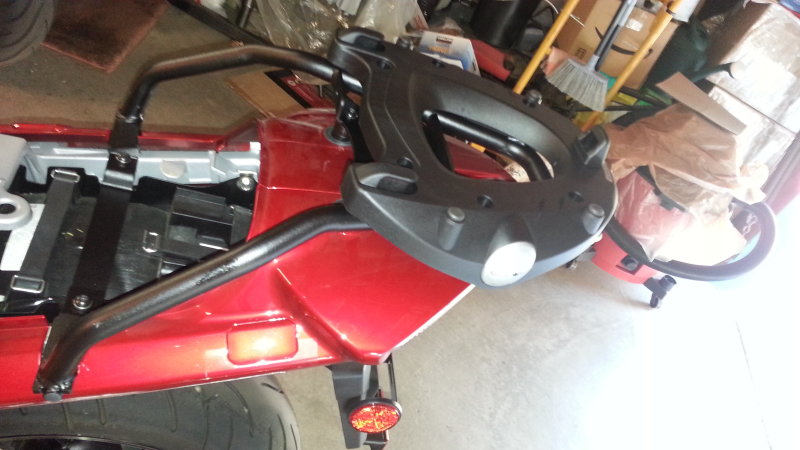
16-AUG-2014
With the top plate mounted
Then the top plate was mounted on the rack. The Givi case will snap onto this plate.
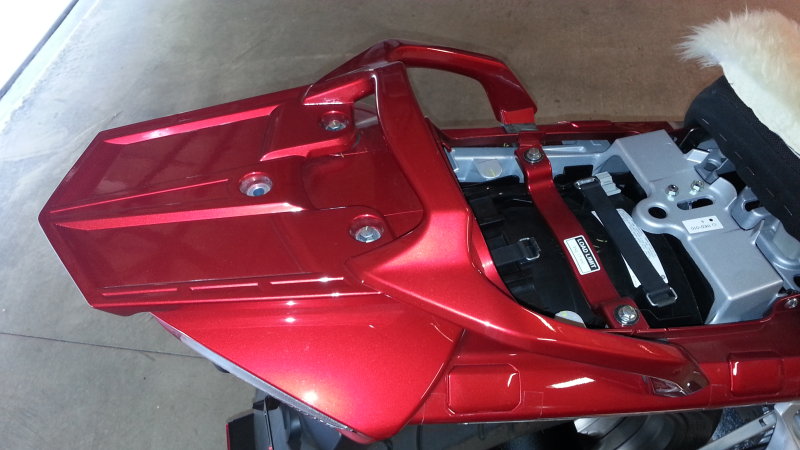
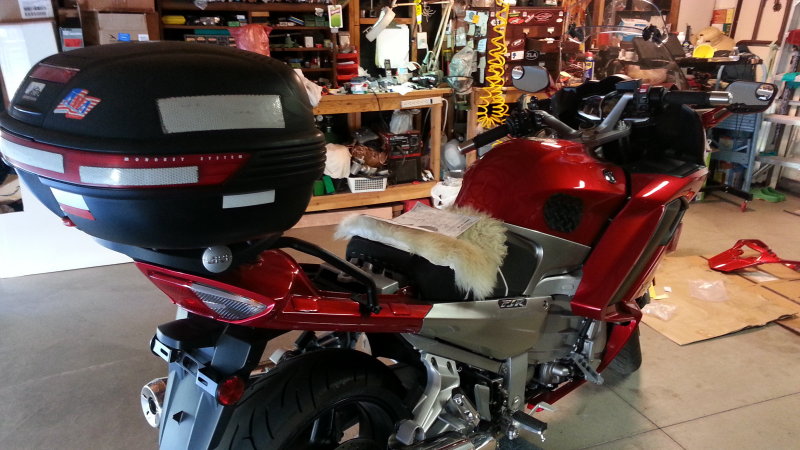
16-AUG-2014
Givi E46 top case mounted
This is my Givi E46 (46-liter) Monokey case that I have been using for the last 15 years. It's now moved over to the new FJR.
19-AUG-2014
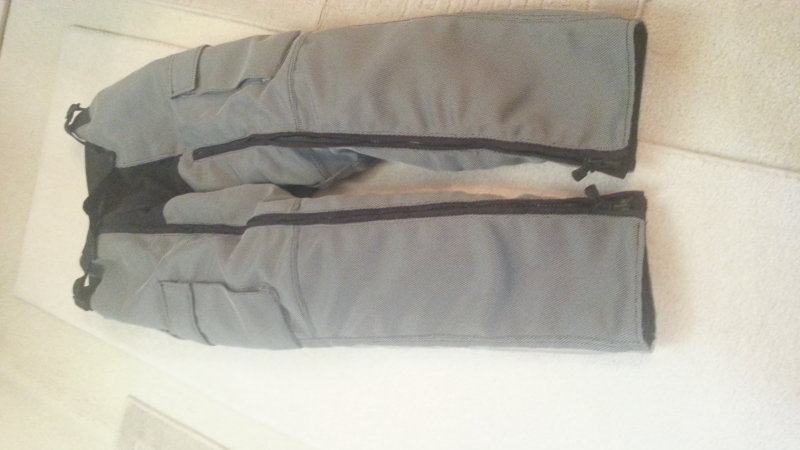
Motoport Kevlar air mesh pants
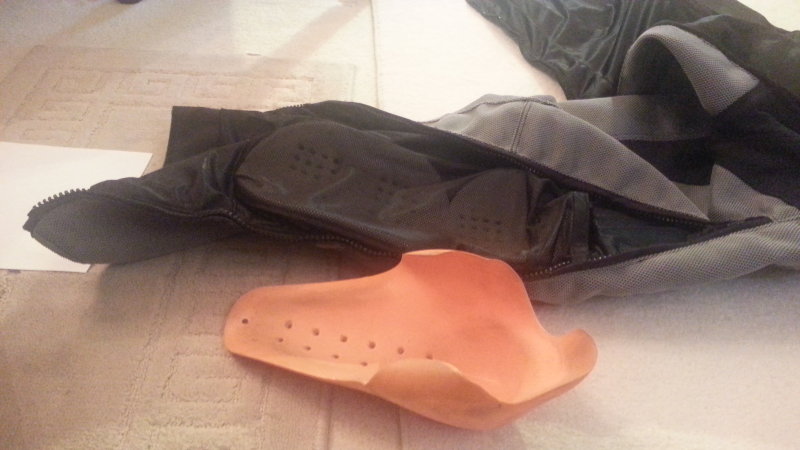
Yes, it's not exactly farkle for the bike, but for me. I have been wearing a pair of Motoport Ultra II cordura with Denier 1000 since 1997, for 17 years. I guess it's time to upgrade. I got a brand new pair of Motoport Kevlar air mesh pants with the knee/shin armour, thigh armour and hip armour. I supplemented the knee/shin with a pair of BMR NP CE Level 2 armour.
I drove to Motoport in San Marcos, CA to try on different sizes of pants and for some reasons, the XS (Extra Small) fits me perfectly. I usually wear LARGE in most other brands. The knee/shin armour were lower than I like so I asked them to move it up by 1" or so and they did it at no charge and ship it to me for free. Great service!
They are not cheap at US$430 out-the-door, but cheap things are not good and good things are not cheap!
19-AUG-2014
BMW NP CE Level 2 armour
That's BMW's NP armour with CE Level 2 rating. It actually performed way better than CE Level 2 in testing. I put it on the knee/shin.
23-AUG-2014
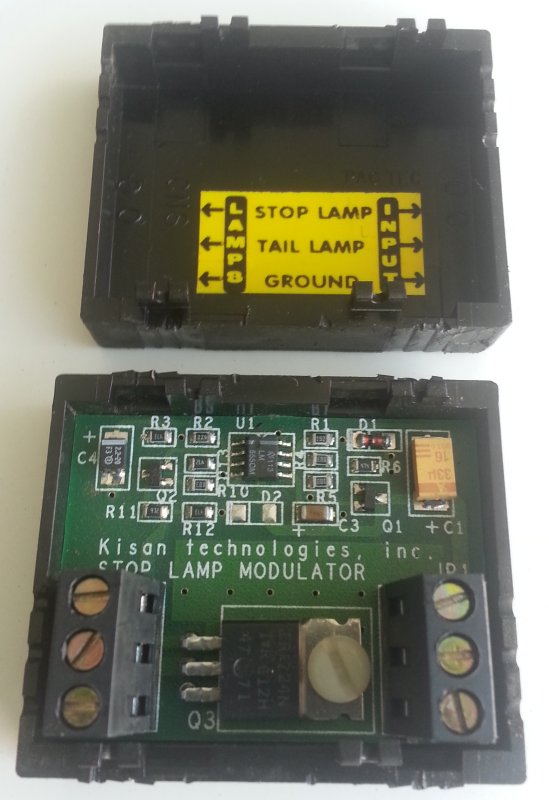
Kisan Tailblazer - Brake light modulator
Kisan made incredible product. I bought a Kisan Tailblazer splice-in unit in 1997 (as that was the only one available back then) when I first started riding. It was a 600cc Suzuki Bandit. I then moved to a Honda CBR-1100XX in 1999 and I moved the Tailblazer to it. After 15 years and 70k miles, I moved to a 2014 Yamaha FJR-1300A and the TailBlazer was moved to it.
This unit is rated for 100W. Basically it can make anything flash by interrupting the ground wire. The connections are simple: there are 3 inputs (tail light, brake light, ground wire) and there are 3 outputs (tail light, brake light, ground wire.) When the brake is on, the modulator interrupts the ground wire to make flashes. Therefore, we can wire this ground wire to any number of lights and make them flash. It works with LED and halogen. I used it to flash both LEDs and halogen on my XX. On the FJR, I didn't want to cut the ground wires to the stock dual tail lights so the stock tail lights are not wired for flash.
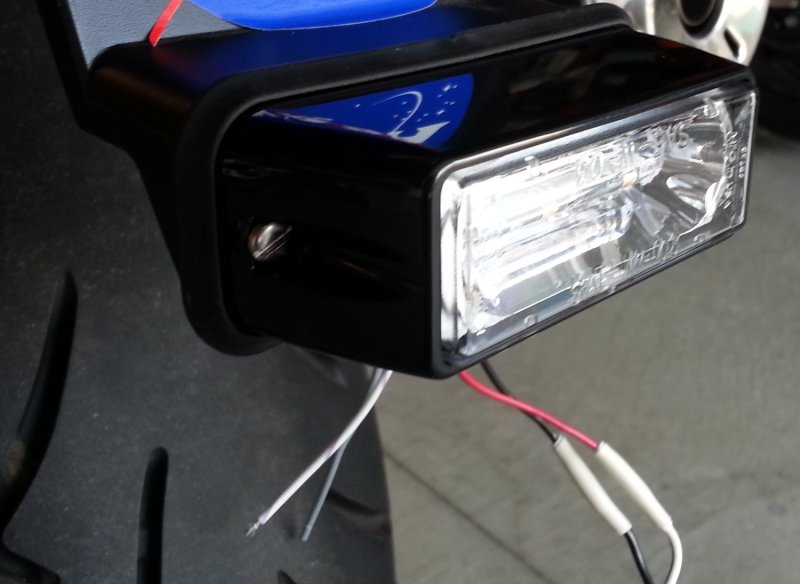
23-AUG-2014
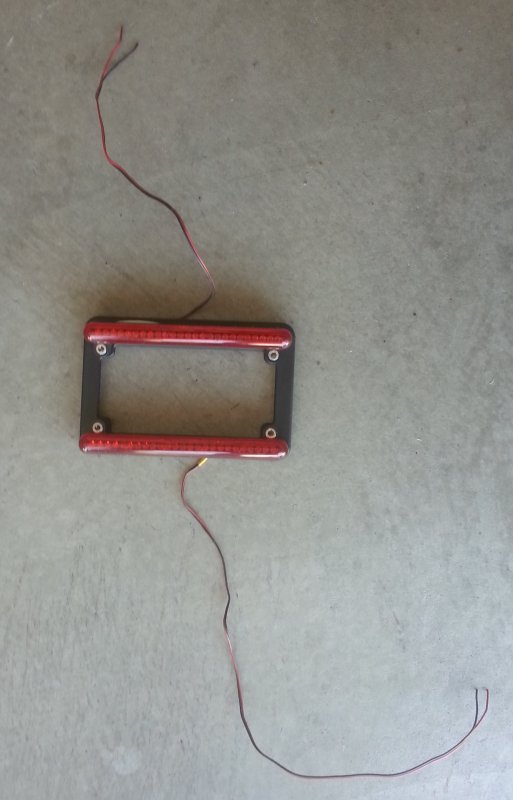
License plate frame LEDs
I wired these LEDs as running light (always on.) When the brake is on, the Tailblazer flashed them for several seconds then they become solid.
23-AUG-2014
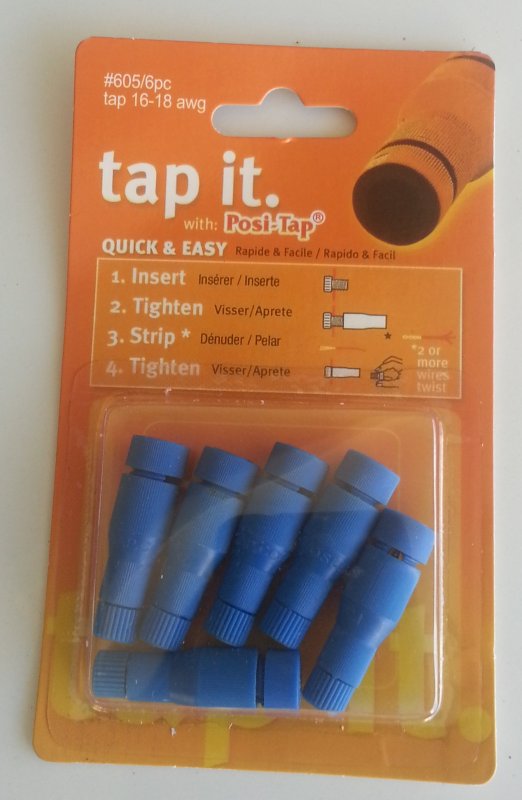
Posi-Tap
I ordered some Posi-Tap for 16-18 gauge wires from Crutchfield.com (excellent service and free shipping.)
I used them to tap into the tail light wire (Blue wire) and brake light wire (Yellow wire) to feed the Kisan Tailblazer. As to the ground, I just wire it from 1 of the seat bolt and feed it to the Tailblazer.
23-AUG-2014
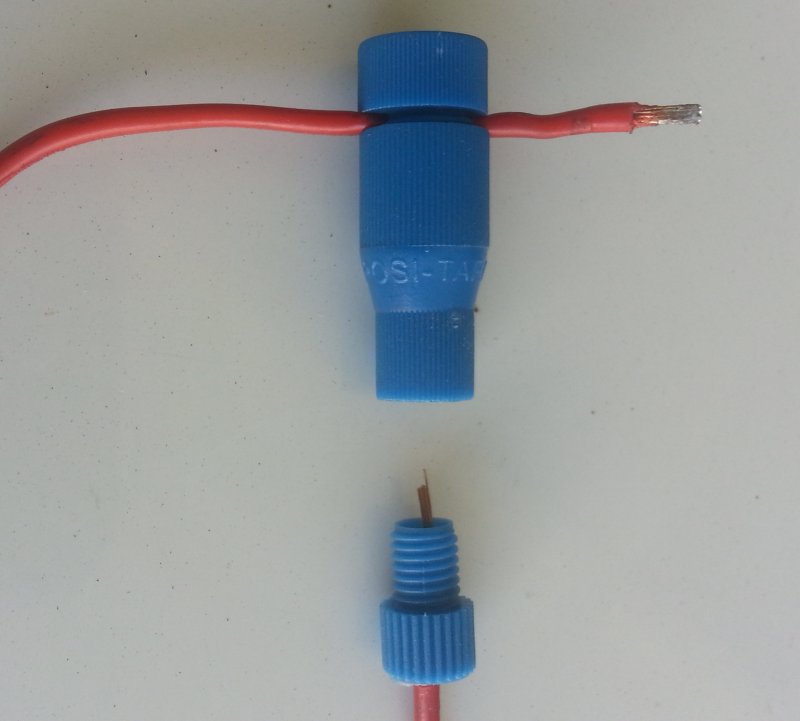
Posi-Tap - How it works
This is how a Posi-Tap works. It has a pointed pin that inserts into the insulation to tap into any wire. Then a wire is connected to it to feed anything.
The nice thing is that they are removable and reusable.
23-AUG-2014
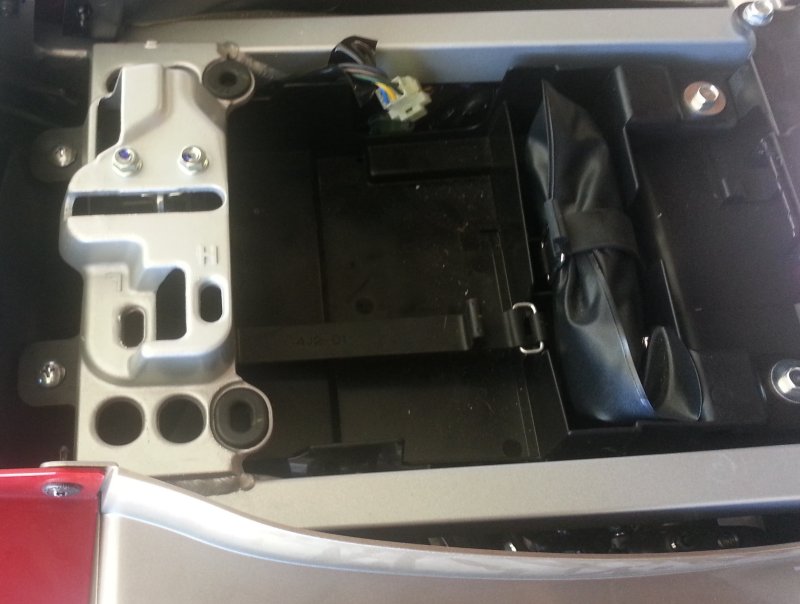
Tap point
There wasn't much room behind the tail light so I traced the wiring to a connector under the rider's seat. After carefully cutting off a few inches of the plastic wrapper and disconnected the connector, I could pull out the connector and tapped into the tail and brake light wires here, then tucked it back to where it was before.
23-AUG-2014
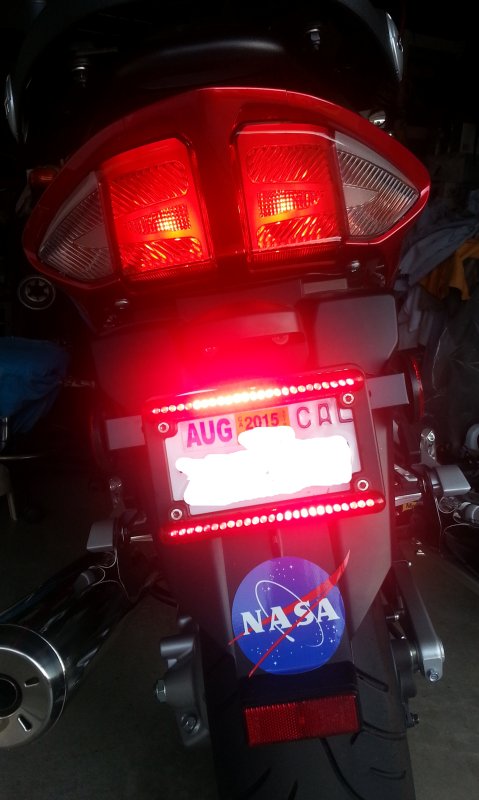
License plate frame LEDs
Now that's how they look like. The license plate frame LEDs will flash when the brake is ON.
25-AUG-2014
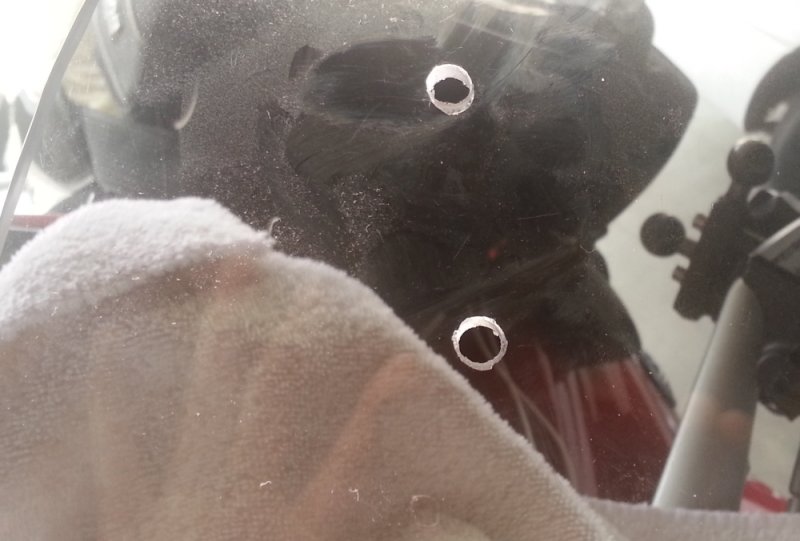
Plastic drill bit
I did not like the MRA X-Creen mounted with the clamp-on mount, as it put the spoiler too high even at its lowest position. At its lowest position, the spoiler was 3" above the top of the stock windshield and I did not like that.
Since it came with the bolt-on mount, I'm going to install it. But I need to drill 4 1/4" holes. I got the drill bit for plastic (the bottom one) and it's so much easier to drill than the one for metal as the angle is sharper.
25-AUG-2014
Practice runs on a piece of plexiglas
I got a piece of plexiglas from Homedepot to do some practice drill before I did it for real on the expensive windshield.
25-AUG-2014
Did it for real on the windshield
25-AUG-2014
MRA X-Creen mounted with bolt-on mounts
It was great that it's now mounted with the bolt-on mounts. I drilled the holes so that after mounted it, the spoiler top is flushed with the top of the stock windshield when the spoiler is at its lowest position.
26-AUG-2014
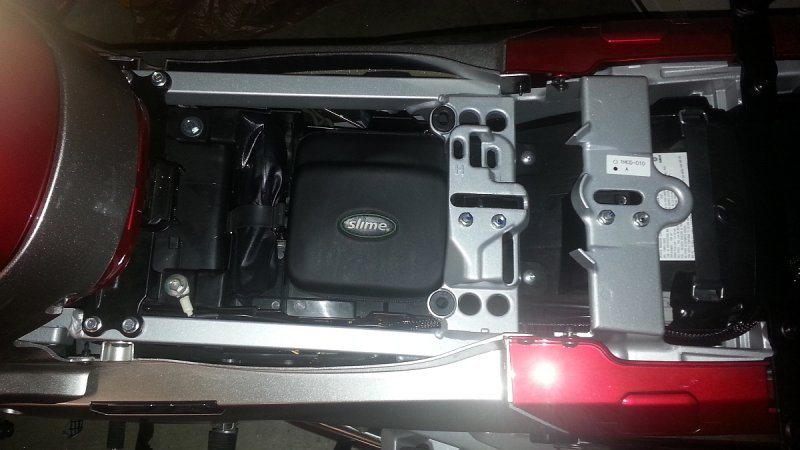
Slime air compressor
The Slime portable air compressor fits nicely under the rider's seat! Nice!
01-SEP-2014
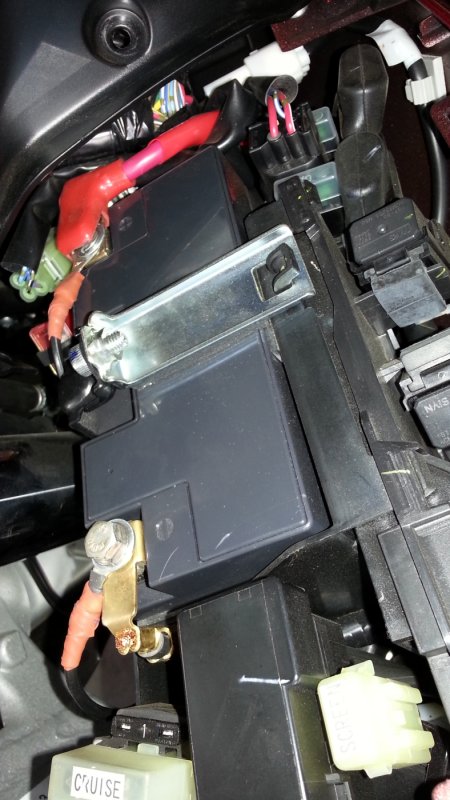
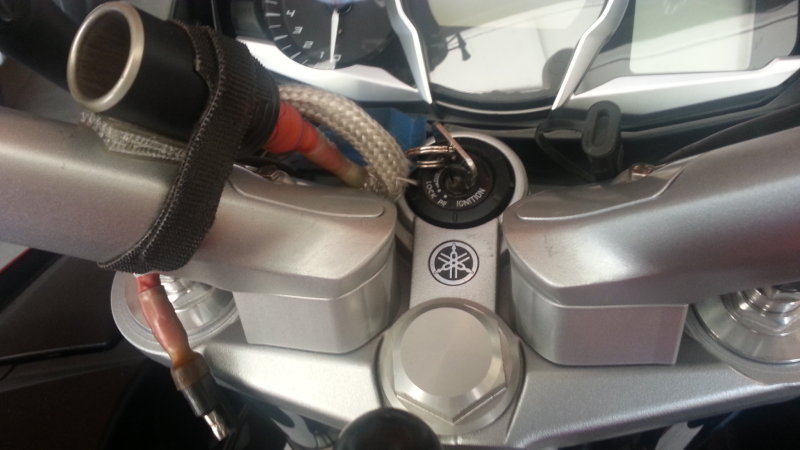
Sept 1, 2014 - SAE connector cable
I installed a SAE connector cable to the battery as the battery is not easily accessed. With the SAE connector, I will be able to connect to a battery charger at home or a Slime portable air compressor while on the road. I will also connect my Widder heated vest to this connector.
I replaced the 2 battery bolts with longer bolts as I'm a perfectionist: I put a washer and a lock washer under the bolts (the stock bolts did not have any washer), together with the SAE cable ring terminals so the stock bolts were too short.
01-SEP-2014
SAE cable routing
I routed the SAE connector to come out next to the ignition switch.
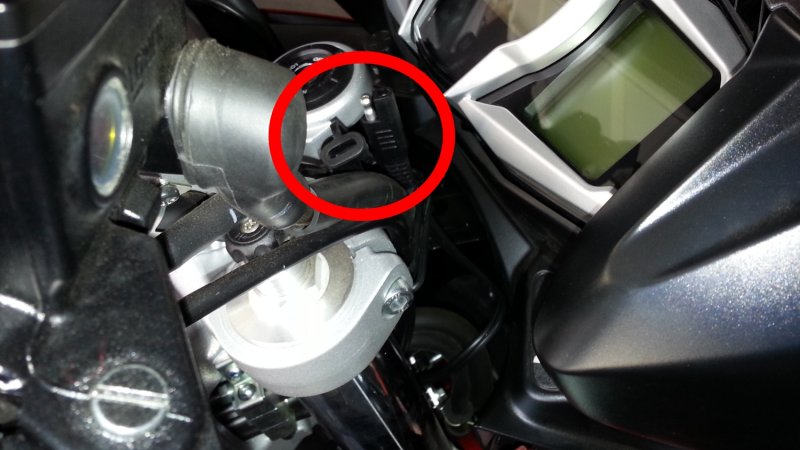
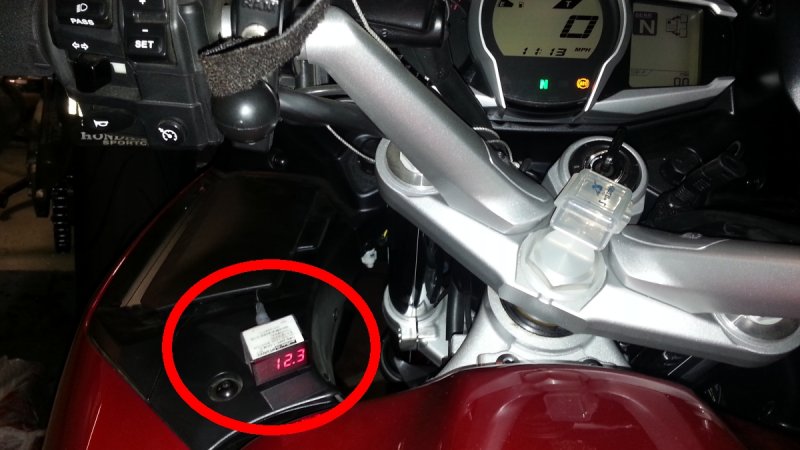
04-SEP-2014
DATEL voltmeter
Installed a Datel voltmeter to monitor battery and electrical system at all time.
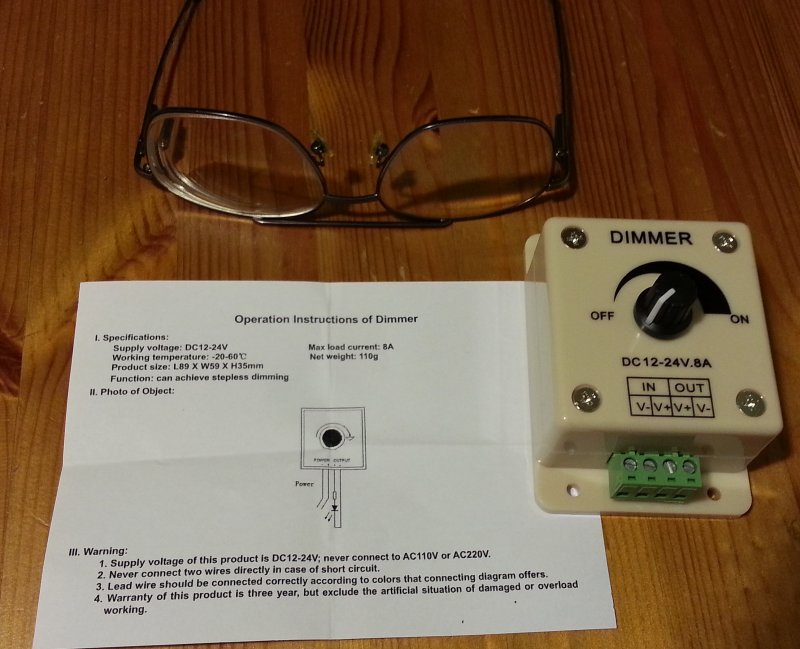
30-AUG-2014
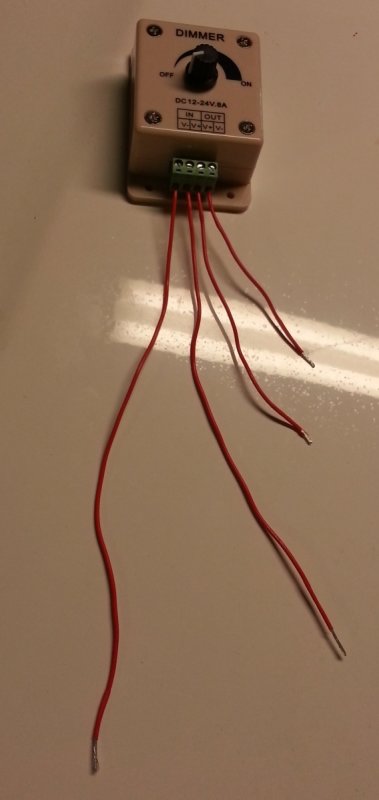
PWM Dimmer
I saw this PWM (Pulse Width Modulating) dimmer on Amazon sold for US$3.60 including air mail shipping from Hong Kong. I was curious so I ordered one to play with. It came to California from HK in 10 days. Not bad at all. How can anyone make any money by selling an electronics dimmer for US$3.60 including shipping fee?
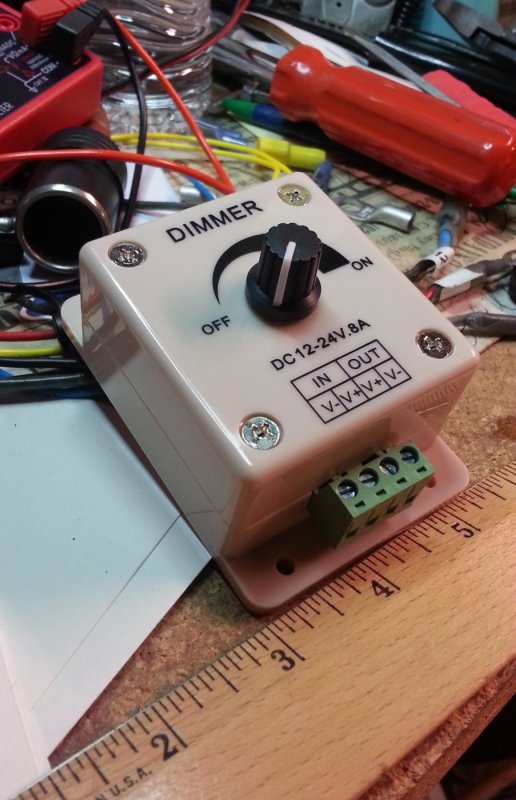
05-SEP-2014
Dimmer in scale
It's bigger than I like so I'll open it up to see what's inside...
05-SEP-2014
Dimmer - internal
It's mostly empty inside. If I can find a smaller plastic box, I'm sure I can make it much smaller. We'll see...
05-SEP-2014
Dimmer - preliminary testing
I wired it up to do some bench testing. Unfortunately, I no longer have my old analog VOM meter. Using a digital Fluke VOM, I was not able to see the pulse width modulation as it sampled and averaged the readings at a low rate. I will bring it to work to hook it up to a scope to see what exactly it does. With an analog VOM, I would be able to see the needle swinging back and forth when the PWM takes place. Not with a digital VOM.
If you are not familiar with PWM, basically PWM turns on and off the voltage/current to the load very quickly from hundred of times per second to tens of thousand times per second so you won't notice the flicker at all. My plan is to adapt this dimmer to my motorcycle heated vest.
I connected a 9V battery to the input and measured the output. The output was very linear from 0 to 9.44V (input was 9.46V). The loss was expected. There was no CLICK in the OFF position but when turning it all the way down counterclockwise, my Fluke VOM registered 0V so it did shut it off properly.
So far so good. I like it.
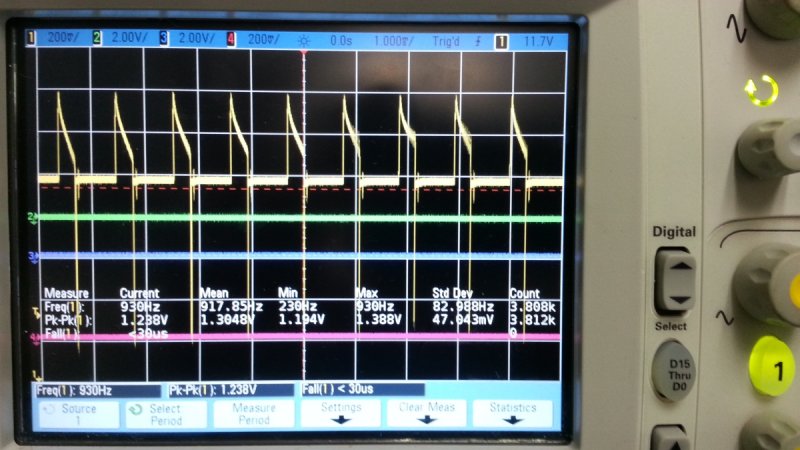
08-SEP-2014
PWM check out...
Yes, it really did pulse width modulation. Good.
05-SEP-2014
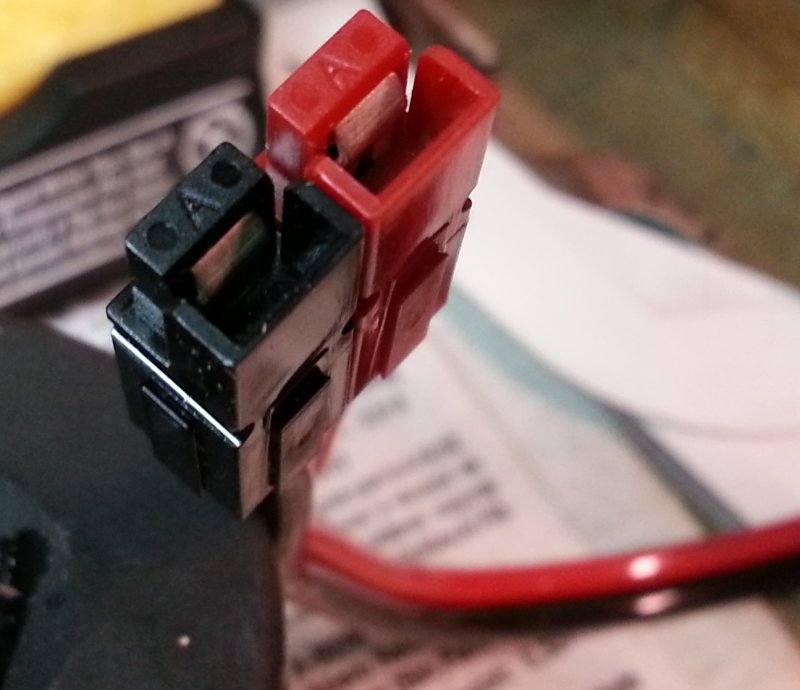
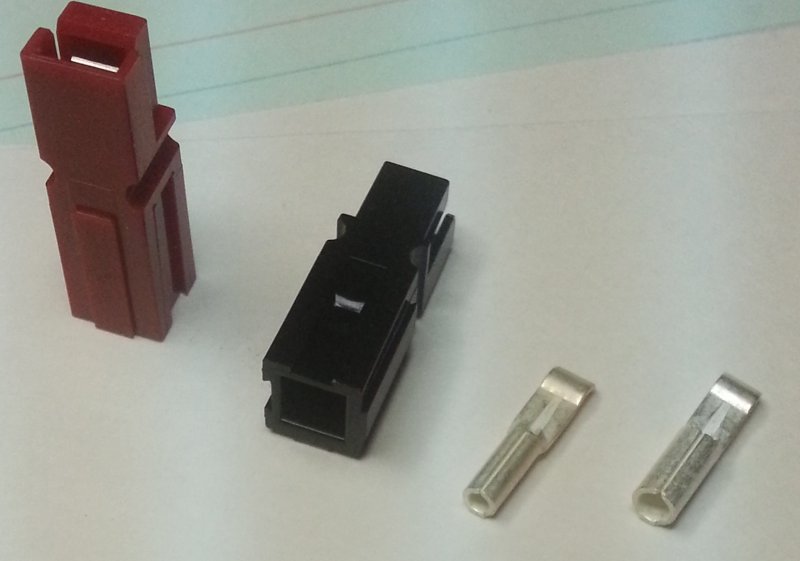
Powerpole connectors
I didn't really like the stupid SAE connector that you have to buy pre-made molded connector with whatever gauge wire they put on it. I got some Powerpole connectors to play with. They come with connectors (in different colors but I got BLACK and RED for negative and positive), then 15, 30, 45A contacts (that fit into the same connector) that I can mix and match to solder any size wire to it.
The 2 connectors can be separated or locked together in any configuration and they are keyed that the polarity is enforced.
19-SEP-2014
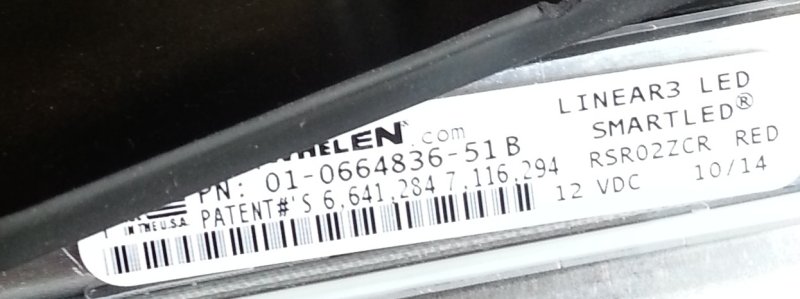
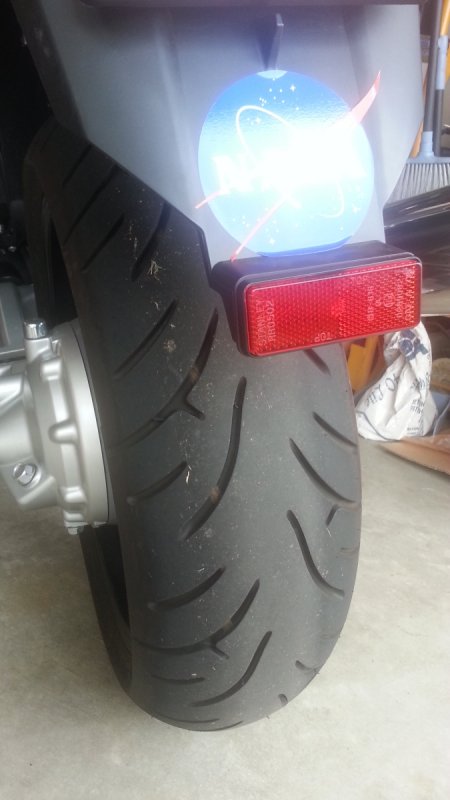
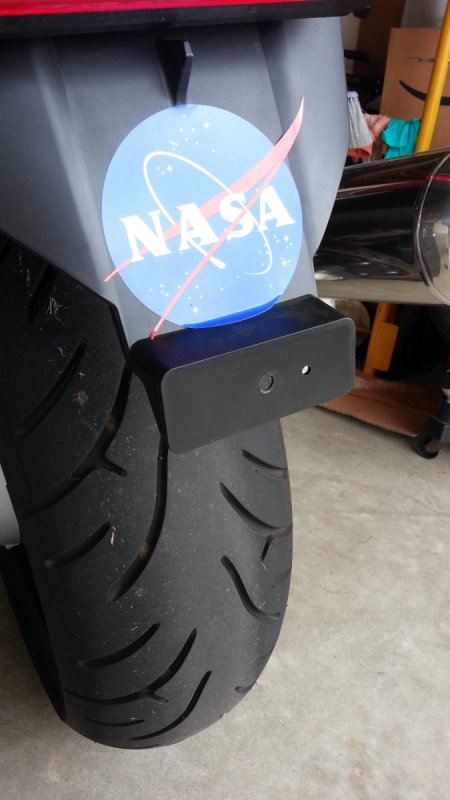
Whelen LIN3 LED light
Bought a Whelen LINEAR 3 LED light. These are the same ones that are used on police cars and ambulance. I got the RED color. It was made in USA and it's not cheap at $65 a piece. It has several continuous flashing modes but I set it to the steady mode as I have a Kisan Trailblazer that flashes it then makes it steady.
19-SEP-2014
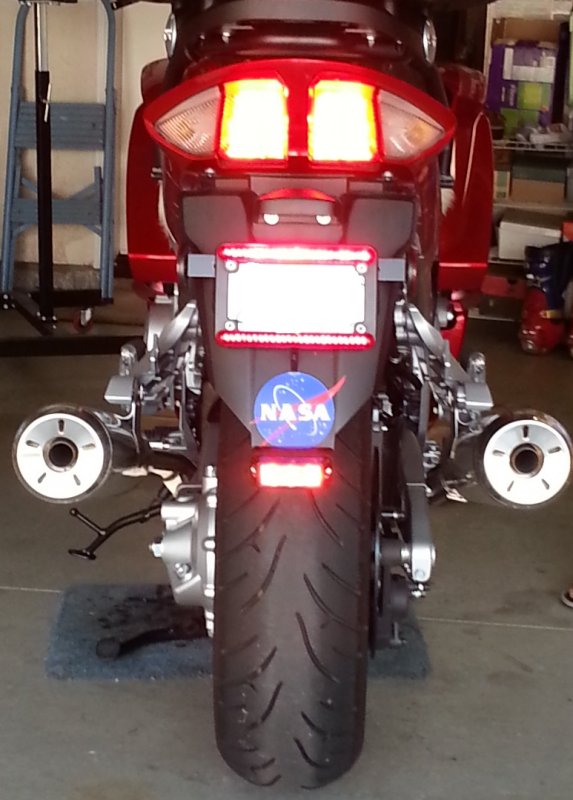
OEM reflector
After considering several mounting positions on the rear, I decided that the position of the OEM rear reflector is the most favorable position for an OEM look.
19-SEP-2014
OEM rear reflector removed
So I removed the OEM Red reflector...
19-SEP-2014
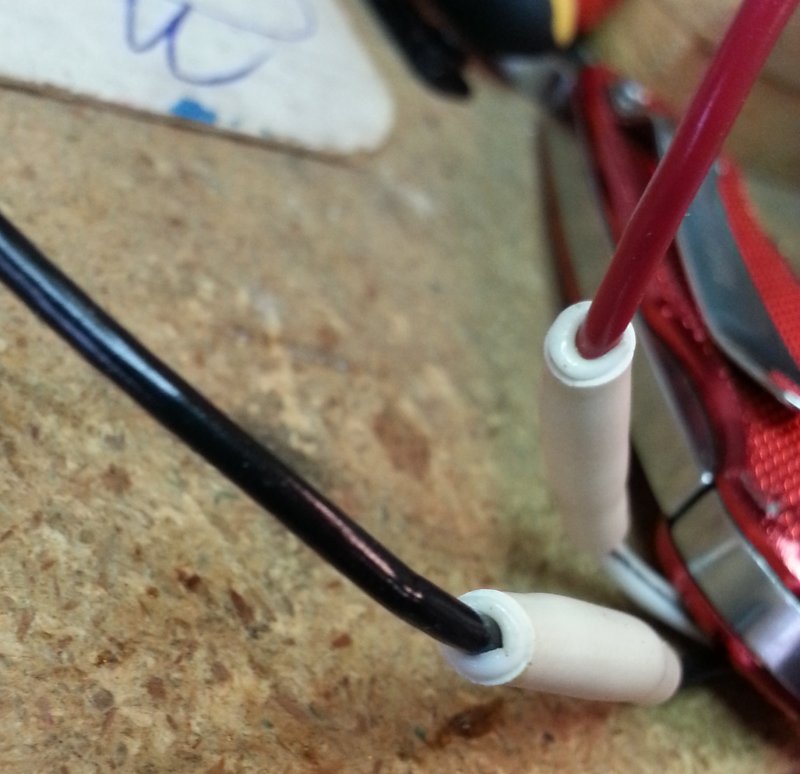
Soldered wires...
As the stock wires were only about 8" long, I soldered longer wires to the back of the Whelen LIN3. I used an adhesive lined heat shrink tubing to make it waterproof. The adhesive liner inside the heat shrink tubing melted and formed a complete watertight seal around the soldered joints. Yes, a job worth doing is worth doing right!
19-SEP-2014
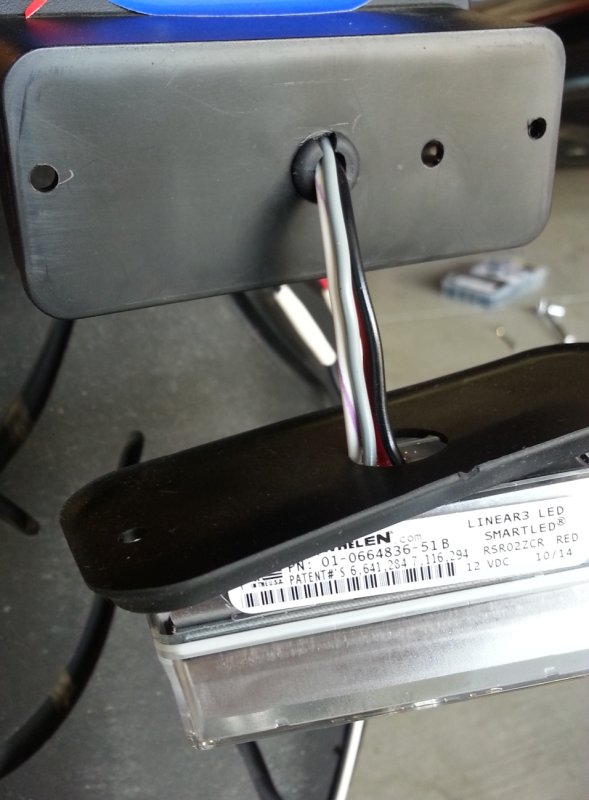
Putting it together...
I drilled out the center hole so it can fit all 4 wires through. I also drilled 2 additional holes on the left and right sides to mount the LIN3 LED light. It came with 2 stupid self tapping metal screws that I replaced with 2 stainless steel bolt with lock washers and nuts. I'm a perfectionist. Yes, a job worth doing is worth doing right!
Why 4 wires? 2 are +/-, 1 is SYNC (when connected more than 1 LIN3 together, like a police car or ambulance, they can use the SYNC wire to synchronize the flash with each other), 1 is MODE (touch it to 12V to switch different flashing mode like fast flash, slow flash, strobe etc...).
Keep in mind that as of today, the California vehicle codes require that a flashing brake light has to flash not more than 4 times for the first 4 second. Specifically, 25251.5c: "(c) Any stoplamp or supplemental stoplamp required or permitted by Section 24603 may be equipped so as to flash not more than four times within the first four seconds after actuation by application of the brakes."
I use the MODE wire to set the light to steady mode and then I disabled the SYNC and the MODE wires by sealing up the terminal. I didn't want to cut them off as I may use them again in the future.
19-SEP-2014
LIN3 mounted
The LIN3 was mounted and incredibly, it looked like the light was made to be a perfect fit in that location! Nice!
19-SEP-2014
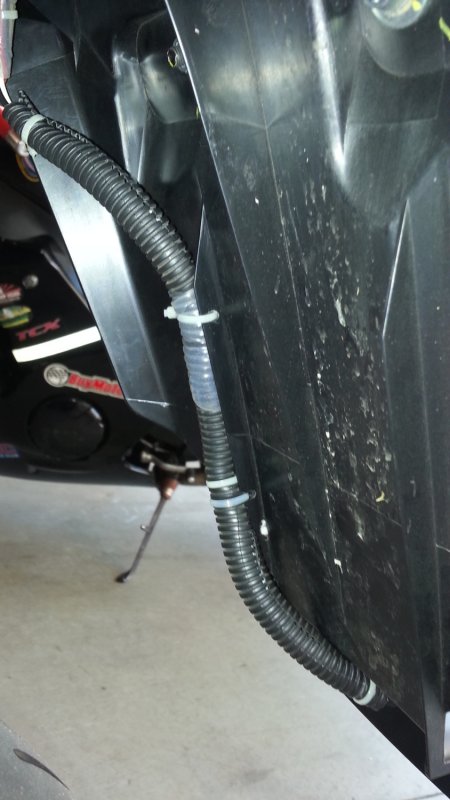
Wiring in the back
I tied the wires up in the back, ran them in a plastic tubing and zip tie it along its path. The wires went into a hole to the tail section where they are connected to the Kisan Trailblazer through the brake light and ground wire. The Trailblazer flashes anything that connects to the ground wire by interrupting the ground.
19-SEP-2014
Final
The picture was taken with a smartphone and it did not record the output of the new Whelen LIN3 LED correctly at all. In reality, the LIN3 LED light was so bright that it immediately draws attention! Yes, that was exactly the effect I want the cars behind me to see and take notice.
20-OCT-2014
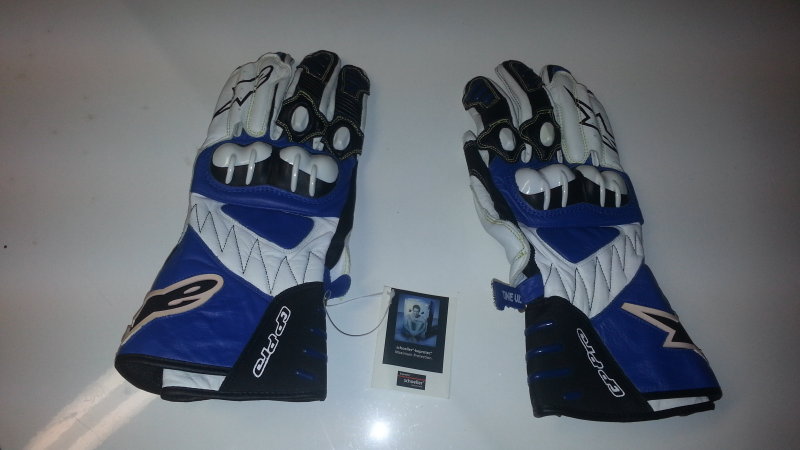
Alpinestars GP Pro racing gloves
I have to get the best. I need to protect my hands as I need them to work. These are 1 of the best gloves.
Again, cheap things are not good and good things are not cheap: they were US$240 out-the-door.
22-OCT-2014
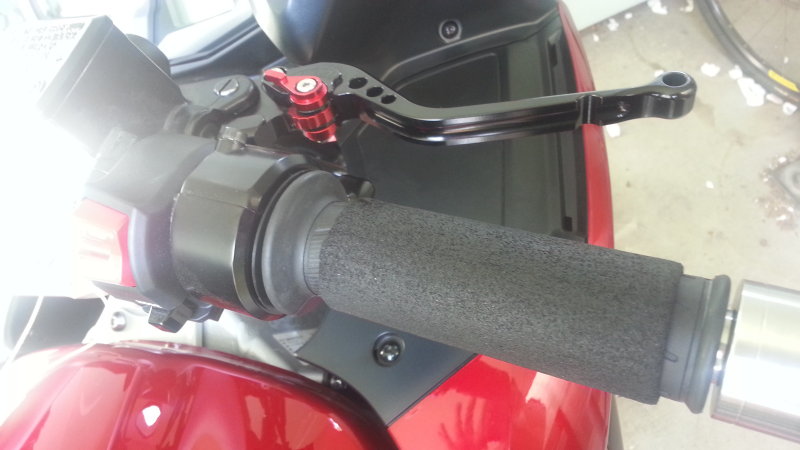
Barkbuster S7 handguards
I installed a set of Barkbuster S7 handguards as the weather is getting cooler. They are attached to the handlebar at the bar ends and shield the wind really well. It came with all mounting hardware and each side weights 14.5 oz. There is a 1/4" gap between the handguards and the dash at full lock.
24-NOV-2014
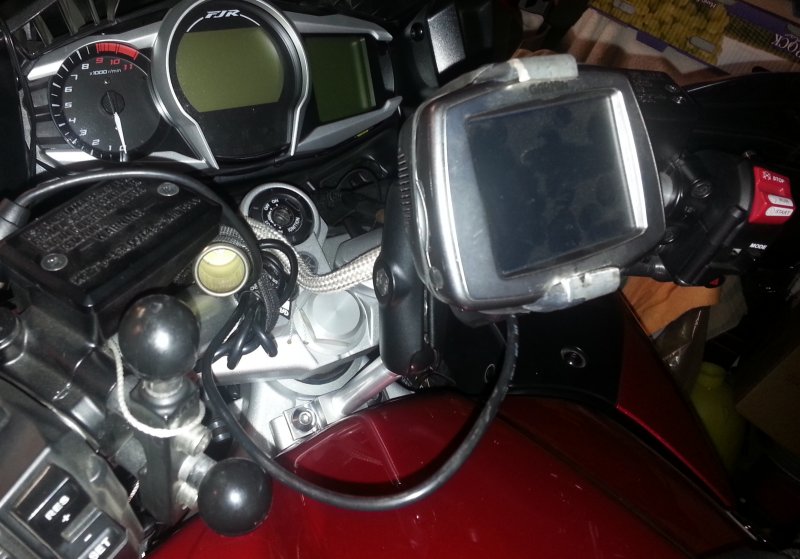
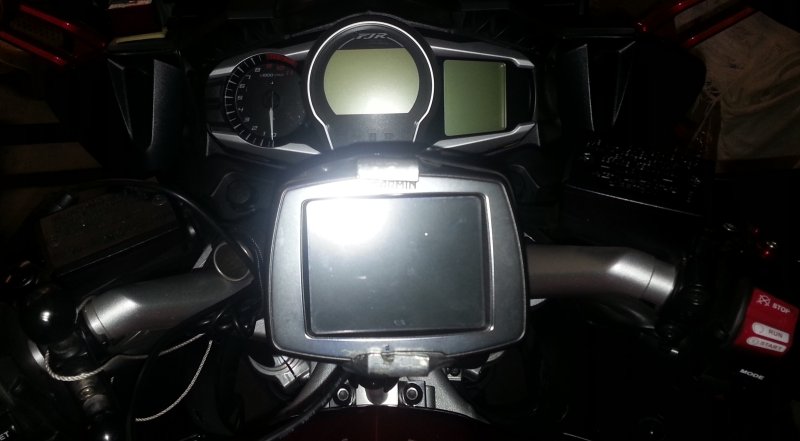
Nov 24, 2014 - Ram bar
Installed an aluminum bar with a ram ball on the same 2 bolts where the front of the fuel tank is mounted. I'm using this to install my GPS. Since the mount doesn't move with the handlebars, it's much better this way for GPS or my dash video camera. I like it.
13-MAR-2015
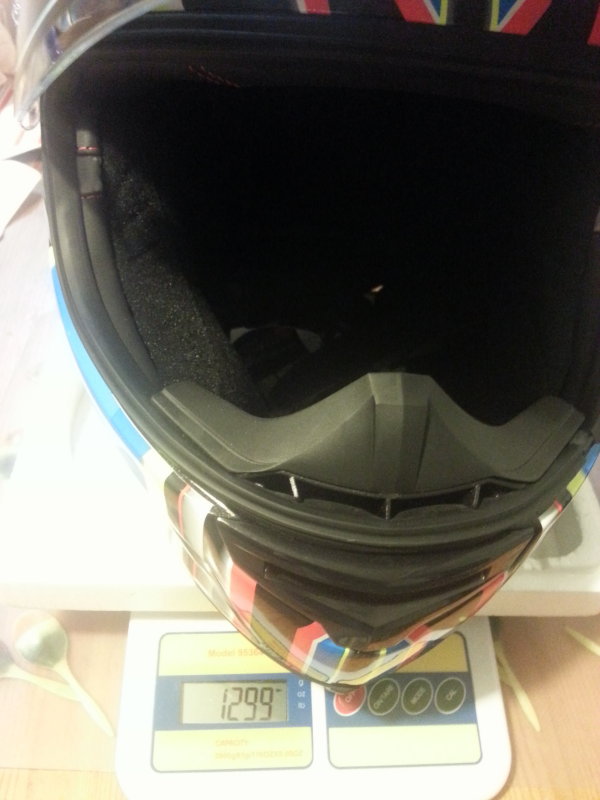
Nexx XR1R Helmet - A low quality helmet and the worst customer service
Recently I noticed that I always had sore neck after a ride so I did some homework on helmet weights. I found that my current Shoei RF-1100, HJC FS-16 weighted about 1675g (3.7 lbs)! I found a table of helmet weights reviewed by webbikeworld.com (
http://www.webbikeworld.com/motorcycle-helmets/motorcycle-helmet-weights.htm) and saw Nexx XR1R carbon is the lightest street helmet on the market. However, I couldn't find one so I ordered a Nexx XR1R Tri-Composite (carbon/kevlar/fiberglass) at #9 on the list (while my HJC is #128 on the list. The higher number the heavier the helmet.)
I weighted the size MEDIUM Nexx XR1R on my digital scale and it's 1299g (2.86 lbs)!!!!!
The light weight makes riding more comfortable and also it made head check much easier and I didn't have to rotate those extra weights!
Good things are not cheap: it was US$400 out-the-door and will need to be replaced every 5 years.
UPDATE:
I don't recommend this brand and helmet. After 3 months, 1 of the plastic latches that held the visor broke when I was riding and the visor flopped around in the wind. I had to pull over and remove the visor (so I wouldn't lose it) and rode about 150 miles home without a visor.
The plastic latches on both sides of the visor were flimsy. Since I bought the helmet brand new and it had a 1-year warranty, I called and emailed NEXX USA customer service to ask for a $10 replacement latch and I was told that they wouldn't honor it. They ask me to send them picture and since the broken latch was gone and disappeared on the road, I wasn't sure what they wanted to see. I sent them pictures of my helmet anyway to show that I'm the owner and a copy of the receipt.
Then they asked me to send in my helmet for them to take a look. What a joke! The visor and helmet were fine, it was the plastic latch that held the visor that broke. I wasn't going to pay US$30 shipping to ship my helmet to get a $10 replacement part, so I gave up and ordered a couple of replacement latches from a distributor, out of my pocket, so I can use my helmet.
I will never ever buy another NEXX helmet again.
11-APR-2015
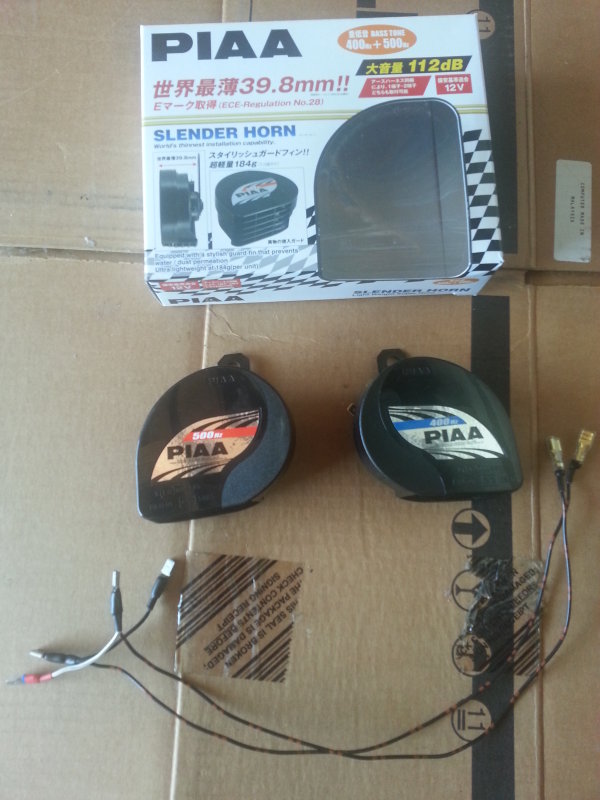
PIAA dual slim horns - Made in Japan
The stock single horn on the FJR was not adequate. It was a kind of 'beep beep' sound that car drivers did not even notice. I ordered and installed these horns and they are absolutely awesome. Now it sounds like a truck. I will get noticed.
I was pleased to see "Made In Japan" in the back of the box. I wouldn't even trust a horn to China.
11-APR-2015
The new dual horns
That's how they look like using the 2 existing bolts that hold the plastic radiator guard to hold the horns. I had to made a Y-cable so that the stock single POSITIVE and NEGATIVE wire now go to both horns.
11-APR-2015
Whistler CR90 Laser Radar Detector with GPS
I think I need a radar detector to keep me honest so I bought a Whistler CR90 Laser Radar detector. It has a built-in internal GPS and updatable red light camera database. It will warn of all red light/speed camera in all USA and also detects laser and radar.
03-APR-2015
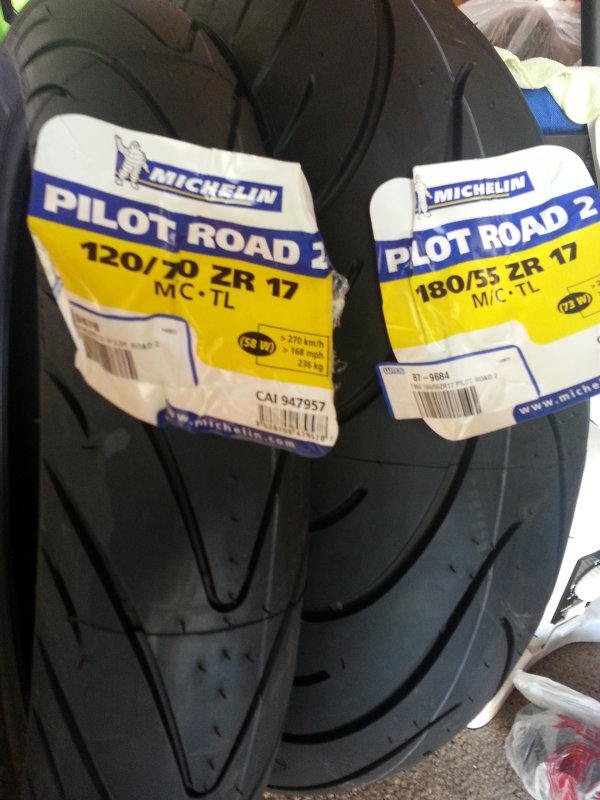
Michelin Pilot Road 2 motorcycle tires
I always like Michelin Pilot Road tires since they first came out. From the original Pilot Road, it evolved into Pilot Road 2, Pilot Road 3 and now Pilot Road 4 (as of April 2015.) While I haven't tried PR3 and PR4 myself, but reviews did not find them exceptional so I stay with PR2 that I'm familiar with. Michelin is still making PR2 so I ordered a set from
http://rockymountainatvmc.com. The service and prices are the best and I received them in 3 days with free shipping!
My FJR has now 6200 miles so I will put them on in a few months.
01-MAY-2015
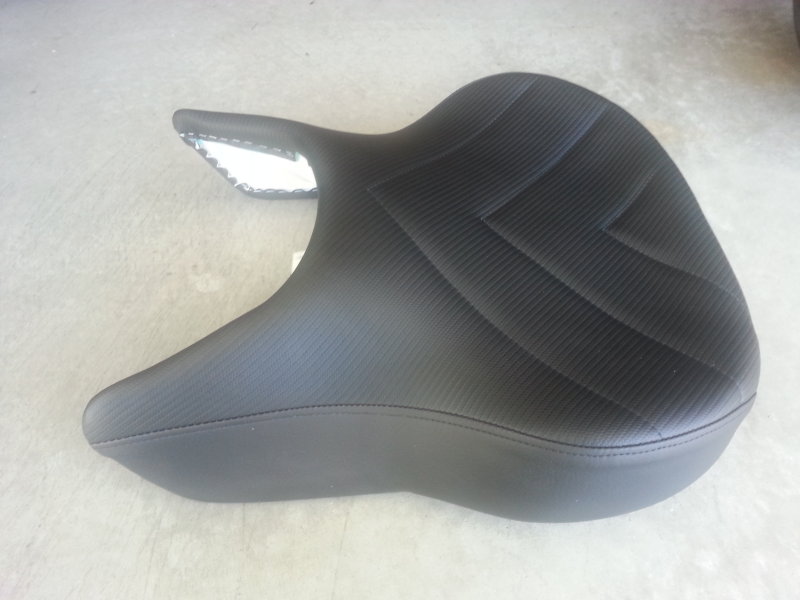
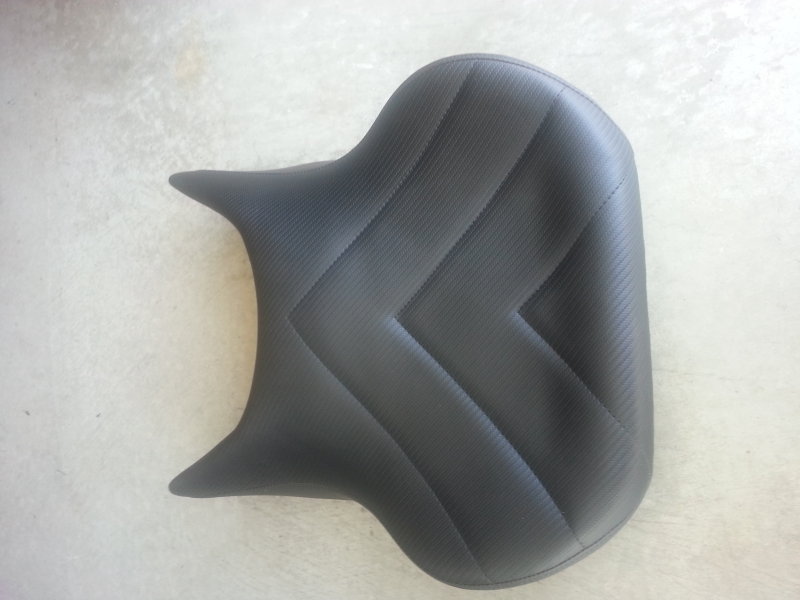
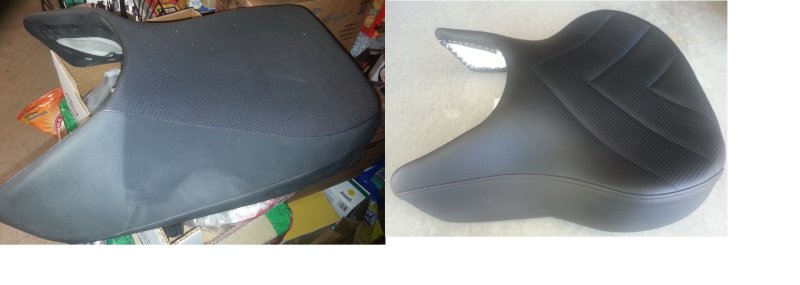
Custom LAAM seat!
The stock OEM seat was only good for about 1 hour then my butt went numb. So I sent my seat to Laam (laamseats.com) to have it custom made. Seth is the builder and he built the seat according to my weight/height and preferences (how low/tall I want it). The custom seat has much more and better support!
01-MAY-2015
LAAM seat - top view
The wings are the additional support for comfort!
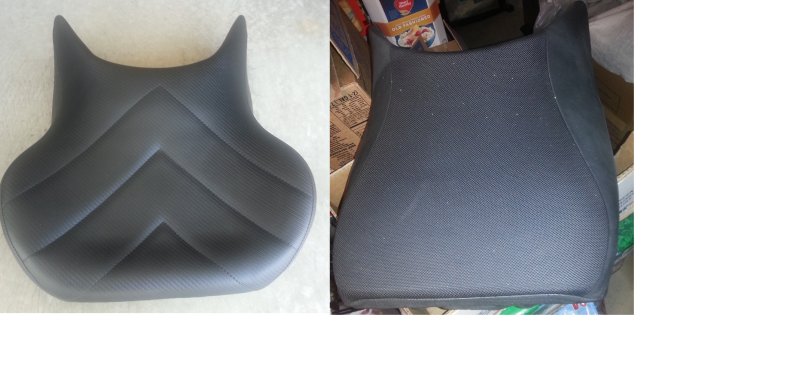
Stock OEM seat vs Laam custom seat
I put this together so the difference between the 2 is clear!
FJR OEM stock seat vs Laam custom seat
27-FEB-2016
BlackPath 1" riser blocks
These 1" riser blocks raised the handlebars by 1". It makes the riding position more comfortable and it also makes the steering lighter as the handlebars are now more inline with my arms. It makes turning effortless. These blocks came with high quality grade 8.8 hardware and Nylok nuts. The stock OEM bolts and brackets need to be cut and removed.
30-JUN-2017
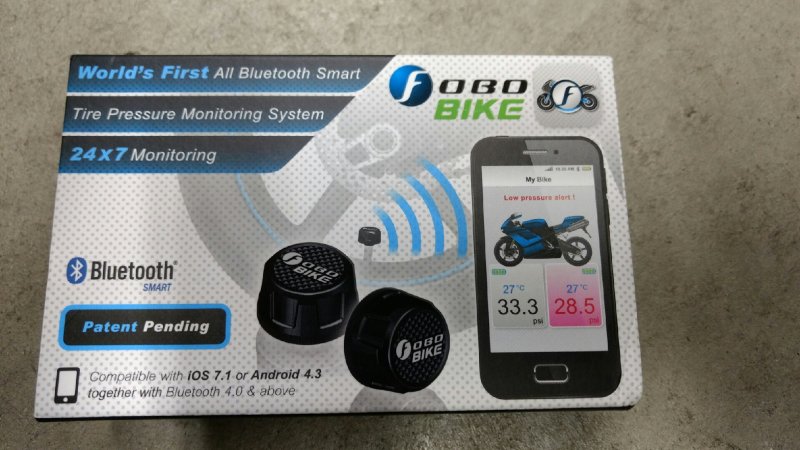
Fobobike Tire Pressure Monitoring System (TPMS)
I ordered a set of 2 TPMS from Fobo. They worked absolutely great. The sensors send tire pressure data to the smartphone Fobo app 24/7 using low power Bluetooth. I like that the motorcycle doesn't need to be move for the app to display pressure. Now checking tire pressure before every ride is trivial.
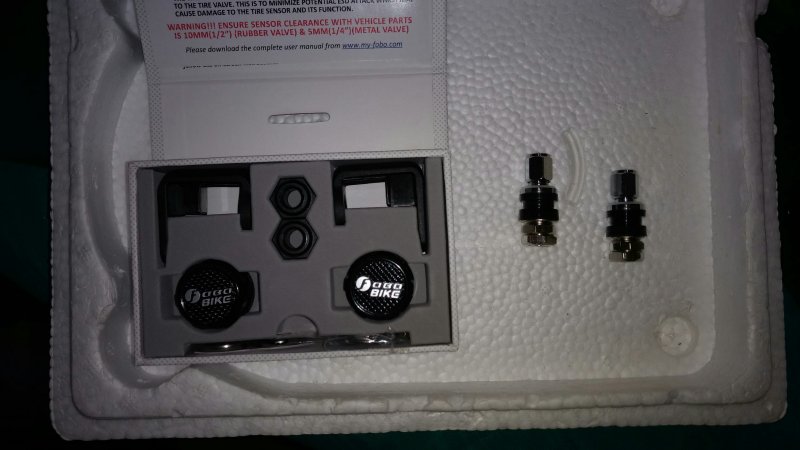
30-JUN-2017
Fobobike content
The design of the packaging box is absolutely top notch, with cut-out for every components and even with a magnetic closure on the cover. Everybody should learn from Fobo how to design a packaging box.
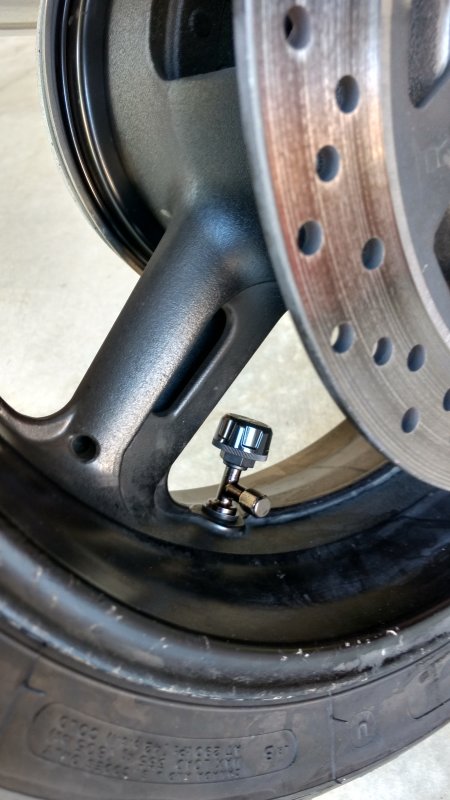
05-JUL-2017
Fobobike installed with T-valve
I ordered the T-valve from Fobo so that I can fill air without removing the sensor.
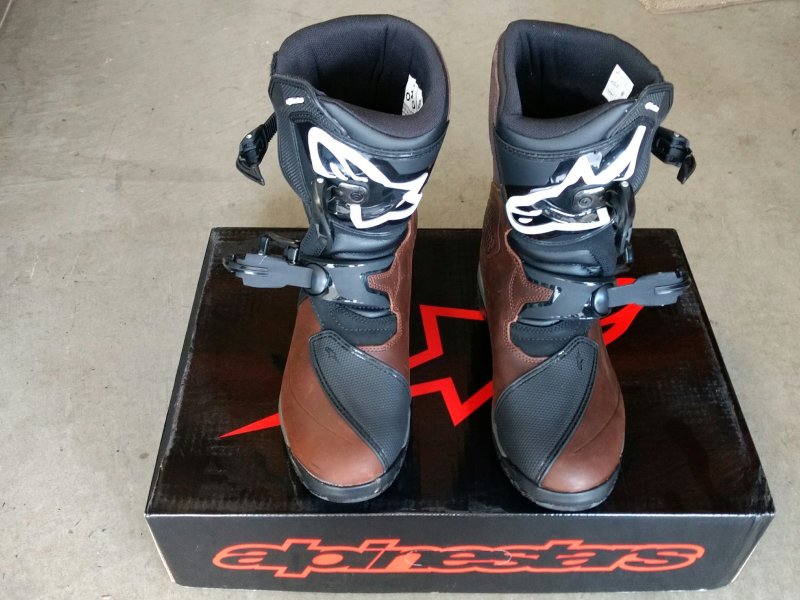
10-DEC-2016
Alpinestars Belize motorcycle boots
My TCS boots' sole were worn, even though the boots were still fine, so I ordered a new pair of Alpinestars Belize boots.
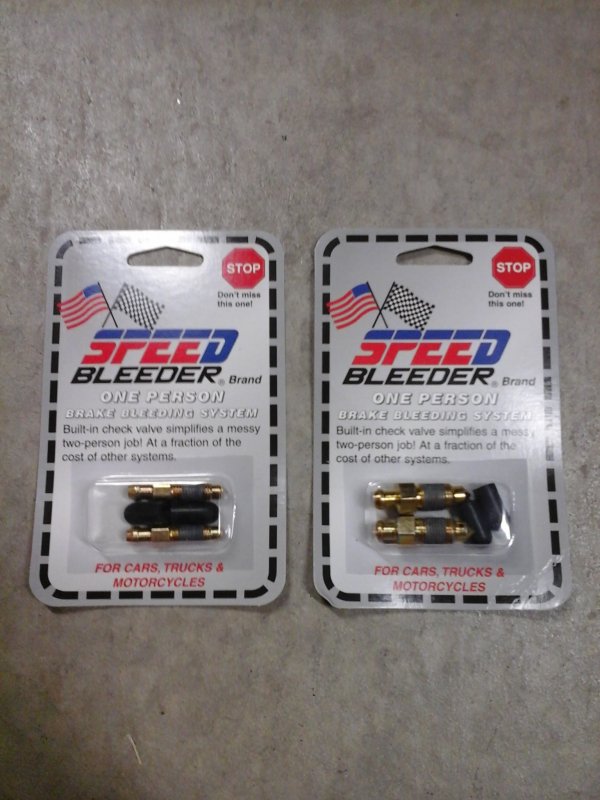
12-NOV-2016
Speedbleeder
It was time to flush the brake and clutch fluid. I replaced all brake and clutch nipples with Speedbleeder to make the job easier.
05-NOV-2017
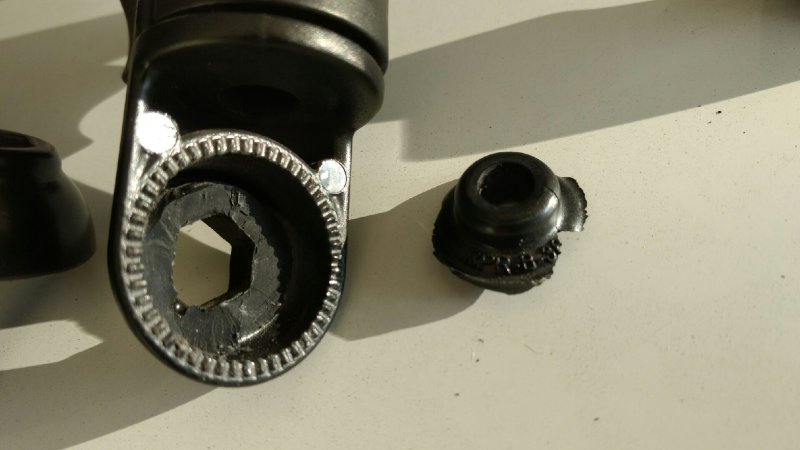
Ram Mount customer service
I have been using all Ram Mount in my cars and motorcycles. The joint of 1 of the arms broke after 10+ years. Since all Ram Mount products carry a lifetime warranty and I have never used their warranty before, time to see how they do.
I went to Ram Mount web site and found a link for warranty service. They have an excellent system in place that I have never seen:
I just needed to fill in my name and address, no receipt needed. Then attached a picture of the broken part (as showed here). I then received an automated email with a confirmation number asking me to call a Ram Mount toll free number to pay the flat rate shipping of US$2.75. I called and gave my visa over the phone and that was it. I received the new replacement part in a few days.
This is 1 of the most streamlined warranty service that I have ever seen. Amazing.
Comparing to NEXX' non-existent and rude customer service (see my story of my NEXX helmet here), Ram Mount is truly an example that everyone else should learn.
I'm just a satisfied customer.