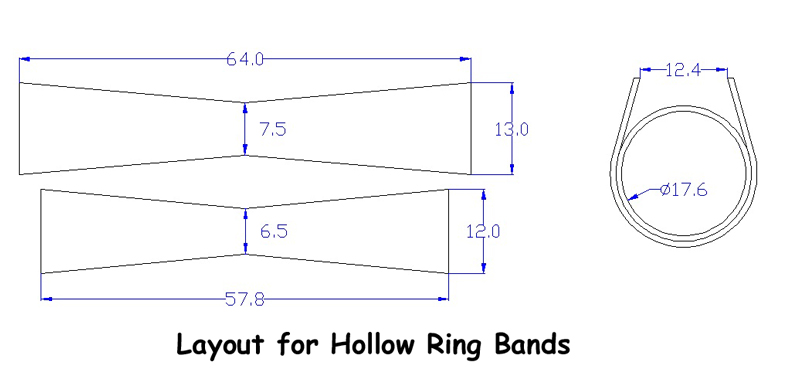
Layout For Band Bowties
All dimensions are in mm.
The inner band is sized to make a size 7 1/2 ring band. The outer band is slightly larger than the inner band so that after the 2 bands are joined it can be trimmed to make a flat surface for soldering the flat outer sheets. After trimming you want the width of the ends of the outer band to be 12.4 mm and the gap to also be 12.4 mm. Since 20 gauge sheet is .8 mm thick this will give you a 14 mm square at the top of your ring.
If you wish to adjust the size of the finished ring change the length of the inner band accordingly and adjust the length of the outer band up or down by the same amount.
Credit where credit is due, these proportions were taken from the box ring lesson in Revere's Book "Professional Goldsmithing".
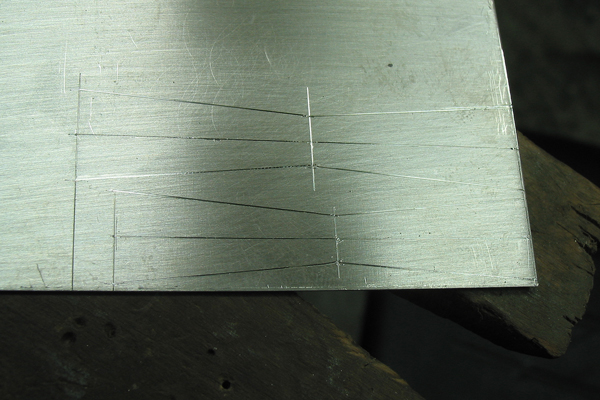
The Initial Layout
The layout of the inner and outer bow-tie shaped bands on 20 gauge sterling sheet. The surface of the sheet has been scuffed with plastic wool prior to layout to make the lines easier to see.
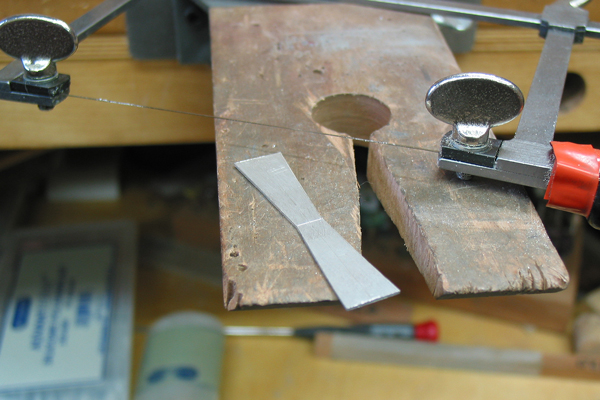
Cutting Out The Blanks
Using an 3/0 blade in my jeweler's saw I cut both bow-tie shaped pieces out. While I could have used shears I don't care for the distortion I get when using them for pieces like this. I feel the time extra time required to saw them out is more than made up for working with distortion free pieces.
The next step is to square up the ends of the smaller inner band blank in preparation for soldering. They must meet squarely with no gaps. The sides just need to be close at this point. They will be cleaned up in a later step.
The band is then bent into a rough circle with the ends meeting square and tight. Solder with hard solder.
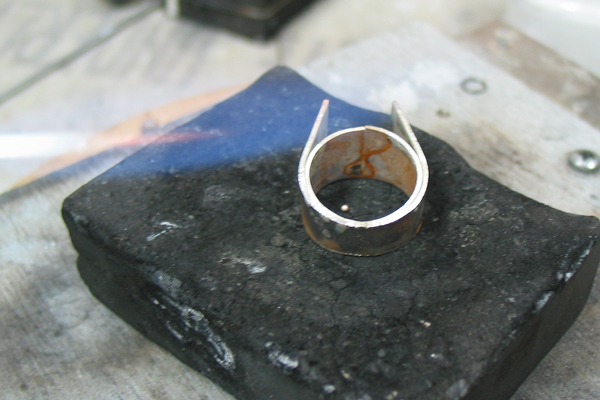
The Soldered Inner Band
After soldering the band is rounded up using my stepped ring mandrel. If you use a tapered mandrel care should be taken not to flare and distort the band.
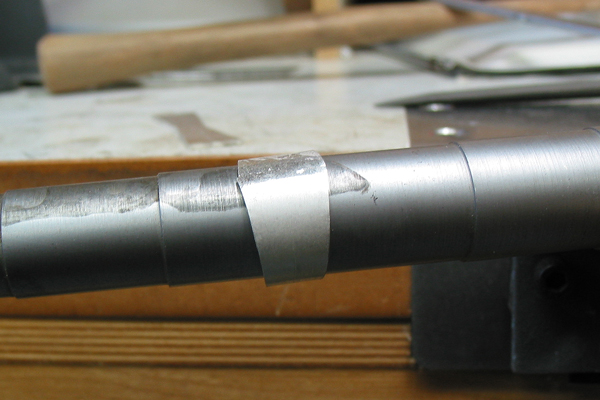
Again using the step mandrel I bent the outer blank around a step 2 sizes smaller then the OD of the inner band. I found that using the smaller size compensated for the spring back and made for a good fit around the inner band. The outer band should be a snug fit at least half way around the inner band.
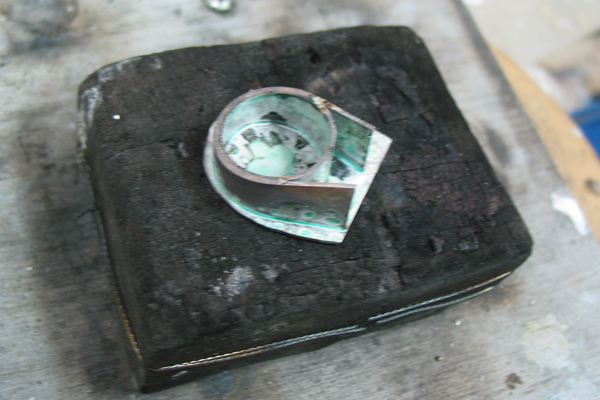
Soldered Inner and Outer Bands
I used binding wire to assure the fit between the two bands and soldered them in place using hard solder. You don't need a 100% solder joint for this step. A good tack will suffice. The next step will assure a good bond between the two pieces.
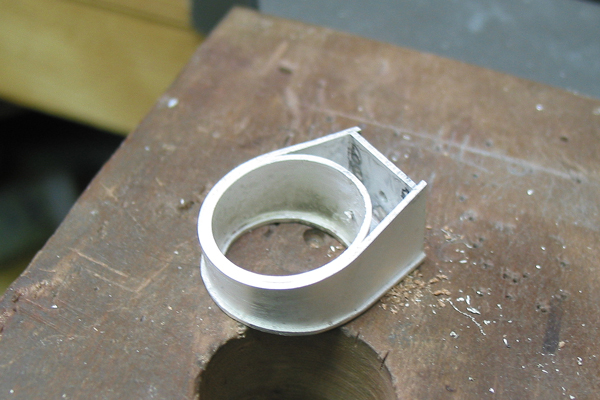
Solder The First Side in place
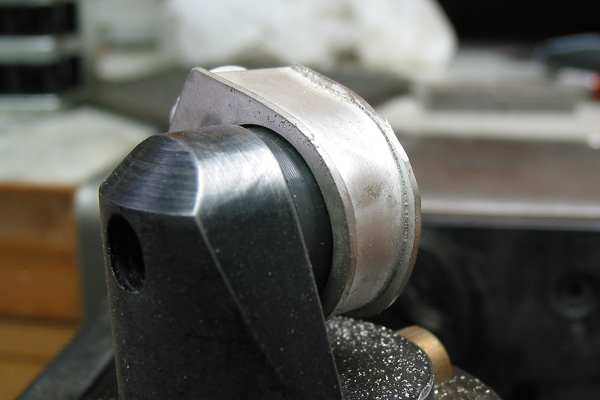
File, sand and otherwise flatten one side of the two bands. The two bands should absolutely flat and both on the same plane so the are no gaps when they are place on a flat piece of 20 gauge SS sheet.
To flatten pieces like this I use a woodworking sand paper mounted on a hard flat surface. I use 180 grit PSA (Pressure Sensitive Adhesive) coated paper on a hard maple block that fits in my bench pin slot.
I placed all the hard solder paillions on the surface of the sheet inside the form. With the charcoal block on a turntable the out side of the piece was heated while being rotated. The result was to draw the solder from the inside to the outside assuring a good joint. Watching for the flash of solder around the outside of the part tells you when the job is done.
BTW the parts are coated with a boric acid and borax in alcohol solution prior to each soldering step to help guard against fire scale.
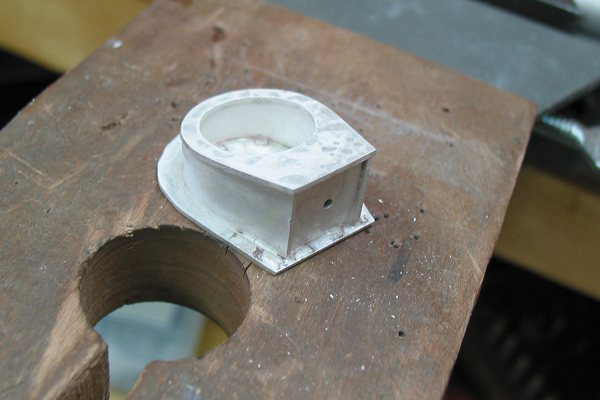
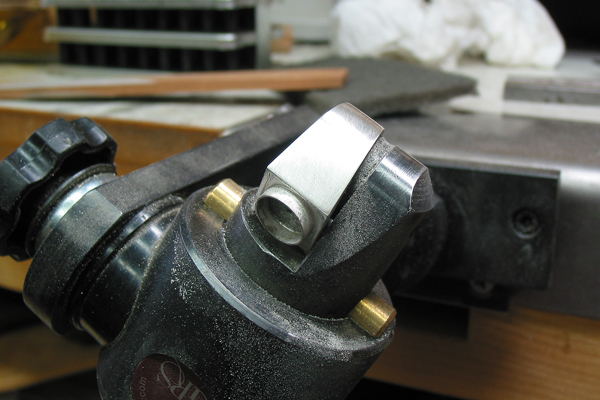
Trimming The Excess Sheet
Using the 3/0 blade in a jeweler's saw all of the excess sheet goods is trimmed away. I left about 1mm of material all around the part. If you would trim it flush the solder joint will shrink away during subsequent soldering operations making the joint apparent.
Next the floor for the bezel was added. It is a bit of a fussy job since three different tapers are involved in getting a good fit. After soldering the floor in place again with hard solder the open side was flatten as described in a previous step.
Solder The Second Side.
Again placing the paillions of solder on the inside of the sheet was soldered as described for the fist side. Please note the hole in the middle of the bezel plate to relieve the internal pressure during the soldering operation.
After trimming away the excess sheet the bezel was soldered in place using easy solder. Easy solder was was used because of concerned that bezel plate might come loose and drop down if too much heat was applied during the soldering operation.
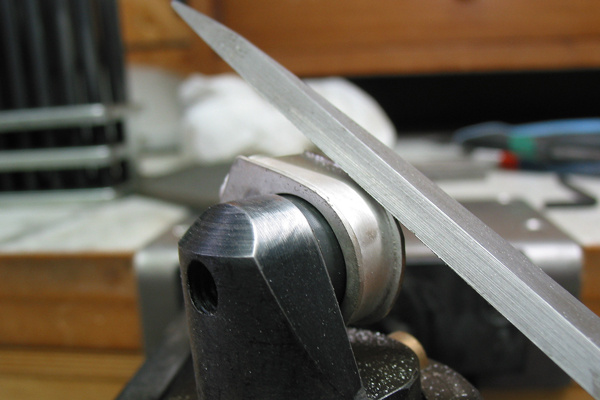
Cleaning Up The Completed form
After all soldering steps were complete the 1mm seam allowance is removed.
Carefully
Care should be exercised while cleaning up the piece. A stray file mark can cause a lot of work. Don't ask me how I know. LOL
I got things close with a file and then used sanding sticks and coarse silicone polishing cylinders in a flex shaft.
Final Finishing
Using progressively finer sand papers through 1200 girt the piece was ready for final polish.
I tried the tumbler sans stone but I wasn't happy with the finish on the broad silver surfaces. Sooooo... It was time to break out the polishing buffs, Tripoli and black rouge. A PIA but the final results made it worth while.
Cutting The Stone
I cut a black opal I had been hording to fit the bezel.