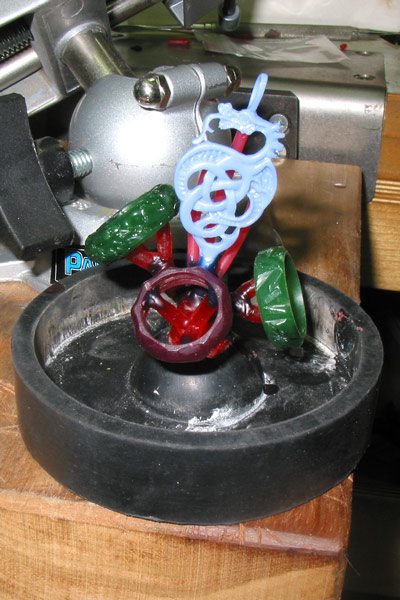
Casting Tree
Here the patterns are mounted on the casting tree and ready for investing. Note the runners on the rings are attached to the inside diameter. This was to prevent loss of my pattern and texture on the OD when removing the runners.
The small pieces of red wax you are able to see behind the dragon are secondary runners designed to get the molten Silver to the thin section at the head and bail before the metal froze off.
The black rubber base is designed to fit tightly to the OD of the casting flask to prevent leakage of the wet investment. The bulbous area you see under the patterns forms the sprue in the casting. The spur is required to hold the extra silver after the mold is full. You always want extra silver available.
To calculate how much silver will be required to fill the mold you weight the wax tree and multiple that weight by 10.5. The wax has a specific gravity of 1 and silver has a specific gravity of 10.5.
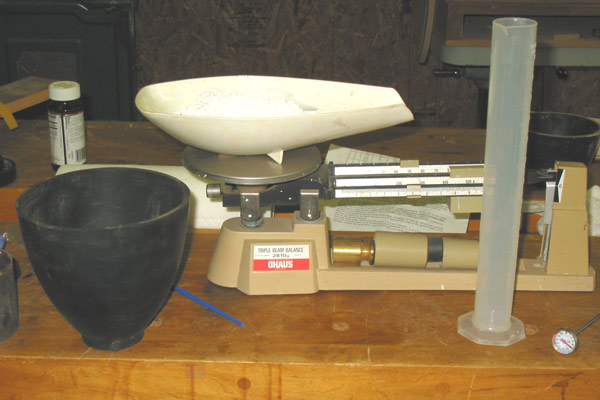
Mixing The Investment
For the investment to have the proper consistence it must be mixed precisely. Here I am weighing the investment powder and measuring the vol. of 100 degree F water. From the time you add the investment to the water you have 9 minutes to get the investment into the flask. I use a count down timer and divide the time as follows.
3 minutes mixing
3 minutes in the vacuum chamber to draw all the air out of the mixed investment
1 minute using a soft artist brush paint the patterns with investment to assure it covers all the nooks and crannies then gently pour the flask full.
2 minutes vacuum the filled flask again to assure all the air is out of the investment.
You want to avoid air bubbles clinging to the wax patterns at all cost. They will destroy your pattern.
I use a flexible rubber bowl to mix the investment in, I just let any excess dry and it falls out when you flex the bowl. Washing wet investment down your drain is a no no. It will collect in your trap and cure. That�s a drain stoppage Drain-O won�t touch. LOL
BTW yes the investment looks just like Plaster of Paris, it has just been formulated to survive the burn-out temperatures.
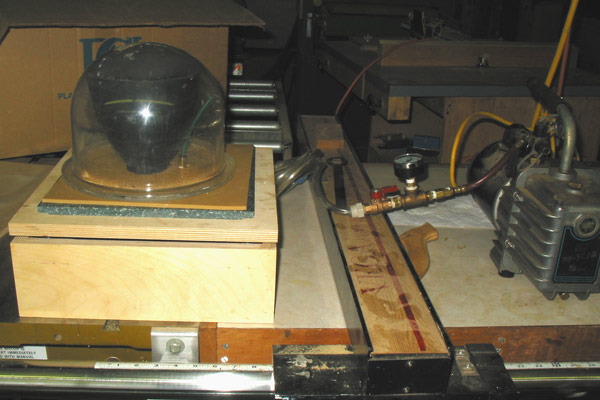
Vacuum Pump & Table
A poor shot of the rubber mixing bowl under the vacuum bell jar to remove the air from the investment. Because of time constraints I really didn�t have any time to play with this shot
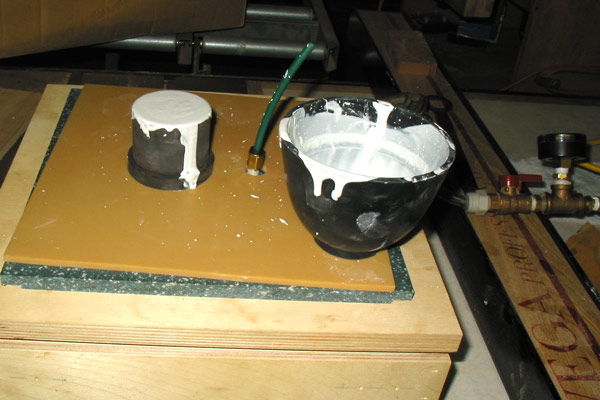
Filled Flask on The Vacuum Table
The full casting flask after the final vacuum cycle. The flask is left undisturbed for 2 hours to allow the investment time to set up.
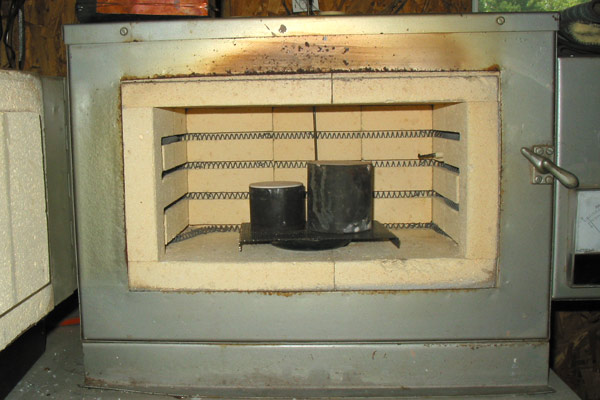
Burnout Oven
After the 2 hours setup time the flask is placed in a kiln sprue side down for a 6 hours burnout cycle. The initial 2 hours is spent slowly taking it up to 300 degrees F. This dries out the investment and eliminates all water that could turn to steam.
The next step is 1 hour at 700 degrees F. At this temperature most of the wax has melted and run out of the mold leaving a void in the investment where the wax patterns were.
The next 2 hours are spent at 1350 degree F. At this temperature any residual wax is vaporized leaving a clean cavity for the casting.
Finally the temperature is brought down to 1150 degrees F and held there until time for casting. I can start a burnout cycle before going to bed and my programmable kiln has the flask waiting for me at casting temperature the next morning.
Some ppl use a much shorter burn-out cycle successfully. It is a personal thing and I am generally in no hurry. Larger production flasks require longer cycle
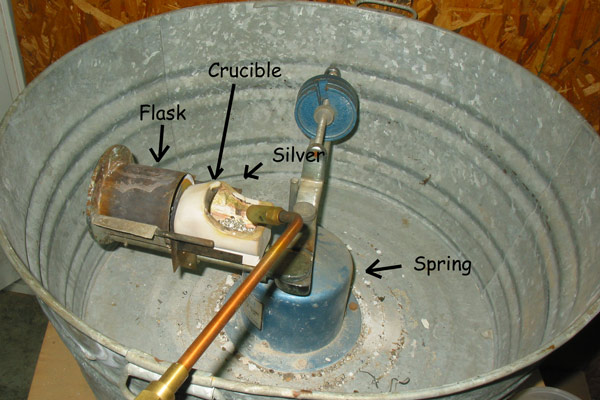
The Centrifugal Casting Machine
This is call a broken arm centrifugal casting machine. I often though the name came from the fact that if you didn�t get your arm out of the way it certainly would be broken. LOL The name actually comes from the fact the section of the arm that hold the crucible and flask pivots 90 degrees from the plane of rotation. This increases the acceleration of the flask when the arm is released for a casting putting more centrifugal force on the molten metal being cast.
The base has a large internal spring, you wind the arm up against the spring tension and then hold it in place with a pin while you prepare to cast. The flask is placed on a cradle and the crucible, which has a hole in the end is push up against the flask. The pre-measured metal shot is put in the crucible where it is melted with a torch. Here you can see I use a rose bud tip on a full sized O2/acytlene torch.
Once the metal is melted I add a small amount of borax to gather up any oxides and the arm is released. The spinning of the arm creates centrifugal force on the molten metal and forces it into the voids where the patterns were prior to burn-out.
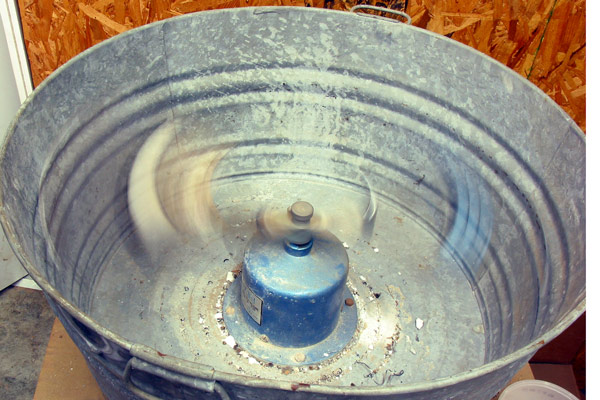
Casting
The spinning cast machining. It will spin for several minutes. After the machine comes to a stop you can plunge the still very hot flask in cold water. The investment plaster blows apart from shock
As Cast
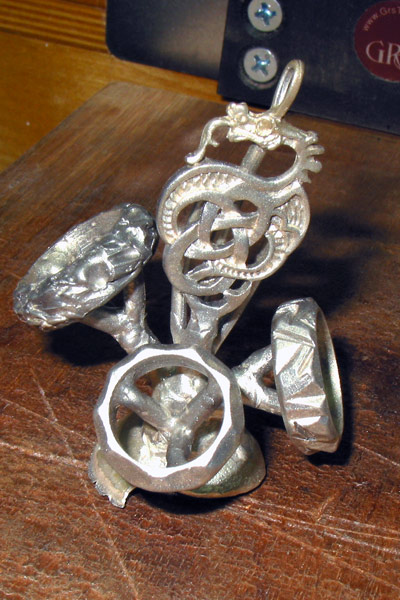
Using a combination of ultrasonic cleaning and glass bead blasting this is the cleaned up casting ready for finishing.
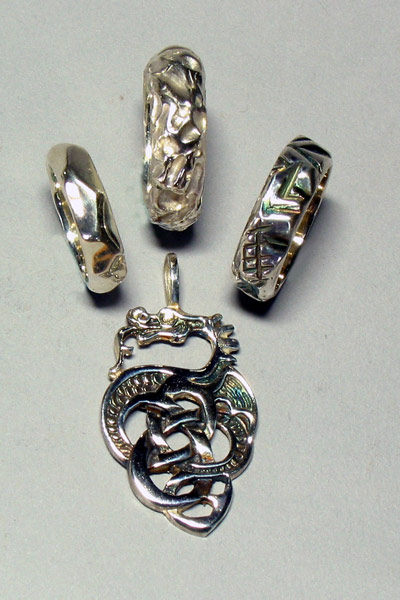
Lost Wax Cast SS
A few investment cast pieces.