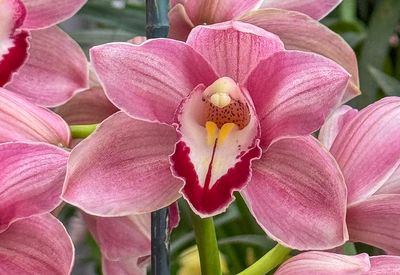
photo sharing and upload picture albums photo forums search pictures popular photos photography help login
Mike Alexander | profile | all galleries >> How To >> Flash tree view | thumbnails | slideshow

Flash

August 2005

Introduction

I'm hardly an expert on flash photography, but have recently taken a Small Flash Photography Workshop at Algonquin College. This is an attempt to get my learnings down somewhere, as well as to provide a source of information for others. I'm not good at taking notes during workshops, so this is all out of my head, with a few referals back to my flash. If you see any glaring errors, or something that isn't clear, please let me know, and I will adjust the text.

Flash can be used for many different reasons, from being the main source of light, to just adding a bit of a catch light in your subject's eye. I will attempt to explain each of these uses, but first we need to better understand the operation of your flash.

Throughout this tutorial, it is important to note that the shutter speed has no affect on the flash exposure, provided you are using a shutter speed no faster than your camera's flash sync speed. It will, however, affect the exposure of your background.

Flash Guide Number

The flash guide number is the specification of how powerful a flash is. The GN is expressed as the distance, in either feet or meters, that the flash will illuminate a subject at a given ISO level, focal length, and aperture. In order to compare flashes, you should always compare guide numbers at ISO 100, 50mm, f/1.

In the case of my Canon Speedlight 550EX, the stated GN is 138' or 42m, however, it is common for manufacturers to overstate this value.

Normally, after you buy your flash, you don't really need to know your GN, although it is good to keep in mind so that you know what to expect out of your flash. We will also see it again in the Manual Flash Mode section.

Flash Synchronization Speed

Every camera has a maximum flash synchronization speed, which is the fastest speed at which you will get a proper exposure with your flash. If you attempt to use a shutter speed faster than your camera's flash sync speed, than you will get a photo which is only partially exposed properly (see the photo below for an example). The reason this happens is that, when the shutter speed is faster than the sync speed, the 2nd curtain starts to close the frame before the first curtain has completely travelled across the frame, so at no point is the frame completely exposed.


1/500s @ f/5.6 ISO 100: note that bottom of photo is not properly exposed, since the shutter speed was set faster than the flash sync speed. This normally can't be done with a modern Canon SLR and E-TTL flash, but I used a small manual flash with a PC cord.

On older cameras, the flash sync speed may be as slow as 1/60 of a second. New cameras can be as fast as 1/500 of a second. The Canon D-Rebel, and 10D are 1/200s. The 20D is 1/250s. The Nikon D70 is 1/500s.

Many flashes have a high-speed sync, which allows them to be used with shutter speeds faster than your camera's flash sync speed. This is accomplished by firing the flash several times in order to cover the full frame. The multiple flashes occur so fast, that they will still appear to be a single flash to your eyes. The downside is that the flash has to lower the brightness of each burst, to ensure that it has enough power for all of them, reducing the range of your flash.

Flash Modes

Manual Flash

All high quality speedlights will support a manual flash mode. This is the simplest form of flash, where the only setting is how much power the flash should put out. This is expressed as full power, half power, 1/4 power, etc. To control the effect of the flash, you must calculate the appropriate aperture to use for your flash, ISO, and distance to subject. The aperture is calculated as:

f-stop = GN / distance to subject

This formula assumes ISO 100, so you will have to adjust the result if you are using a different ISO.

For example, if you have a flash with a GN of 138', and you are photographing a subject that is 10' away, you would calculate the f-stop as:

f-stop = 138/10 = 13.8

so you would set your camera to the nearest f-stop, which is f/16 for a proper exposure. If your camera supports half or third f-stops (most modern cameras do), then you can get even closer to the appropriate value.

If you know the GN of your flash, it is possible to construct a chart of aperture values to use based on the distance to your subject.

Manual Flash Table for GN = 138
ISO/Distance 4' 6' 9' 13' 17' 25' 35' 49'
  100    f/32    f/22    f/16    f/11    f/8    f/5.6    f/4    f/2.8 
  200    f/45    f/32    f/22    f/16    f/11    f/8    f/5.6    f/4 
  400    f/64    f/45    f/32    f/22    f/16    f/11    f/8    f/5.6 

Once you have calculated the appropriate aperture value to have the flash properly expose your subject, you set the appropriate shutter speed to properly expose your background at your calculated aperture. If the correct shutter speed is faster than your camera's sync speed, than you must compensate by lowering your ISO value (score on e for the digital folks =:-) )

To put this all together in a single example, suppose you have a flash with a GN of 110, your camera's flash sync speed is 1/250s, your main subject is 10' away, and you meter your chosen background at 1/500s @ f/4. You start by calculating the correct aperture value to give a proper exposure of your subject with your flash:

f/stop = GN / distance = 110 / 10 = f/11

Next, calculate the shutter speed required to give you a proper exposure of your background at this aperature:

1/500s @ f/4 = 1/250 @ f/5.6 = 1/125 @ f/8 = 1/60 @ f/11

So, to properly expose this shot with your flash in manual mode, you would set your camera to 1/60s @ f/11.

With today's modern flashes, you don't normally use the manual mode of your flash, unless you are using the flash off camera (which will hopefully be covered in intermediate or advanced flash operation topics someday).

Auto Flash

In auto mode, the flash uses a sensor to determine when it has put out enough light to illuminate the subject. The amount of light is determined by the aperture value, which must be set on both the flash and the camera. For a normal exposure, you set the aperture to the same value on both the camera and the flash, but there are circumstances where you may want to use different values (see fill flash below).

As in manual mode, the flash exposure is determined by the aperture, and the background exposure is determined by the shutterspeed. The smaller the aperture setting on the flash, the more light the flash will need to put out in order to expose your subject.

Unlike manual mode, you set the background exposure first, and then set the aperture on the flash to match the value you selected on the camera. It is important once again, to choose a shutter value that is no faster than the flash sync speed of your camera.

Let's do the same example as the manual mode, but this time for auto mode (GN = 110, flash sync speed = 1/250, subject = 10', background = 1/500 @ f/4). The first step in auto mode, is to set the camera to properly expose the background (1/500 @ f/4). Problem, the shutter speed is faster than the camera's flash sync speed, so the exposure must be adjusted

1/500 @ f/4 = 1/250 @ f/5.6

So, set the camera to 1/250 @ f/5.6 to properly expose the background, and stay within the camera's flash sync speed.

Next, set the f-stop on the flash to f/5.6 to match the aperture on the camera. You are now set to take a properly exposed shot.

As you can see, auto mode is much simpler to use than manual mode, however not all flashes have an auto mode.

Through The Lens (TTL or ETTL)

This is the simplest mode to use, and is supported on most modern flashes. You camera must also support TTL in order to use this mode on your flash.

In TTL mode, the camera communicates all settings to the flash, and the flash will set itself accordingly. There's not much for the photographer to do.

To get a proper exposure in TTL mode, all that is necessary is to set your camera to take a proper exposure of the background. The camera will communicate the exposure settings to the flash, which will then set itself to match. During the exposure, the camera will measure the output of the flash through the camera lens, and shutoff the flash once enough light has been put onto your subject.

Going back to our above example one more time (GN = 110, flash sync speed = 1/250, subject = 10', background = 1/500 @ f/4), you set your camera to properly expose the background. Like in auto mode, an adjustment needs to be made to keep the shutter speed below the camera's flash sync speed.

1/500 @ f/4 = 1/250 @ f/5.6

Simply set your camera to 1/250 @ f/5.6, and the flash will take care of itself.

Flash Exposure Compensation

Flash Exposure Compensation (FEC) is used in TTL mode to alter the exposure of your subject. When using fill flash (see below), you usually want to lower the output of your flash by -1, -2 or even -3 stops depending on how much fill you want. You can also increase your flash output by +1, +2 or +3 stops to achieve a high-key effect on your subject.

FEC is usually set on your flash unit, but many cameras allow it to be set there as well.

Flash As Main Light Source

When shooting in dim lighting, or when your subject is backlit, your flash will be used as the main light source. How you achieve this depends on what mode you are using your flash.

Flash Mode Setup
Manual Set the camera to the aperture calculated based on the GN and the distance to your subject, then set your shutter speed to properly expose the background at that aperture.
Auto Set the aperture and shutter speed on your camera to properly expose the background, making sure your shutter speed is within the flash sync speed. Then set the aperture on the flash to match the aperture on your camera.
(E)TTL Ensure that the FEC on both the flash and your camera is set to 0. Set the aperture and shutter speed on your camera to properly expose the background, making sure your shutter speed is within the flash sync speed.

Fill Flash

Fill flash is used when the flash is not the main light source, and you just want to even out the light, or to fill in shadows on your subject (under chins, racoon eyes, etc). Fill flash can also be used when your subject is side-lit, to bring out some detail on the dark side of your subject.

How much fill flash you want will depend on the situation, and your preferences. It is best to experiment to determine the right amount to use (digital scores again =:-) )

Once again, setting the fill flash will depend on what flash mode you are using.

Flash Mode Setup
Manual Set the camera to an aperture 1, 2, or 3 stops smaller than the value calculated based on the GN and the distance to your subject. Then set the shutter speed on the camera to properly expose the background at that aperture.
Auto Set the aperture and shutter speed on your camera to properly expose the background, making sure your shutter speed is within the flash sync speed. Set the aperture on the flash to an aperture value that is +1, +2, or +3 stops larger than the aperture on your camera
(E)TTL Set the FEC to -1, -2, or -3. Set the aperture and shutter speed on your camera to properly expose the background, making sure your shutter speed is within the flash sync speed.

Catch Light

Catch light is a small sparkle of light in you subjects eye, which adds life to your photo. The flash can be used to create a catch light by using a very small amount of fill flash, and directing the flash towards your subjects eyes.

Direct Flash vs. Bounce Flash

Direct Flash

Direct flash means to have your flash unit pointed directly at your subject. It produces the most illumination with the least amount of power, but it often creates harsh lighting, cold colour tones, and shadows. It is the only possible flash when shooting outdoors, or in large halls.

Bounce Flash

Bounce flash means that you point your flash at a point on the ceiling, or on a nearby wall that is approximately half way between you and your subject. This will bounce the light, softening out the lighting, and reducing the shadows. You must pay attention to the colour of the wall or ceiling, as the bounced light will take on that tone.

Some amount of light is lost when using bounce flash. In auto and TTL modes, the flash will compensate for this loss, by increasing the amount of light put out by the flash.

In manual mode, you must compensate for the loss of light, but setting the aperature on the camera 1 or 2 stops larger than the calcualted aperture.


Camera_flashes_2.gif c268_6833.jpg