24-FEB-2011
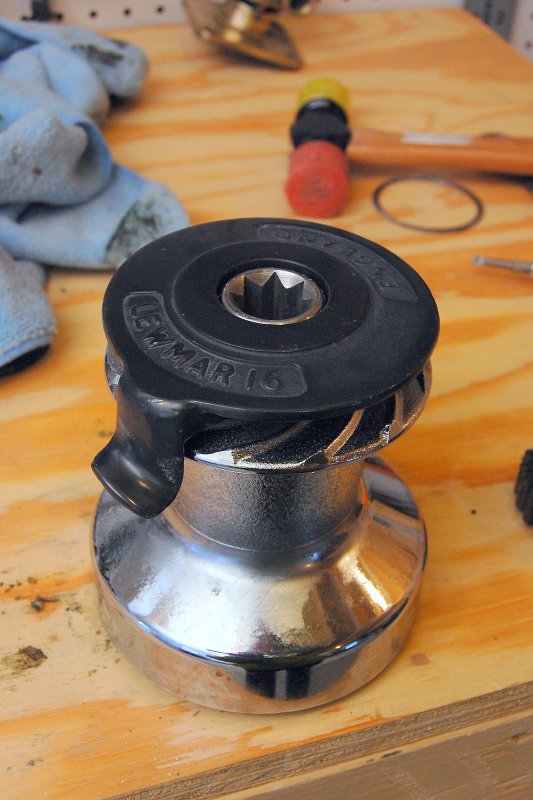
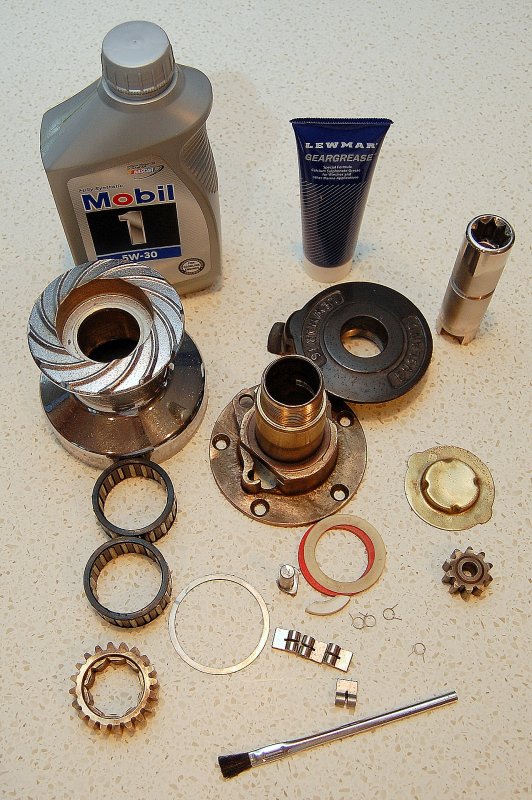
The Winch
Cleaning & lubing a winch is not complicated but can get tedious, especially if doing it on-board. This old Lewmar "England" style winch is built like a tank but suffers from a design issue which necessitates removal from the boat for a proper clean and lube. Many newer winches are designed so the base can be left attached and a proper cleaning can be effected, this one was not.
_
If your winch was bedded with 3M 5200/Satan Glue, well, sorry for that, and good luck removing it. This starts with the winch already removed from the boat.
_
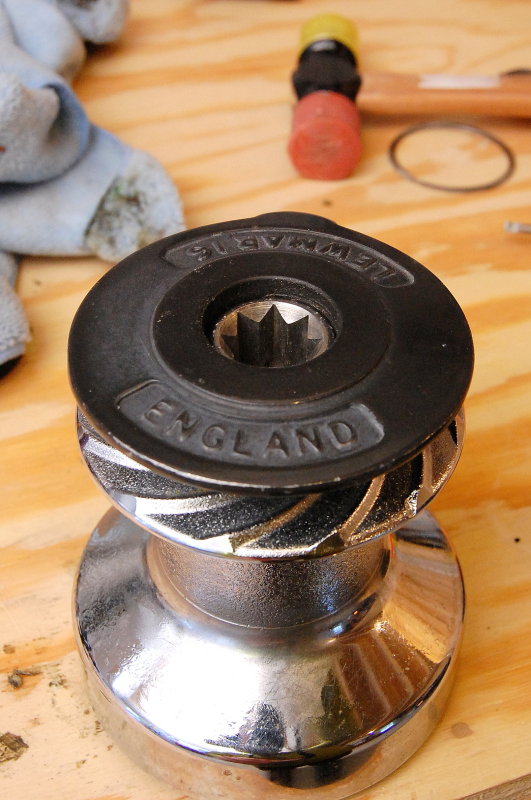
First things first the black top, which also serves as the line stripper, needs to be removed. A simple tap with a plastic hammer, seen in the back ground, in a counter clockwise direction, will have it spinning free in no time.
24-FEB-2011
Top Spun Free
Continue to unscrew the winch top...
24-FEB-2011
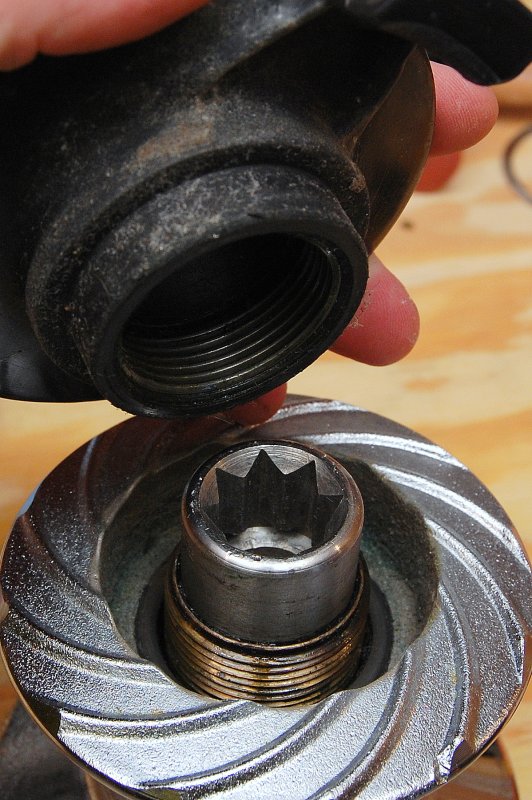
Remove It From The Winch
Remove the line stripper from the winch and set it aside for cleaning.
24-FEB-2011
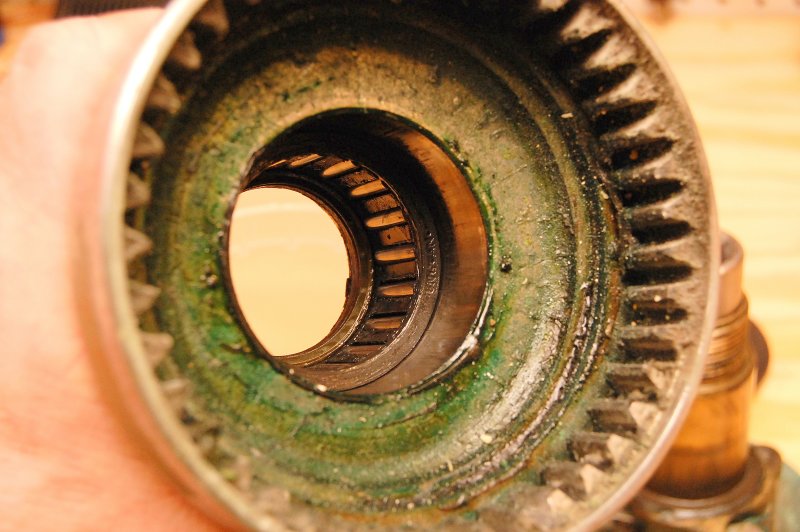
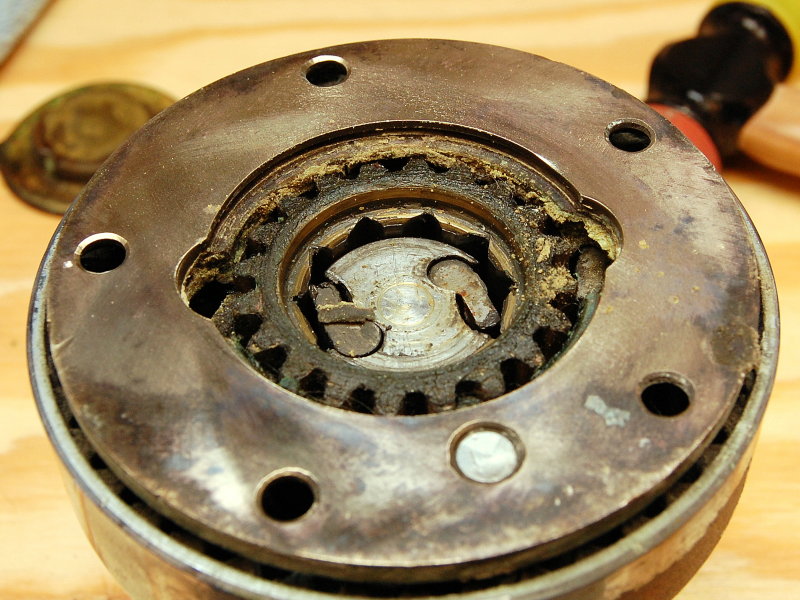
Remove The Drum
With the line stripper removed simply lift the winch drum of the base. You are looking up into the bottom of the winch drum here.
_
Inside the drum you'll find the bearing races, though one may be left behind on the winch base, or both. Reach in and slide the bearing races out or if one was left on the drum lift it off and set it aside for cleaning.
_
Under the top bearing race on this winch are two plastic washers/shims. Remove them but note the color and position they were in so they can be installed in the correct order when putting it all back together..
24-FEB-2011
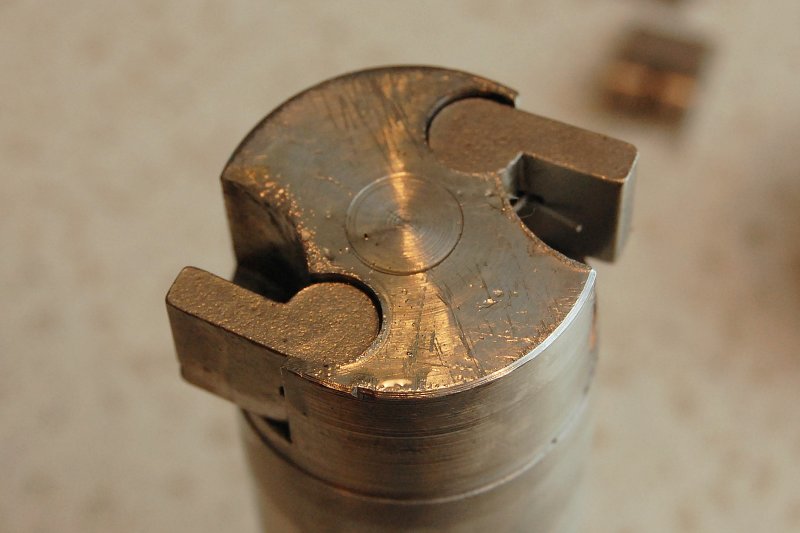
The Base Pawls
This is the bronze winch base and we are looking at the outer pawls. There are two one on each side. To remove them simply slide them up as shown here partially lifted out.
_
When removing the pawls be very careful to not let the pawl springs go SPALOING....!!!
_
Once removed set them aside for cleaning.
24-FEB-2011
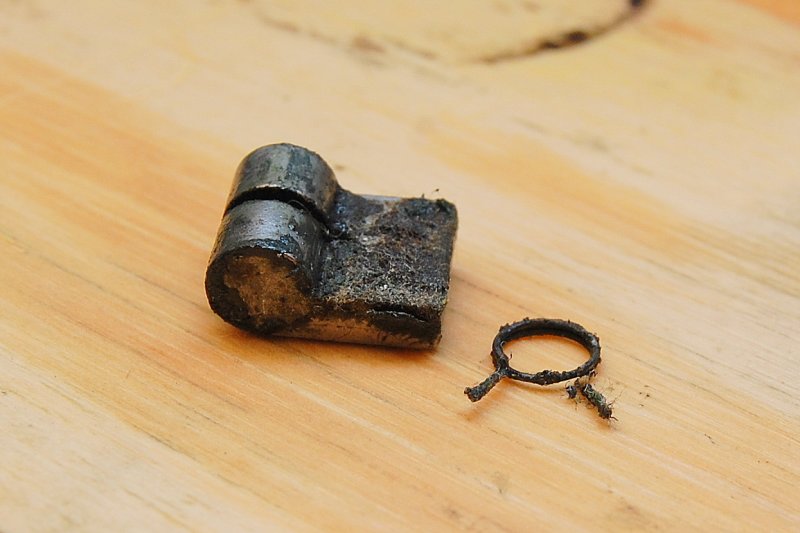
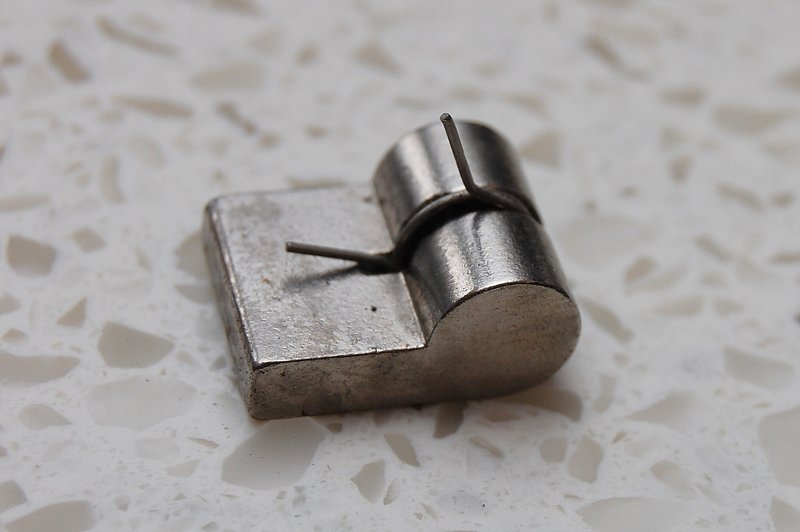
Winch Pawl
This is a winch pawl and the pawl spring. These springs have a mind of their own so keep and eye on them.
_
When winches are not cleaned and lubed regularly this is what they look like. If the wrong type of grease had been used it hardens and becomes quite gummy & thick..
24-FEB-2011
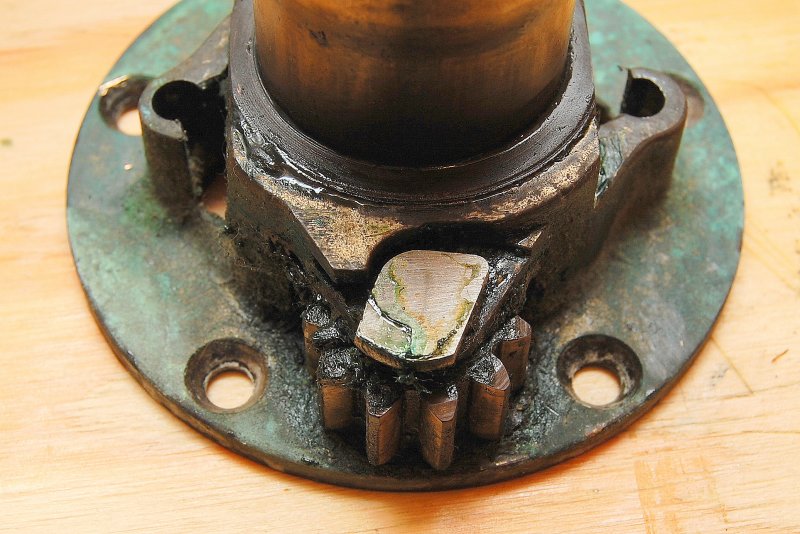
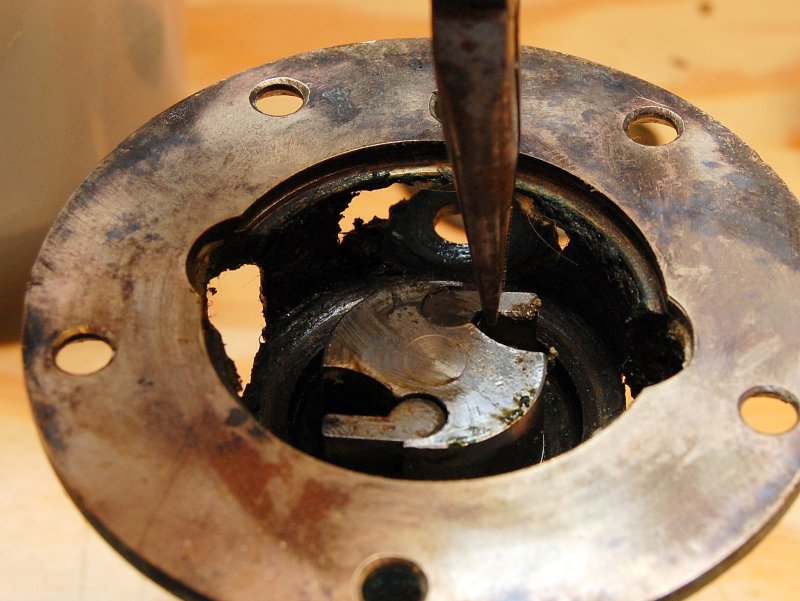
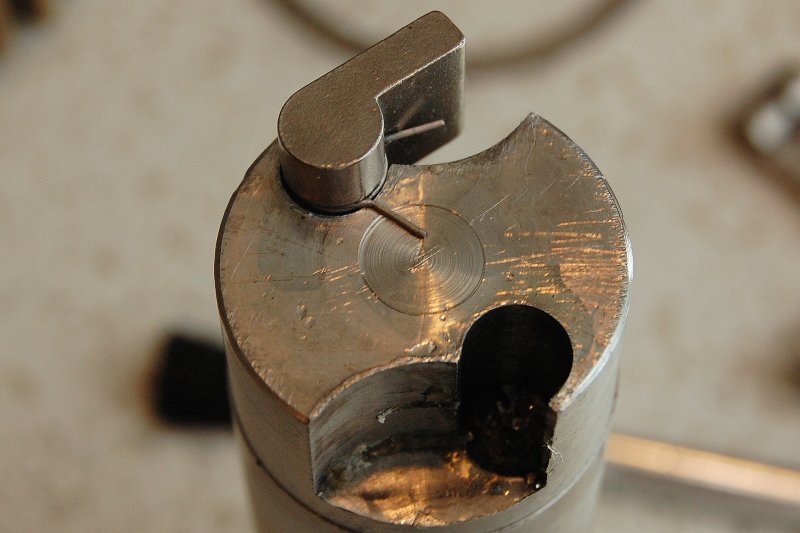
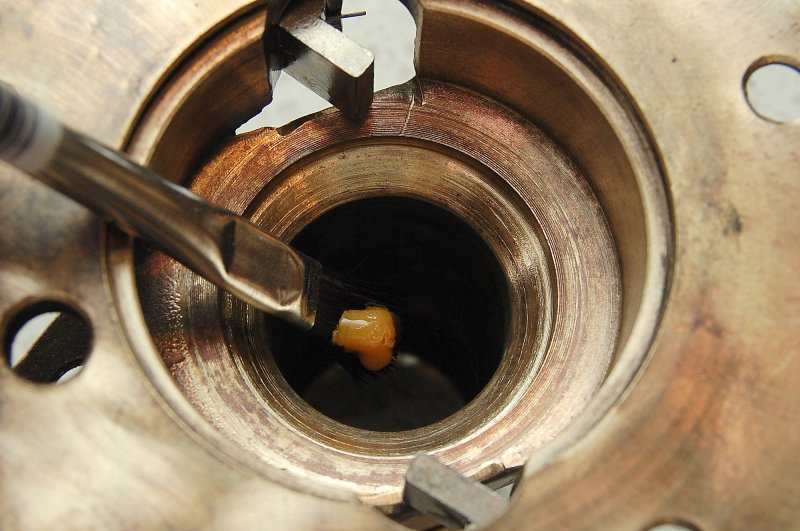
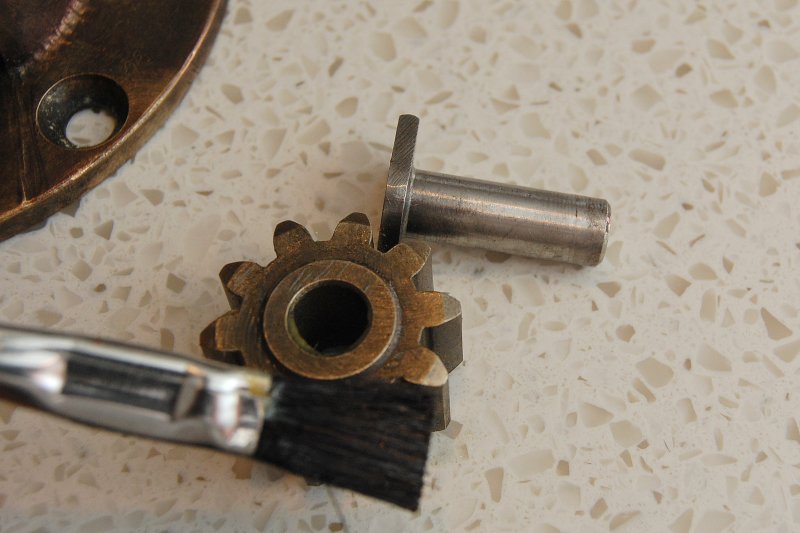
Gear Shaft
The odd squarish shaped silver thing above the gear, is the gears shaft. In order to remove it it simply flips outward and is lifted straight up. In this photo it has already been flipped out from the winch base.
24-FEB-2011
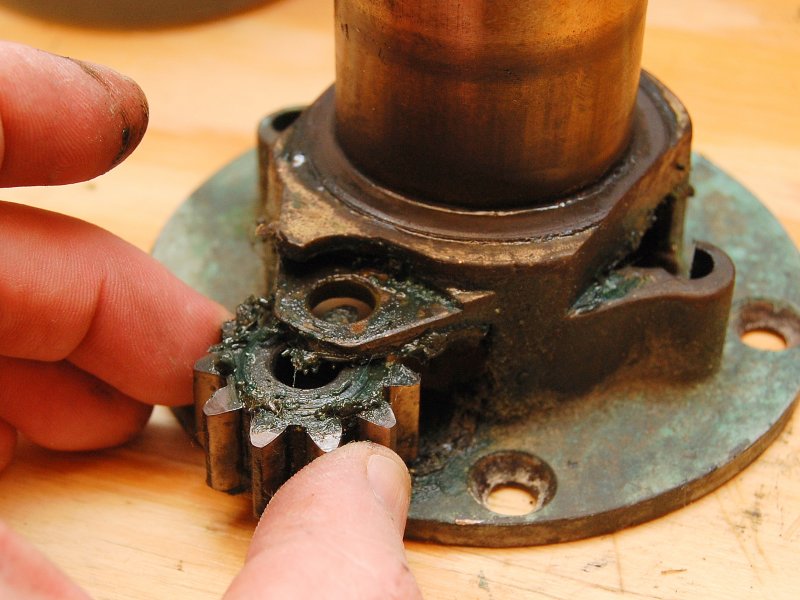
Remove The Gear
Once the gear shaft has been lifted up and out simply slide the gear outward from the base and set it aside for cleaning.
24-FEB-2011
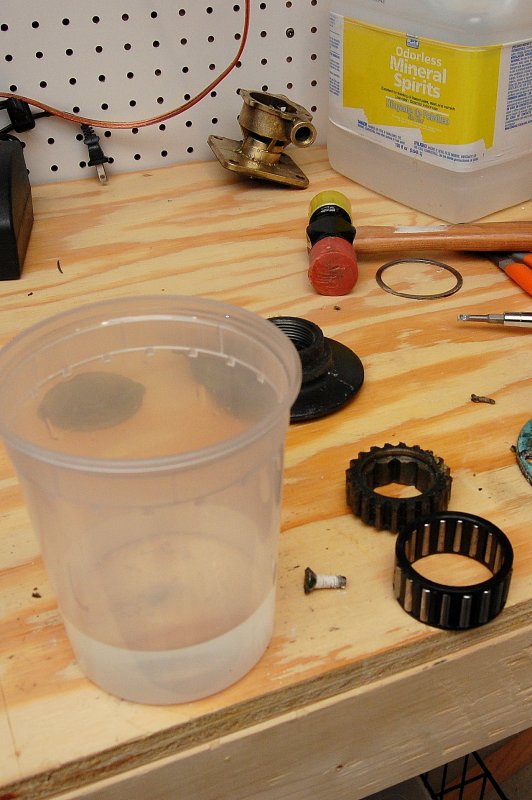
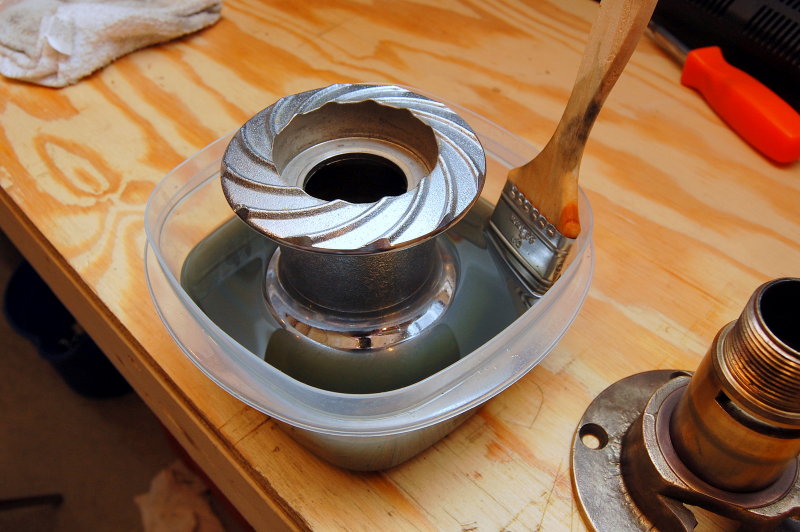
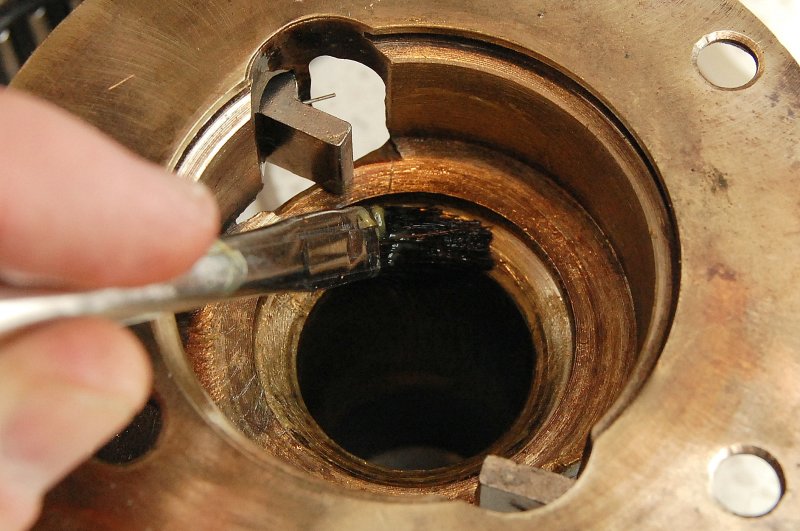
Cleaning
For cleaning the small parts, gears, pawls and bearing races I use Odorless Mineral Spirits. Soaking the parts for a while loosens the old gummy grease and gets the parts ready to be re-installed. Some grease gets so hard that a small brass brush is needed to get it all off..
_
Tupperware works well for soaking parts in, just don't tell my wife where it goes...
24-FEB-2011
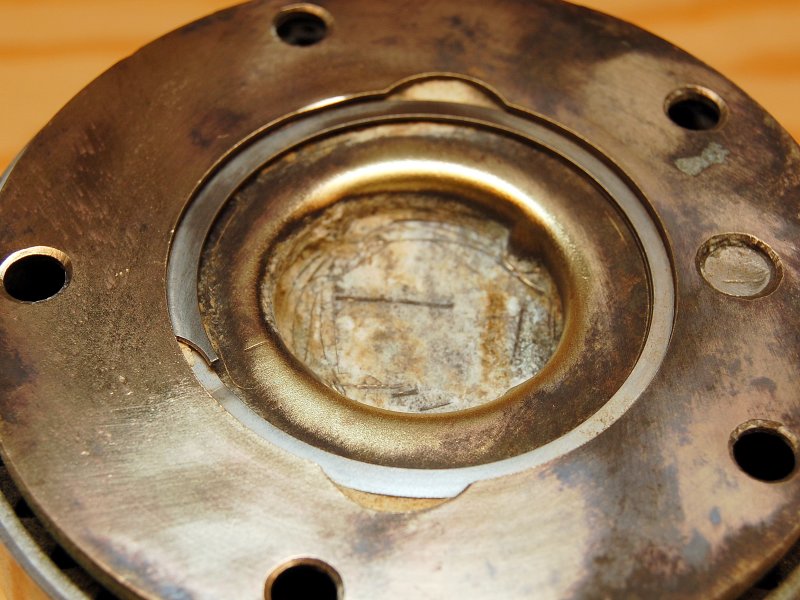
Winch Base Grease Cap
You are looking at the bottom of the winch base here. The stainless clip needs to be removed to get the grease cover off the winch base.
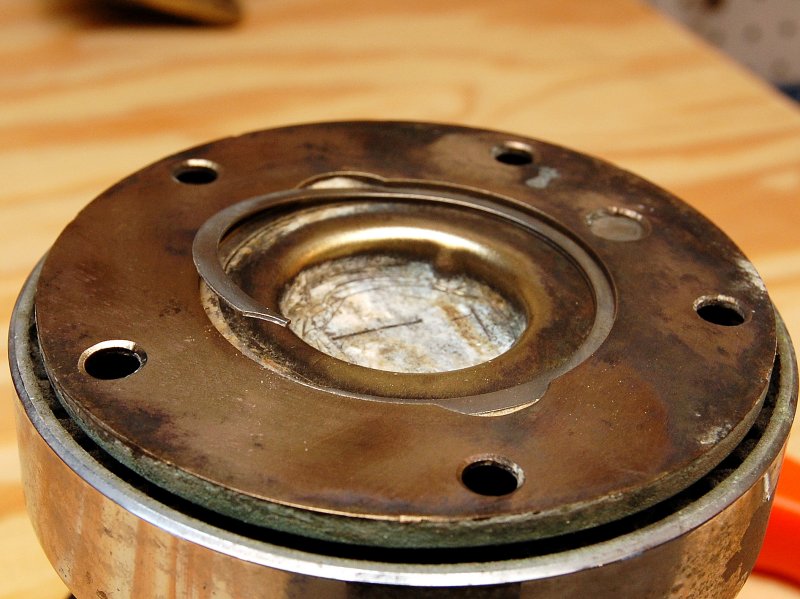
24-FEB-2011
Sainless Clip
A small screw driver or mechanics pick will get the clip started. Don't be surprised if there's some corrosion between the bronze and stainless that makes it hard to remove. Once removed don't forget to clean the retaining slot. A Dremel with wire brush works well for this.
24-FEB-2011
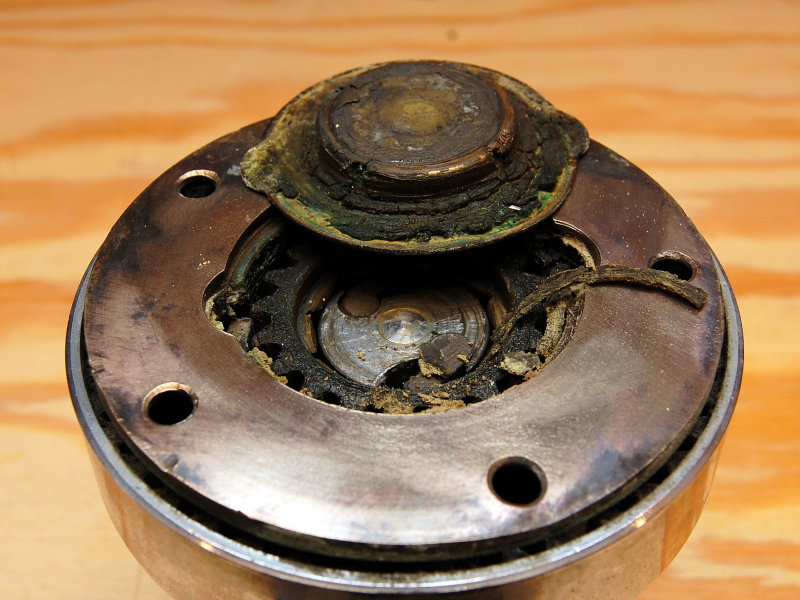
Pop The Base Cover Off
With the clip removed pry the grease cover off. It is easy to see that this end of the winch had been neglected for a long, long time..
24-FEB-2011
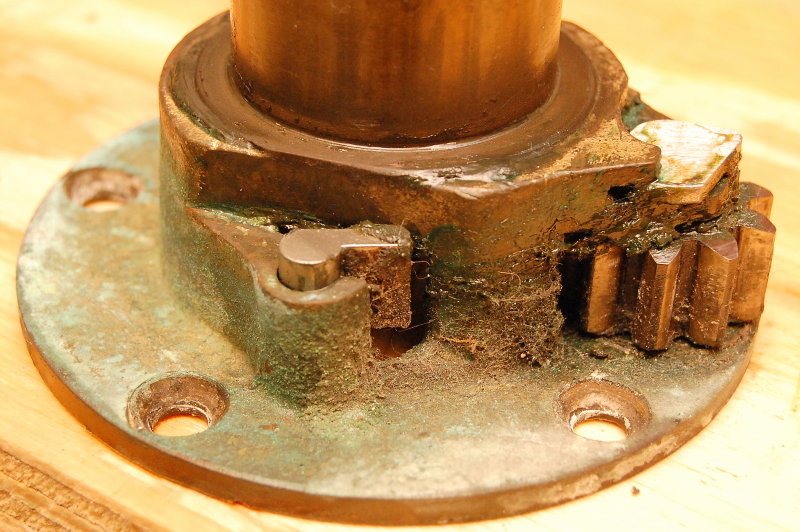
Winch Base Gear & Pawls
This is the base gear and the shaft pawls. To remove the gear simply lift it out.
24-FEB-2011
Remove The Shaft Pawls
Now that you've removed the gear a pair of needle nose pliers will make it easy to get the pawls out of the shaft. Once again beware of the SPALOING factor with the pawl springs. Add the gear and pawls to the cleaning pile..
24-FEB-2011
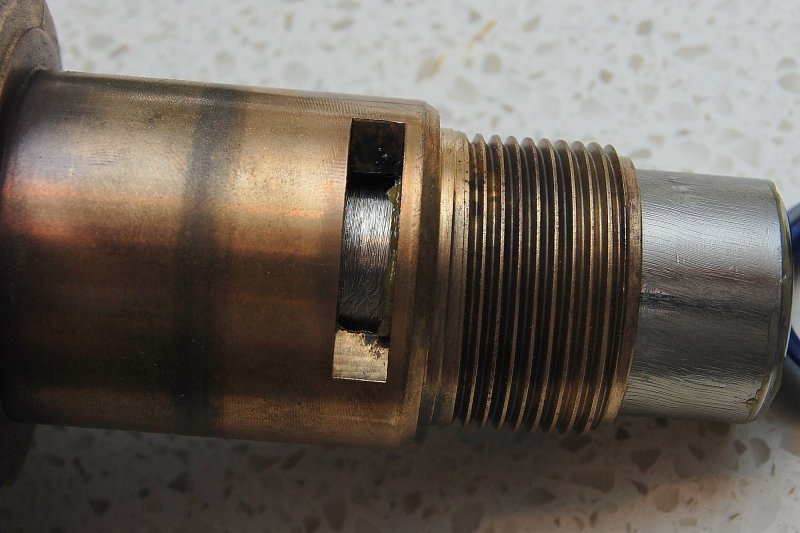
Shaft Retainer
The shaft is held in place by a plastic insert that fits into a machined window in winch base. Use a small dental pick to peel it outwards as shown here..
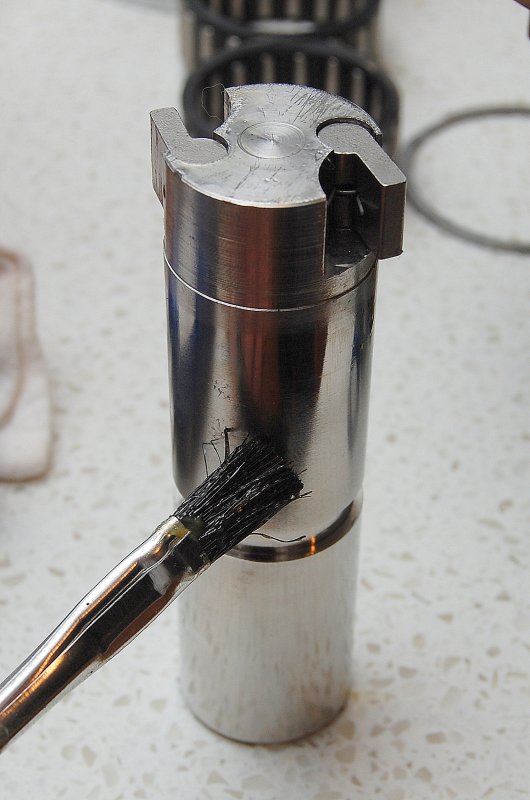
24-FEB-2011
Winch Shaft
With the plastic retainer removed simply slide the shaft out of the winch base. The slot about halfway down the shaft is where the retainer rides. This amazingly simple design keeps the shaft in the drum.
24-FEB-2011
Clean The Winch Base
The grease in this winch was rather resistant to cleaning as it had become very hard and gummy due to lack of maintenance and being the wrong type of grease. About four hours of soaking in Mineral Spirits solved that. A cheap "chip brush" works well for cleaning the parts.
25-FEB-2011
Clean Parts Ready For Reassembly
An acid brush, some Lewmar winch grease and some motor oil are all I use to put it back together. Any good quality light machine oil will work for the pawls but I have been using a synthetic motor oil for years and had great results. Lewmar sells a pawl lube but I've never used it. For the grease I find the Lewmar grease very worth it. A tube like that will do about ten winch rebuilds.
25-FEB-2011
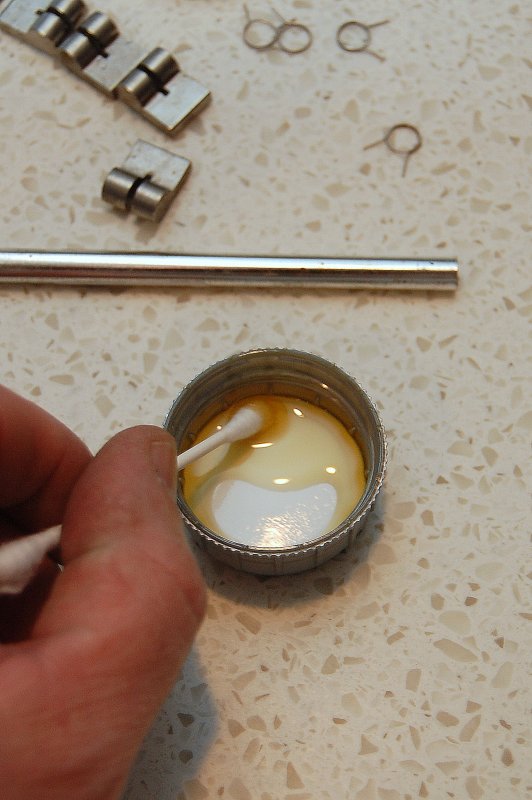
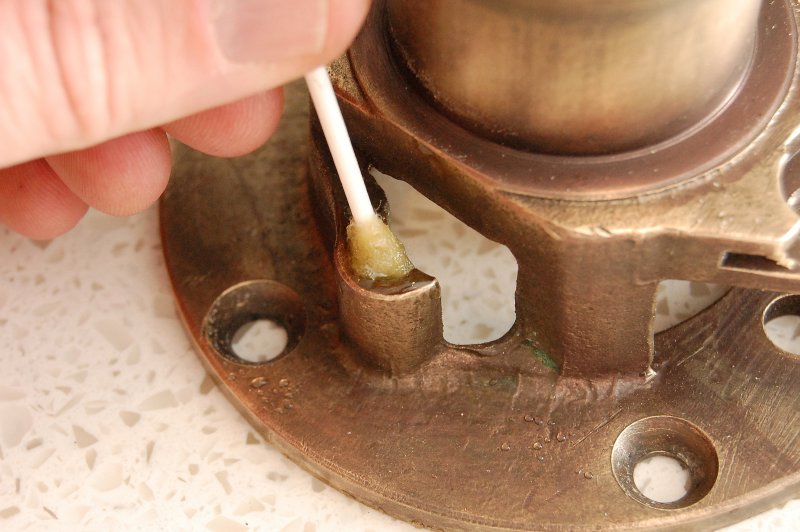
Oil In The Cap
For applying the oil to the pawl surfaces I simply pour a little oil in the cap and use a Q-Tip to apply it.
25-FEB-2011
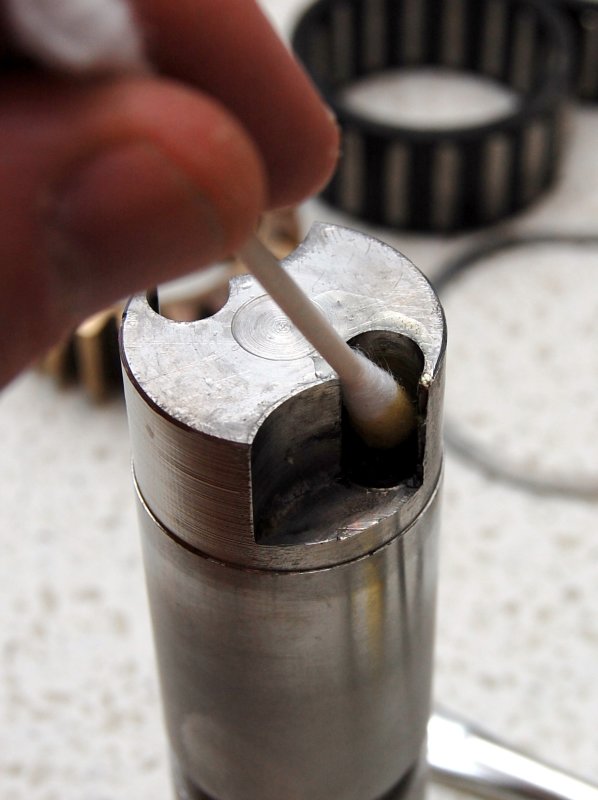
Lube The Shaft Pawl Slots
The winch pawls should not be greased, just oiled with a light weight oil. Greasing the pawls can cause them to stick. If the pawls stick it could create a very dngerous situation with a loaded winch.
_
I simply apply some oil to the machined slots with a Q-Tip.
25-FEB-2011
Install The Pawl Springs
With a winch cleaning the only items that normally need replacement are the pawl springs. Everything else seems to last for a long, long while.
25-FEB-2011
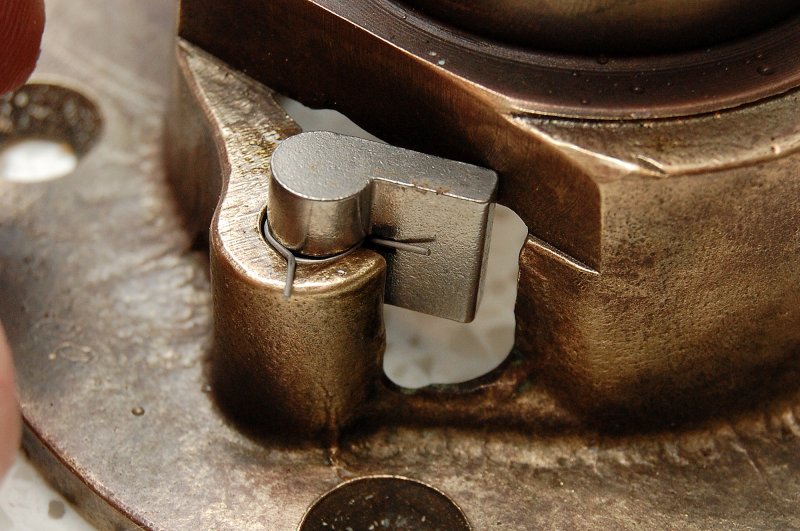
Install The Shaft Pawls
Lube the pawl with oil and drop it in until stopped by the spring. Then take your finger and compress the spring towards the pawl while at the same time lightly pushing the pawl downward. Once the spring arm is over the lip of the shaft the pawl will drop right into place.
_
Once in place give it a good coating of oil with the Q-Tip..
25-FEB-2011
Lubed And Instaled
The shaft pawls are ready for reassembly..
25-FEB-2011
Base Pawls
Repeat the same process for the base pawls.
25-FEB-2011
Insert The Pawl
Once again reinstall the pawls & springs and lube well. NO GREASE.....
25-FEB-2011
Lube The Insde of The Base
Using the acid brush place some winch grease on the brush and lightly coat the entire inside where the shaft will spin. Make sure you have a 100% coverage nice thin film of grease. This is not a trailer wheel bearing so packing it chuck full of grease is not optimum. A light coating is all it takes.
25-FEB-2011
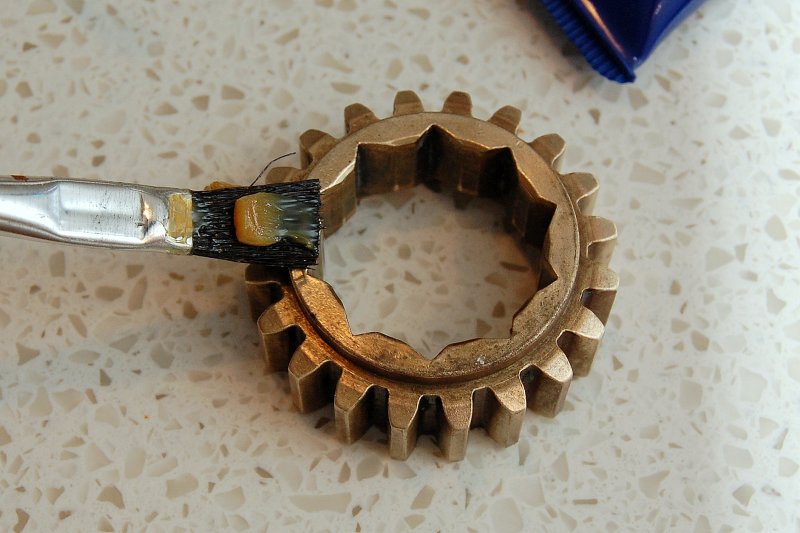
Grese The Base Gear
Apply a light coating of grease to the entire gear.
25-FEB-2011
Grease The Teeth
It is important that you grease the gear teeth but that you not over do it. A light coating is all that is needed. Too much grease on the teeth can cause the pawls to stick..
25-FEB-2011
Grease Film
If you click on this picture and blow it up you can see the film level you're looking to achieve. Not too little and not too much..
25-FEB-2011
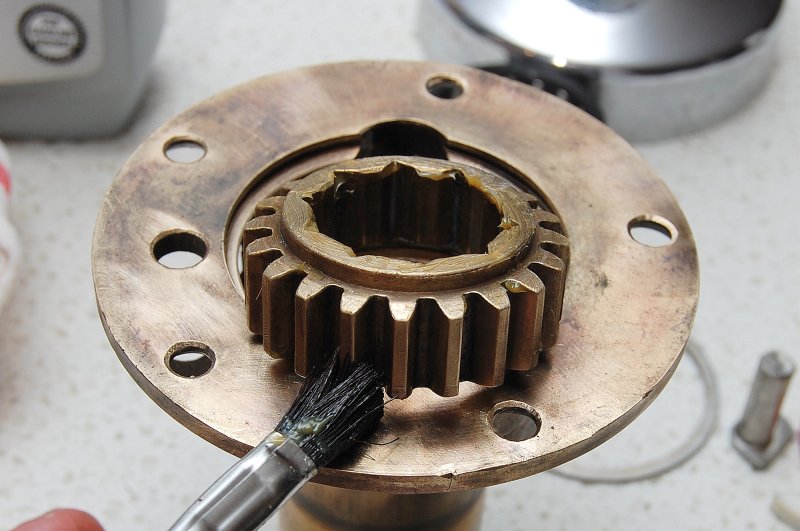
Grease The Gear Race
This area must also be greased as the gear will be turning in here and you don't want bare bronze to bronze.
25-FEB-2011
Grease The Shaft
While I've already lube the inside of the base you'll want to be sure and grease the shaft too before reinstalling it. Don't forget to grease the retainer slot..
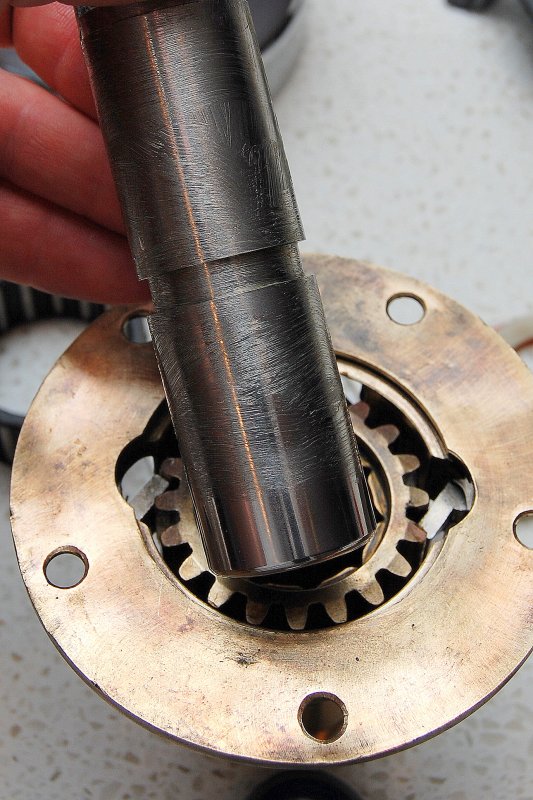
25-FEB-2011
Install Gear and Shaft
Compress the pawls and drop the gear into place. Once the gear is installed you can insert the shaft. When you get to the gear compress the shaft pawls and drop it in.
25-FEB-2011
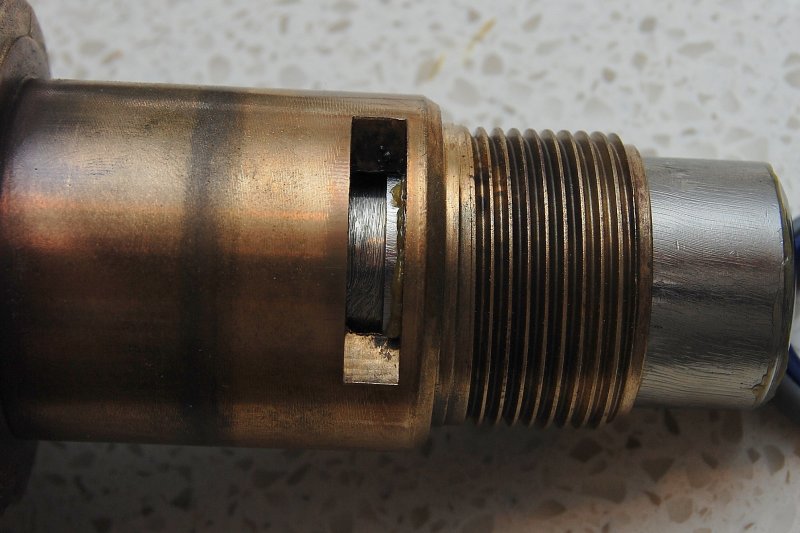
Align Shaft With Retainer Window
The shaft is out of alignment here and will not accept the retainer. The shaft needs to be slid up a touch more.
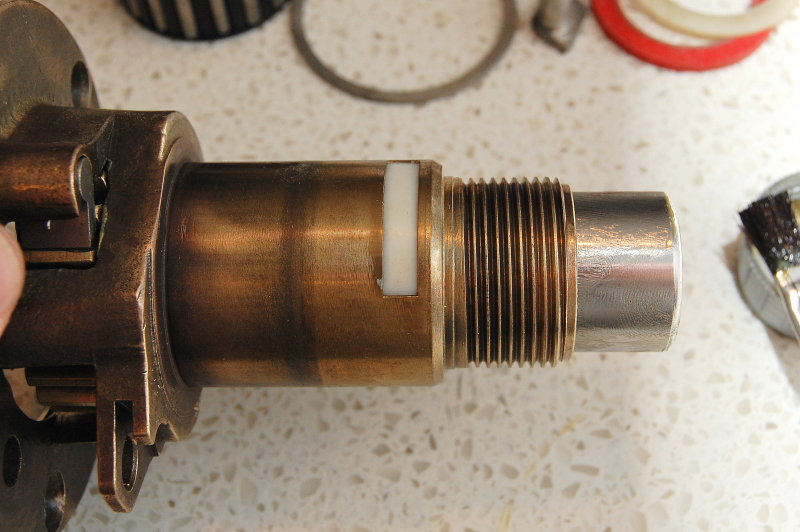
25-FEB-2011
Shaft Aligned
The shaft is now ready for the plastic retainer to be installed.
25-FEB-2011
Install Shaft Retainer
Here you can see the plastic retainer reinstalled. The shaft will now stay put.
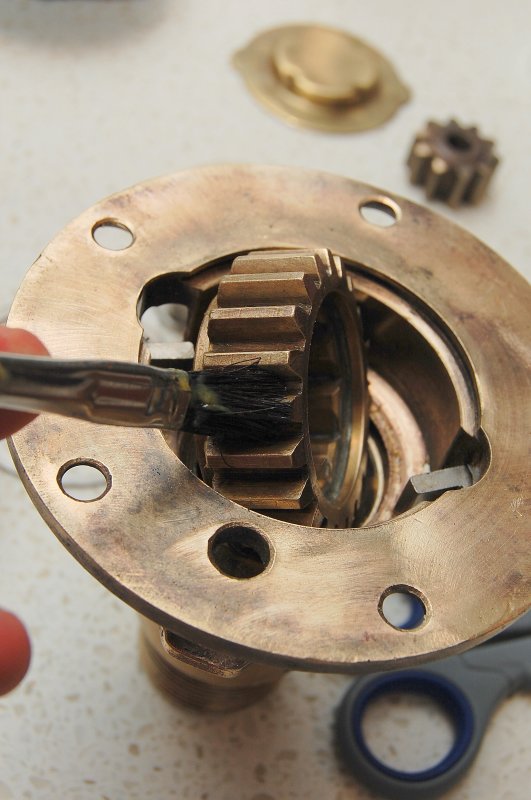
25-FEB-2011
Grease Gear & Shaft
Now grease the small gear and the shaft it rotates on. The same "light coating" of grease applies here.