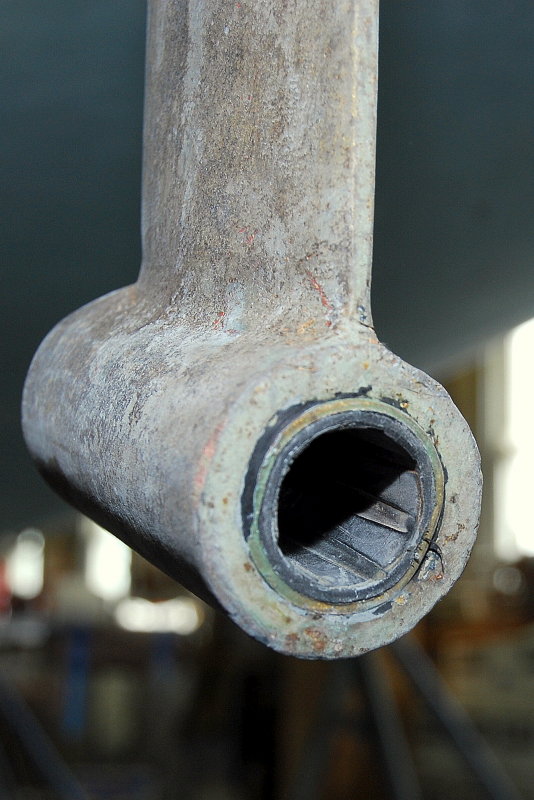
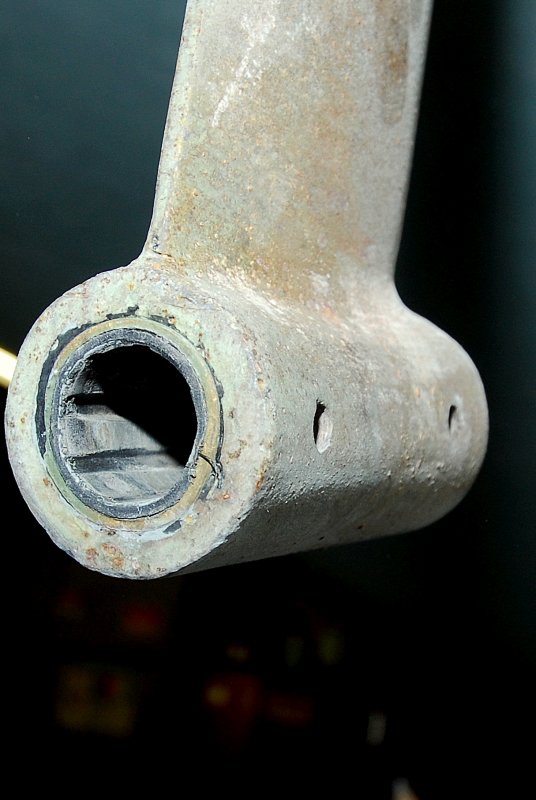
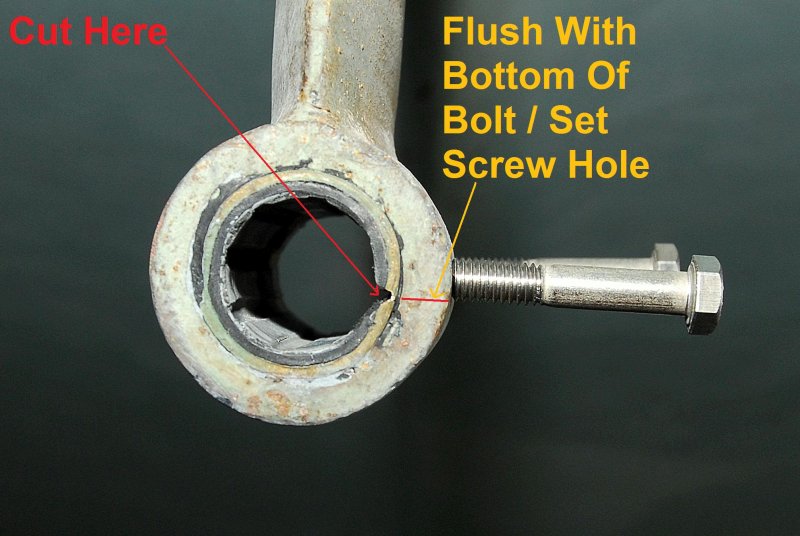
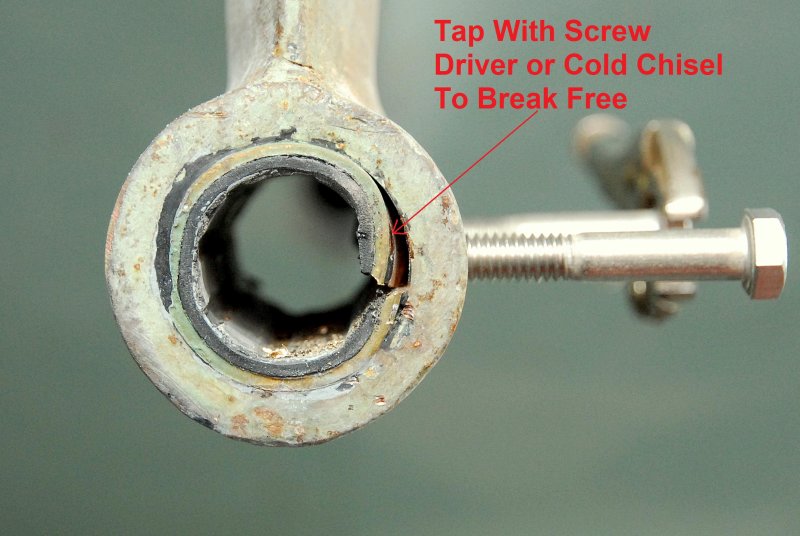
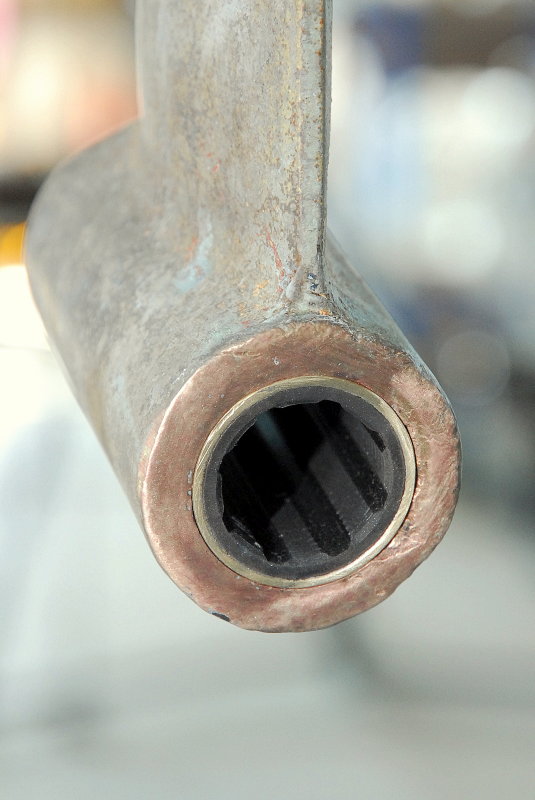
Replacing a cutlass bearing is not a tough project but does require some thought. On some boats the bearing is inside the dead wood making replacement more of a task than when it's mounted in a strut. These instructions deal with replacing a strut mounted cutlass bearing.
While there are some commercial tools designed for cutlass bearing removal they a bit pricey for a DIY to replace just one bearing. Some owners associations have purchased them and allow their members free use of the tool. The Catalina 34 organization owns one such tool. They work well however and don't require the shaft be removed, a big plus.
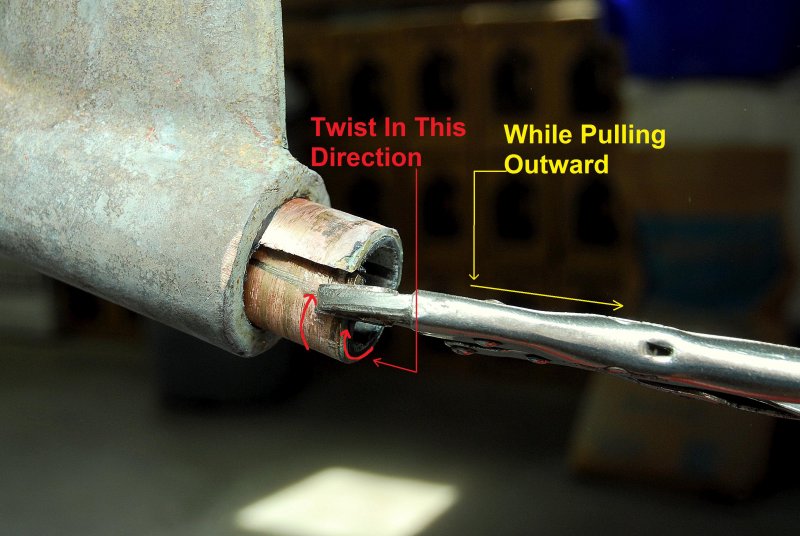
Occasionally when a bearing has been installed for a while they can become frozen or corroded in place. In these instances the shaft would need to be removed anyway even if you had a cutlass bearing tool. This article focuses on the removal of a cutlass bearing once the shaft has already been removed.
Cutlass vs. Cutless®
Before we move on I should address the issues of the words cutlass vs. Cutless®. The word Cutless® is a registered trademark of Duramax Marine® LLC. It is a BRAND NAME for a sleeve or stave bearing.
Duramax purchased this name, and product, from Firestone Rubber many years ago. When Firestone developed the product they named it the Cutless®. This is a branded product name. People call soda "Coke" all the time, even if it is not the brand they are drinking. In time the industry began using the spelling cutlass perhaps because a windlass is not a windless, I don't really know, but it happened.. The long and short is that over time the word spelled cutlass has become an industry wide accepted generic term whether Duramax likes this or not. It is very tough to change history after it has evolved........
It should be noted that Duramax strongly disagrees with anyone using the term Cutlass, with an "a", as they feel it is simply too close to the word Cutless®, which is their brand of stave or sleeve bearing. They feel using the word cutlass is intentionally misleading.
Duramax has been fighting hard to get anyone they can to stop using the word cutlass, including me. When I spoke with them I made sure to mention the bearing I used was not one of their branded products. Hamilton Marine happened to be out of Johnson Duramax bearing in this size, when I purchased it, (99% of the time I use Cutless® brand) so if I used the word Cutless®, it would be false advertising and unfair to my readers. On top of that using the word Cutless® would be free advertising for Duramax and I used a Morse Marine bearing not a Johnson Duramax.
I could really care less about the free advertising aspect, but if I did not use a Duramax bearing I am simply not going to call it a Cutless®. This is kind of like re-filling Heinz Ketchup bottles in a restaurant with generic ketchup. It's not Heinz, so why try to pretend it is... This bearing was not a Cutless®, so I am not going to call it one...
Duramax owns the rights to the word Cutless®, in many countries, though Australia recently shot them down because they feel the word cutlass is an accepted "generic" term..
The proper generic term for these bearings is stave bearing or sleeve bearing. So where's the rub? Sadly the vast majority of boaters would not know what I am talking about, had I used the title; "Replacing A Sleeve Bearing".. I chose the word cutlass carefully because it is well accepted, and understood by most boaters, as to what it is/describes. Had I physically used a Cutless® bearing then I would have used the word Cutless® but this one was not a Cutless® brand....
It should be noted that Vetus, a considerably larger world wide marine company than Duramax, continues to market their stave/sleeve bearings, even in the USA, as Cutlass bearings...
So Cutless® is a brand name. Duramax feels using the word cutlass is an infringement on their trade mark. Vetus, many magazines, marine chandlers, books and history seem to accept the word cutlass as generic. My readers will have to decide whether to call it a Cutless®, cutlass, stave or sleeve bearing. I have simply chosen a term that is well accepted and understood by most boaters.
Do Quality Bearings Matter?
I prefer to use either Morse or Johnson Duramax manufactured bearings. I have found the consistency and accuracy of these product to be high quality. I have seen far too many "generic" bearings not meet the spec size, come unglued from the shell, use a very low quality Home Depot grade yellow brass that completely corrodes quickly etc. etc.. It is simply not worth it to purchase a bearing from an unknown source or unknown internet vendor. Hamilton Marine in Maine is a great source for Johnson-Durmax Cutless® bearings. Vetus, Morse Marine, Johnson Duramax and Buck Algonquin (these are Duramax manufactured Bearings)are all what I consider quality bearings.
I will give you one example of how the use of a cheap eBay sourced bearing cost an owner considerably more than he saved.. A customer ordered a generic cutlass bearing and quickly realized the scope of the project was beyond his capabilities. He then hired me to remove the old one and install the new one. I don't like to install owner sourced parts and this is one of the reasons why..
When I got there the Chinese origin no-name bearing was under sized and not machined to standard industry spec for its size. I refused to install the bearing, it was not safe, and told the customer I could have one by the next day. He insisted on returning & getting another from his eBay supplier. Sure why not, it's his money and he's proud of his cheapness, so I figured I'd let him play out his fantasy of saving money on eBay. On trip #2 the next bearing came in, once again, undersized. Again, the owner insisted he would make this right after I basically insisted he let me source the correct bearing from a legitimate supplier and manufacturer. Remember, he has now been billed twice for travel/minimum charges only to stand there with my thumb in my ass to tell him once again, "it's too small". The third bearing he got was not even in the same league and so far off it was not even laughable. On that visit I told him to call someone else if he insisted on wasting my time.
I then asked him how much this bearing cost. Very proudly he said; "Oh it was only $38.00 and "free" shipping." Hmmmm it has now cost him over $275.00 in travel and minimum charges to save a grand total of, are you ready, $8.99 !!!!!!!!! That is, the Johnson-Duramax Cutless® bearing I eventually sold him, was just $8.99 more than what he paid for his glorious eBay special. The Cutless® bearing fit perfectly and went in without issue. To save $8.99, the customer spent an additional $275.00, inclusive of multiple trips by me to his boat, for a removal & re-installation, that should have taken less than 2 hours in total.
Don't be over-consumed by your penchant to save a few pennies, on a critical piece of gear, that needs tolerances tighter than unknown sources can apparently deliver. Please stick with brand-name known quality parts. Don't be penny wise and pound foolish.