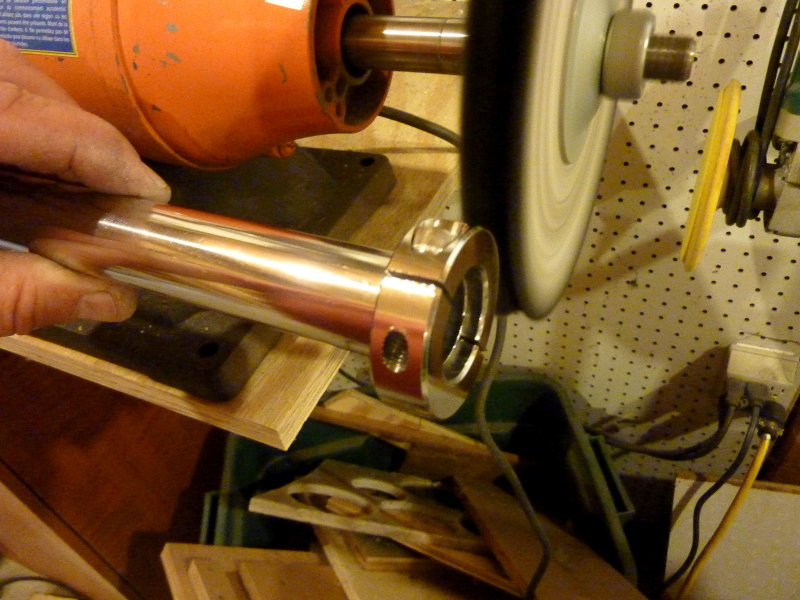
TIP: Buffing & polishing stainless steel creates some pretty good heat and can be tough on your hands. In order to buff the clamp collars I use a scrap piece of 1" stainless and simply clamp the collar to it. Easy, simple and cuts buffing time dramatically!
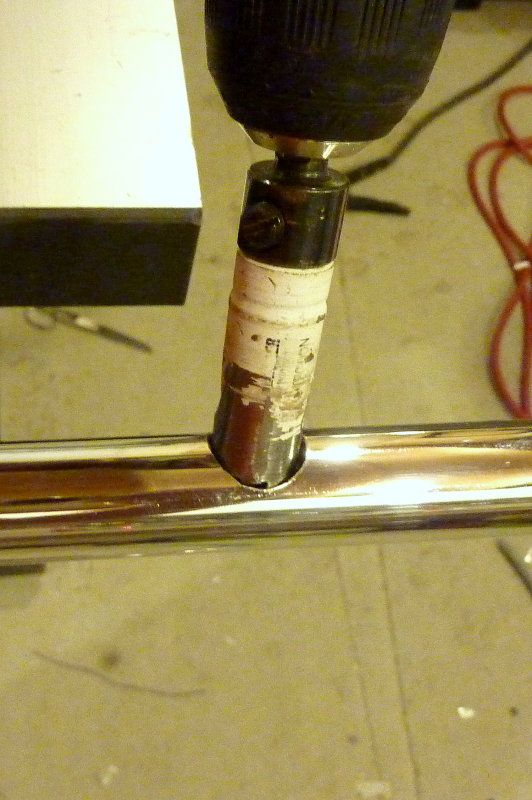
Drill The Wire Hole
Once you have decided upon the height of your mount and clamped it in place you are now ready to drill the hole for the wires.
I first drill a 1/4" Pilot hole into the pedestal guard to center my hole saw into. For drilling a large enough hole I use Lenox Bi-Metal hole saws. They make easy work of 1" SS.
The hole size in the pedestal leg will depend upon the wires you need to fit down the leg. The smallest hole that will fit the wires is what you want. If in doubt grab some 1" copper pipe and make a test bore to see if your wires fit.
Once the hole is drilled please be sure to do a good job at de-burring this hole. Again, for this, I use a Dremel type tool but a small round file can work too. The important thing is to have a smooth hole that won't destroy the wire when pulling it through the guard..
TIP: For drilling into stainless I use drills made by Viking/Norseman. Viking/Norseman are actually the same company but go to market under two different brands, like Johnson / Evinrude did..
These drills are made here in the USA and are very good quality. One of my favorite drill sets for the boat are the Norseman/Viking 29 piece round drill index sets 1/16" to 1/2" in 1/64th increments.. They are in a round plastic container with screw on lid and an EXCELLENT gasket seal. The set is totally waterproof and stays closed in a tool bag, unlike metal indexes.
I use this set for 85-90% of the drilling jobs I need to do on boats. These drills also eat SS for lunch... Both Norseman and Viking offer the same sets under different part numbers. I think at last count I had three of these drill indexes.
I like them because KL Jack, a local nut & bolt wholesaler, stocks the replacement drills from Norseman/Viking and when I break one I can easily replace it with a matched drill of the same quality. The crap you get at Home Depot, Lowes or other retailers are pure unadulterated JUNK!!!
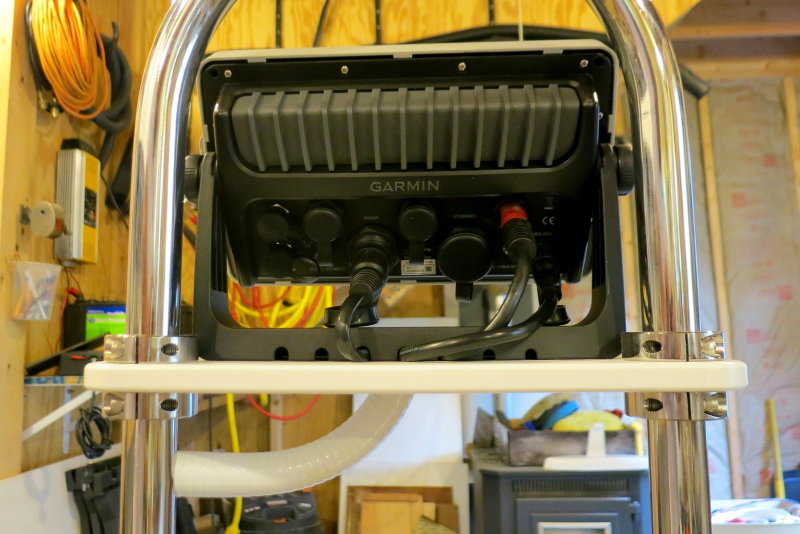
Running The Wires
You have many options here for running wires as you can use grommets, split loom or hose as I have on this one.
Here I ran the wires through some tubing and into the pedestal leg. For this Garmin 741 everything needed fit in one of the 1" legs. The wires included the power/data cable, Garmin network cable for radar and a NEMA 2000 drop.
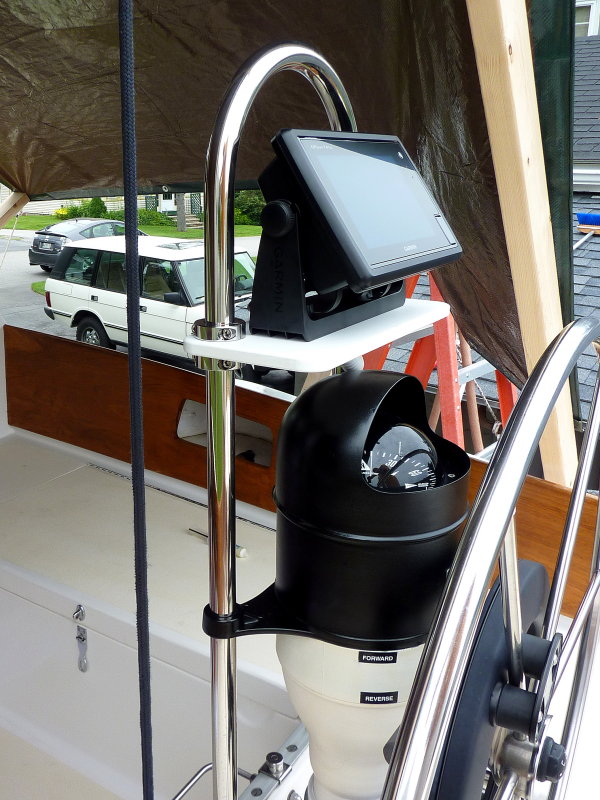
Garmin 741 In a Bristol 40
This is one of the production mounting plates on a Bristol 40. The owner really liked the finished product and loved that it did not change the aesthetics of his beautiful boat very much at all. He specifically said he like that it did not get all gawdy looking" like he had a 40" plasma TV at the helm.
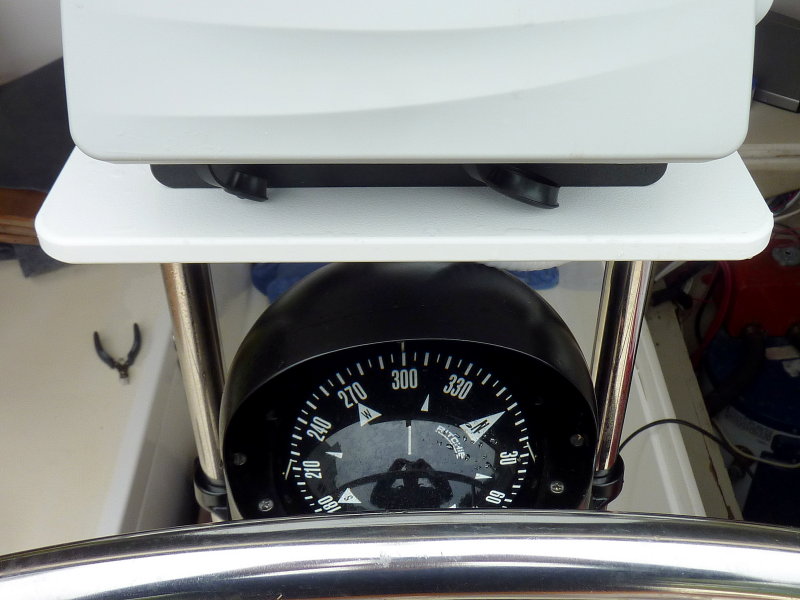
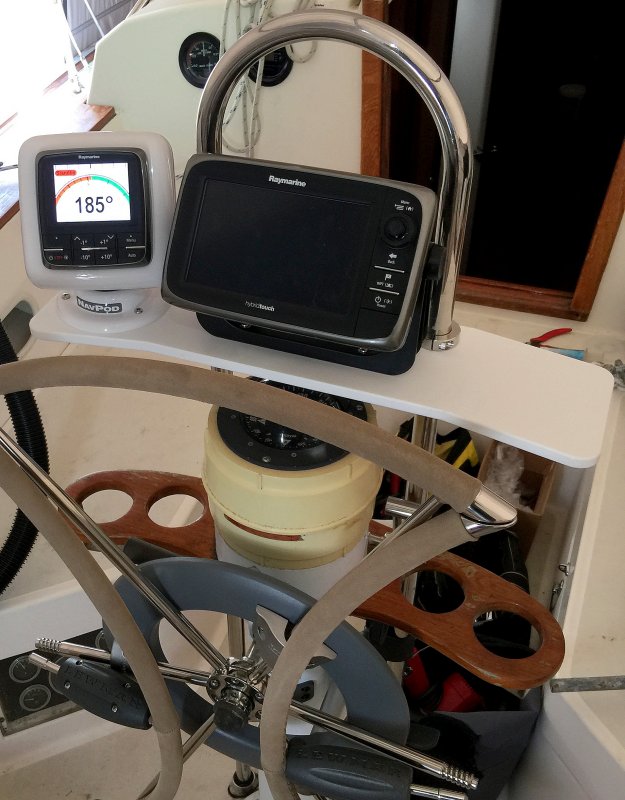
View of Compass From Standing At Helm
You want to ensure you can see the compass from standing at the helm so adjust your height accordingly.
NOTE: Installing ANY plotter at the helm like this WILL cause interference with your compass. Any time you do, you should have your compass professionally swung and a deviation card made. I have yet to find a plotter that could not be swung, even magnet door plotters like those from Raymarine, Garmin and Simrad, Lowrance HDS units etc..
RANT:I think magnetic doors on plotters are simply STUPID and highly ARROGANT and IGNORANT move by the designers. However, the reality is that I have yet to see a compass like this that could not be swung, and a deviation card made, even when mounted in close proximity.
TIP: For those located here in Maine Dave Witherill of Pathfinder Compass does exceptional compass work. You can contact him via his cruising blog.
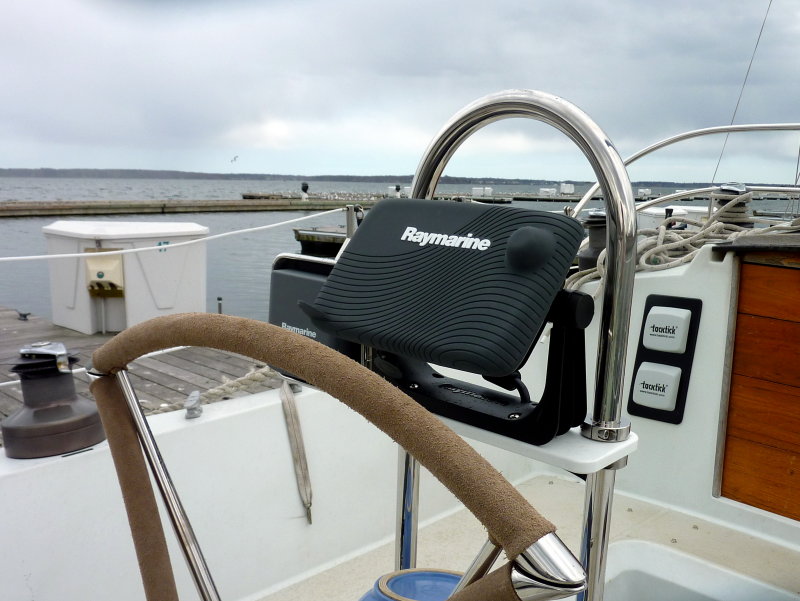
This is a prime example of an OEM pedestal guard that was simply too short. I did not want the owner accidentally grabbing the plotter when looking for a hand hold so we opted for the taller SG10 pedestal guard..
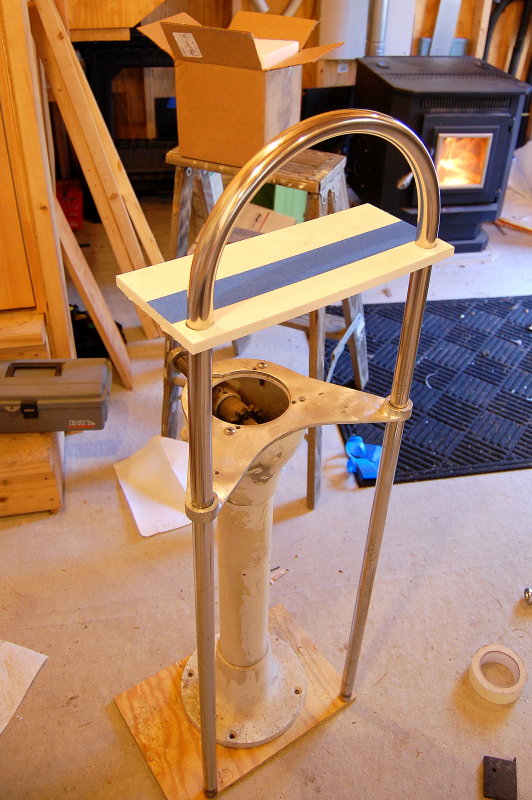
Mocking It Up In The Shop
I know most of you don't have a spare pedestal kicking around, to do mock ups with, but with careful on-boat measurements you can easily figure and calculate your needed height. Here you can see why this factory OEM Edson guard was simply too short. The mounting plate is where I needed it to be in order to have good visibility for the compass and this left too little room for a hand hold..
You will need to measure to the top of the compass dome and then add about 4-5" clearance between compass top and the bottom of the mounting plate. This height will vary slightly depending upon your physical height.
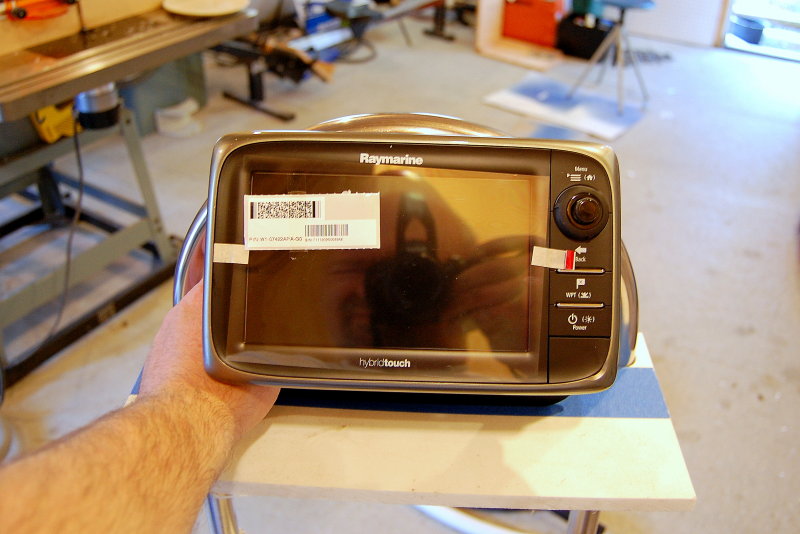
e7D Installed On An Ericson
This was one of the original prototypes holding a Raymarine e7D. This owner had a very, very tired pedestal and he went hog wild on an all new set up.. New complete steering pedestal, new SG10 guard, new plotter, new folding wheel , new compass etc. etc..
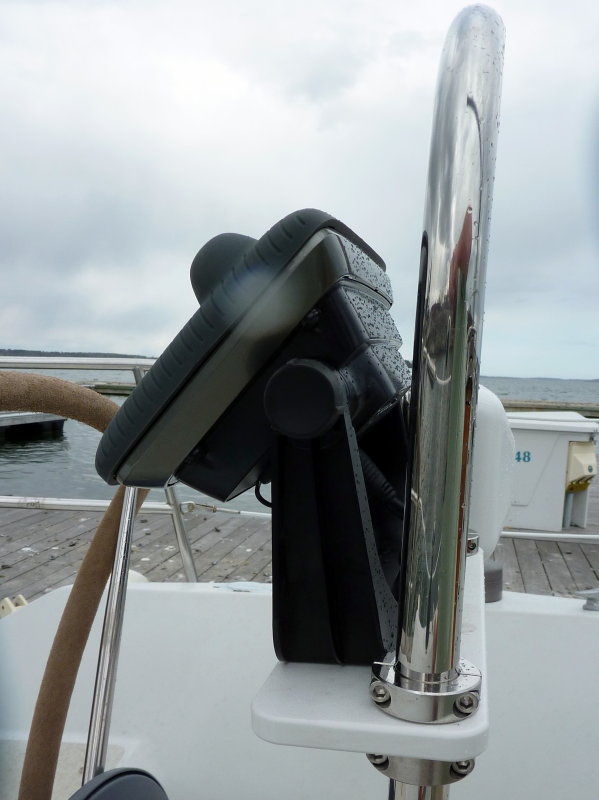
Side View
The original plate design was narrower but I have since made it deeper to accommodate a wider range of plotters.
Total Cost for the mount comes in at:
1 - Compass Marine Mounting Plate = $58.25
4 - 316 SS Clamp Collars = $128.00 ($68.00 if using 303/304SS)
This is another optional plate I can do. I call it the wing plate. You could drill the wings for cup holders, mount a phone holder, iPad holder or even a swivel NavPod for an AP or wind/depth/speed display as is shown. Email me if you are interested in one of these plates; compassmarineservices at gmail dot com
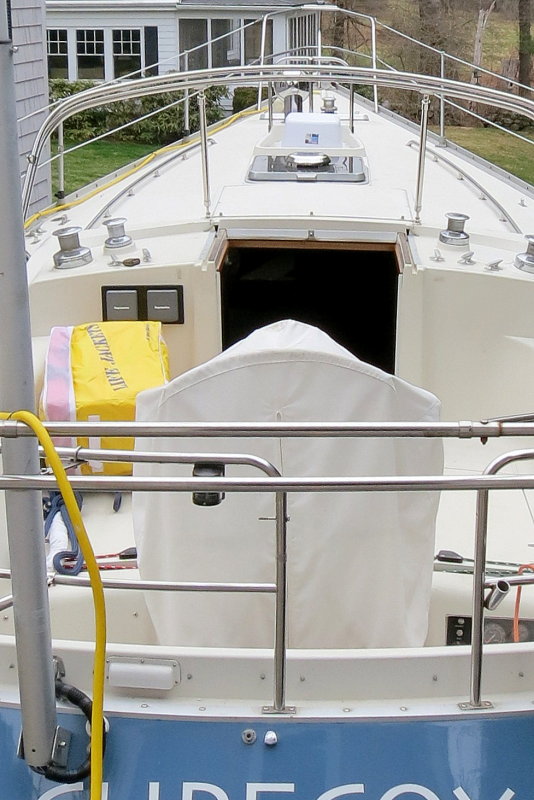
Cover Your Pedestal
I am constantly amazed at the sheer number of sailors who don't cover their pedestals when not in use? Any canvas maker can make you a pedestal cover that will literally pay for itself in reduced UV and water damage. Compasses, pedestal paint & electronics are expensive and none of them like constant exposure to the elements.
Pedestal covers prevent moisture ingress, limit UV damage and keep your gear out of sight, out of mind for thieves.
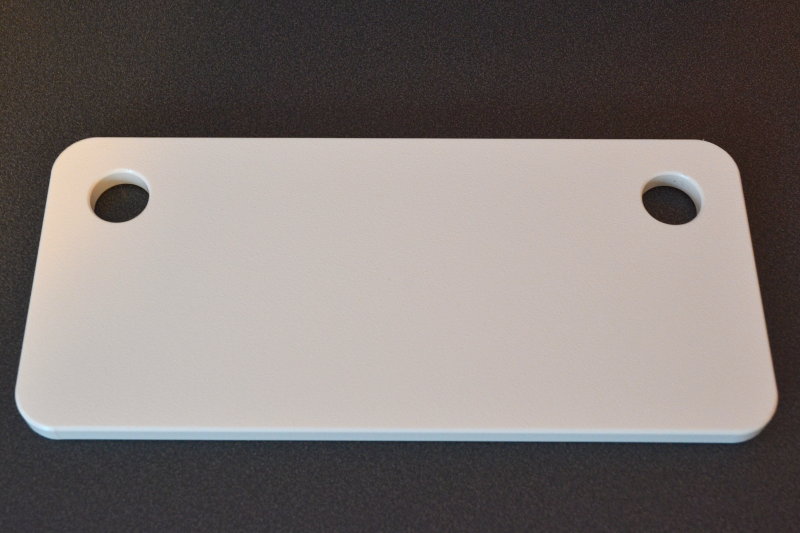
Pedestal Guard Mounting Plate
We make these mounting plates, by hand, and sell them on the new site.
Like what you saw or read in this article? Was it helpful? Could the information save you some money? Would you like to see more articles like this?
If so feel free to donate, support the site, and keep it growing. Please DO NOT feel obligated at all. If you like it and want to make a donation, please do. Your donations help keep the content coming and also help keep it FREE.
Click the DONATE button below if you would like to make a donation via PayPal.