MAY-2006
Clean Up The Surface
To clean up the residue I used my "boat chisel". My boat chisel has been sharpened to minimize scratching the surface. If you're not skilled in the use of a chisel or dulling or sharpening them the right amount, find another way of removing the vast amount of sealant or you could scratch your hull.
Once I had the majority of the surface clean I used Paint Thinner (it works well on butyl) and then Acetone, with chemical resistant gloves on, to do a final cleaning.
MAY-2006
Phase 3 (optional) - Cabin Side Compounding
While you have your ports out you may want to take the time to compound and polish the cabin sides. It's much easier without the ports getting in the way. I simply used Gorilla tape on the inside of the cabin to seal off the port openings then buffed away.
For the compounding phase I used a Makita 9227C buffer at 600-1500 RPM, Presta Ultra Cutting Creme compound and a 3M compounding grade pad part #05711.
For the polishing phase I used a Makita 9227C buffer at 600-1500 RPM and Presta Chroma 1500 polish with the blue wool Presta polishing grade pad.
MAY-2006
Taping Off The Inside
Here's a shot of the Gorilla Tape (duct tape) I used when compounding the cabin sides to prevent a mess inside the boat..
MAY-2006
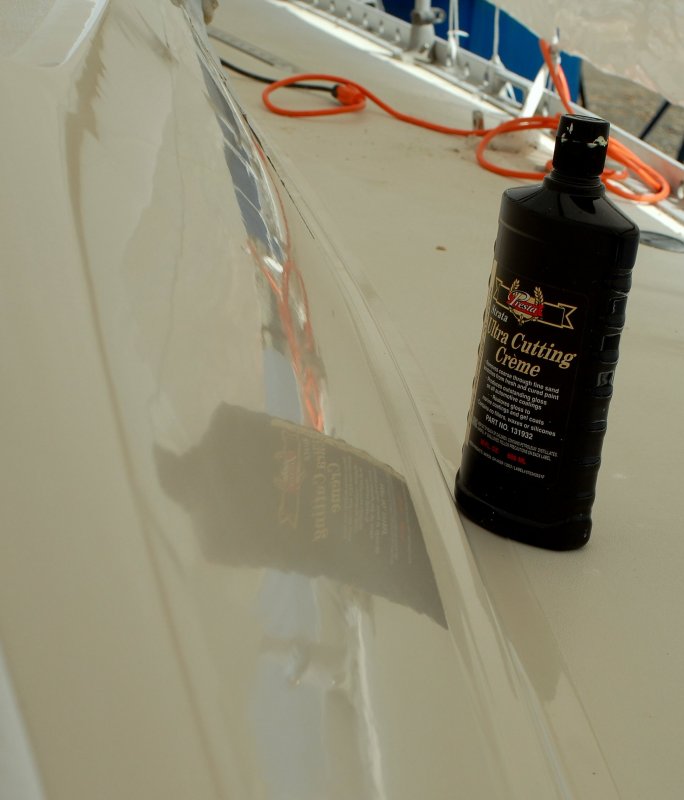
Polishing The Cabin Sides Before & After
There's no doubt it's well worth it to take this extra step!
MAY-2006
Temporary Duct Tape To Cover The Openings
Here's another tip, this one for keeping your boat dry while the work is in process.
I chose to remove all the old ports then prep, cut, drill, chamfer and bore the openings all at the same time but needed a way to keep the boat dry as I was going through the installation process.
I have been using Gorilla Tape from the makers of Gorilla Glue and it is far and away the finest duct tape made. It's thick, does not leave much if any residue, and sticks tenaciously to just about anything.
To seal the port openings, until you can install the ports, start at the bottom of the port opening and work your way up like clapboards on a house overlapping each seam by about 1/2". If you worked your way down water will get in but if you tape from the bottom up the seams over lap so they don't drain into one another.
Even though my boat is covered I didn't want to take any chances, and yes this stuff will keep rain out!
MAY-2006
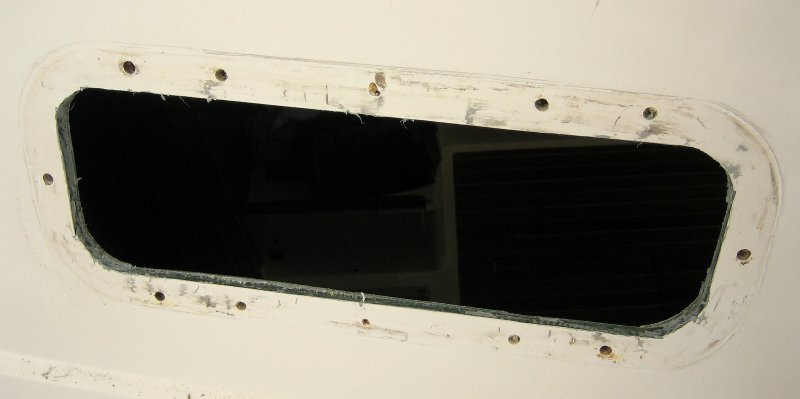
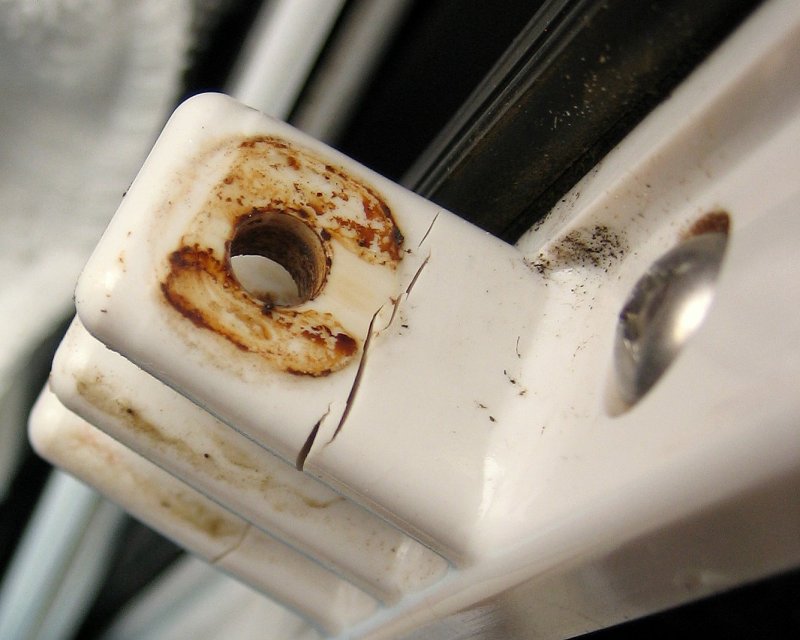
Why I NeededTo Replace My Ports
After 29 years the plastic had become quite brittle and many of my hinges looked like this or worse. I won't have to worry about the NFM cast stainless steel ports degrading or becoming brittle.. ever!
MAY-2006
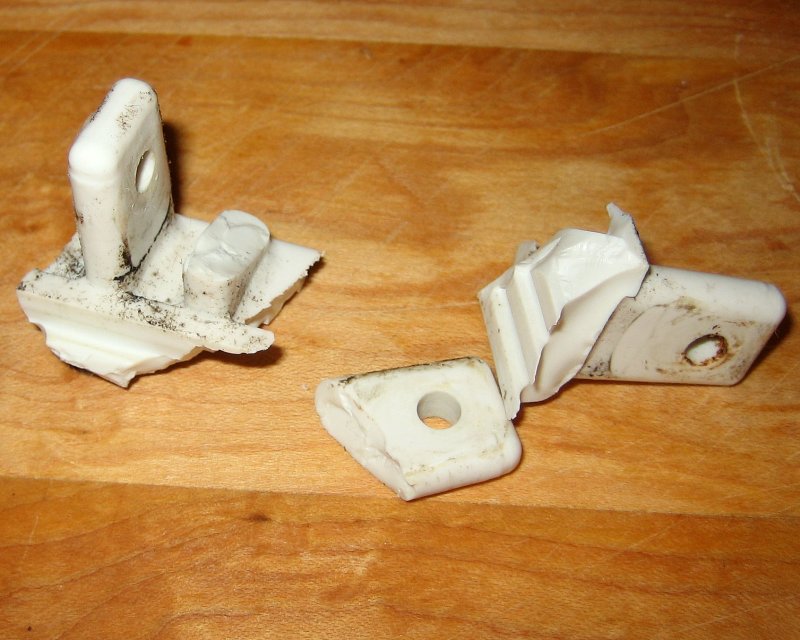
Why I NeededTo Replace My Ports 2
As I said some were worse! This hinge literally fell apart after I removed the port. In defense of Beckson these plastic ports lasted almost 29 years but should have probably been replaced about ten years ago.
It should be noted that these Beckson ports were no longer safe for any sort off shore sailing. One big wave surely could have broken them, in the brittle state they were in, and allowed your boat to take on green water..
MAY-2006
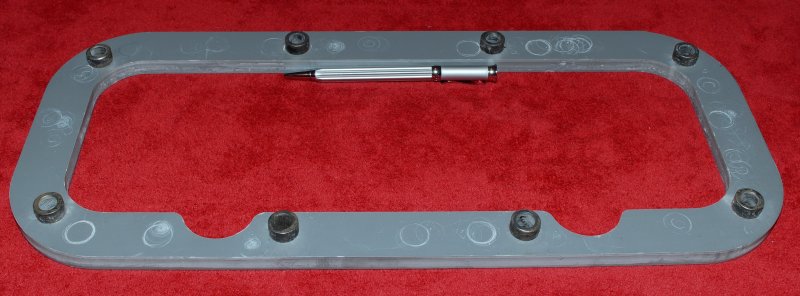
Phase 4 - NFM 4X14 Template With Drill Guides
This is the actual template from NFM. They charge you for it but when you return it they will credit back your $90.00.
Installing these ports without one is just being penny wise and pound foolish, so don't do it.
As you can see from the photo these templates are very heavily made and have built in drill guides which make drilling straight holes, through angled cabin sides, very easy. I have included a pen in the photo to show how robust these things are.
Please plan ahead when buying from NFM as they often run out of templates. I waited almost 5 months to get one and came very close to not buying NFM ports because of this!
Oh, and if you do use a template, please send it back when you're done so others don't have to wait eons to get one...
MAY-2006
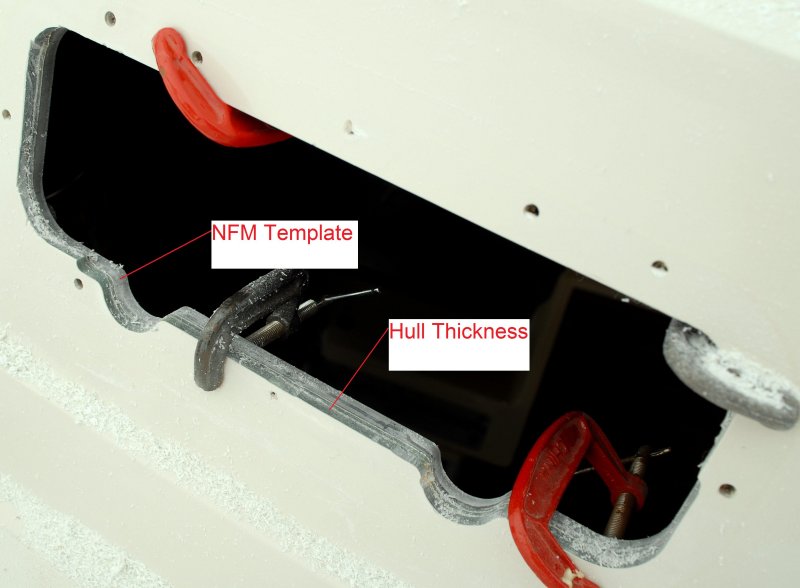
Template / Guide & Hull
For the next step I needed to cut the openings for the NFM ports slightly bigger than the Beckson's had been and also accommodate for the spigot. I used the NFM Template (shown in the previous photo) which, as I said, is a must have item for this job.
To cut the openings I chose to use the NFM template as my router guide and use my Ryobi laminate trimmer with a bearing guided flush cut bit. Using a jig saw, hand saw or sanding drums just seemed like an awful lot of work!
This photo shows the template clamped to the inside of the cabin and a partial routed edge. Make sure you clamp tightly!
MAY-2006
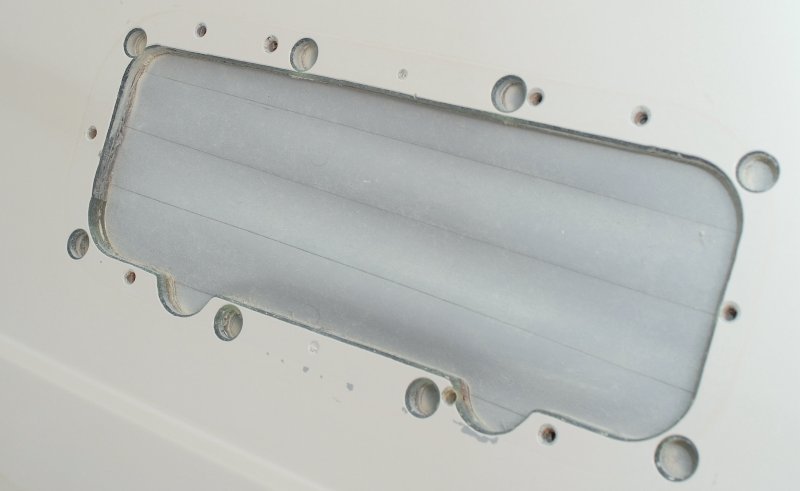
Cutting The New Port Openings
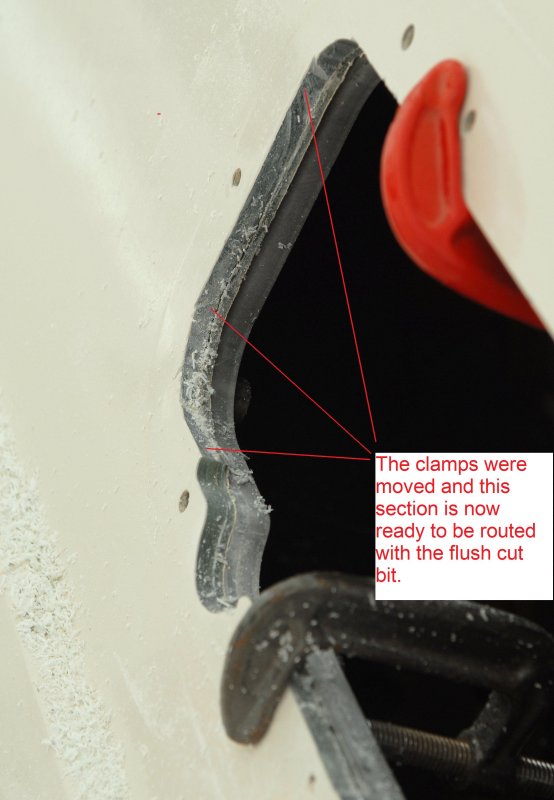
In order to get the laminate trimmer around the entire opening you'll need to move the clamps as you go. Just cut a section them move the clamps. I was able to cut an entire port with only three clamp moves and the template stayed put.
As evidenced by the photo, using the flush cut bit and the NFM template as a guide, leaves a perfect cut that looked better than the original factory openings..
MAY-2006
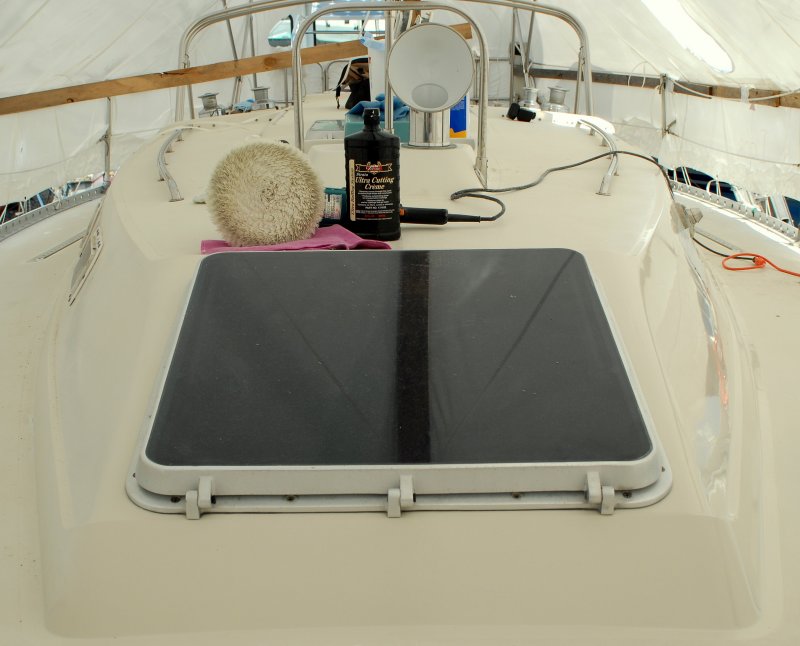
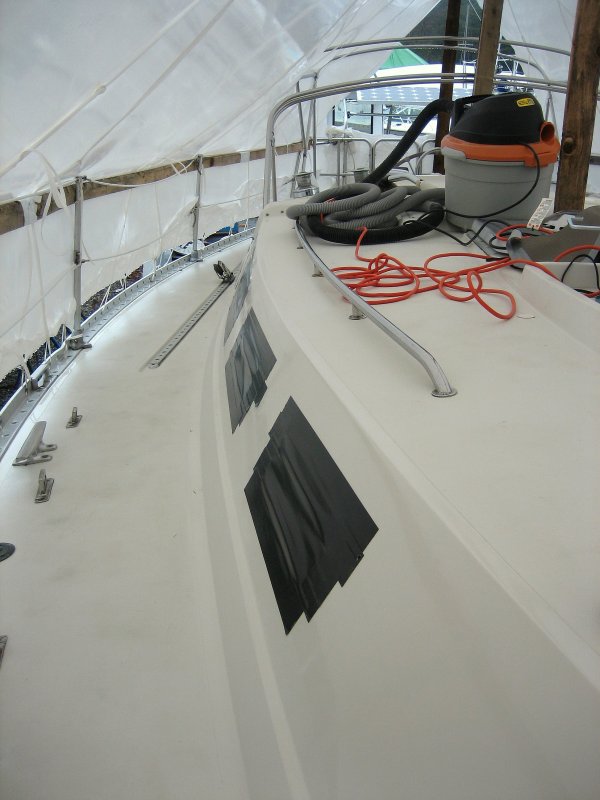
Vacuum Tip
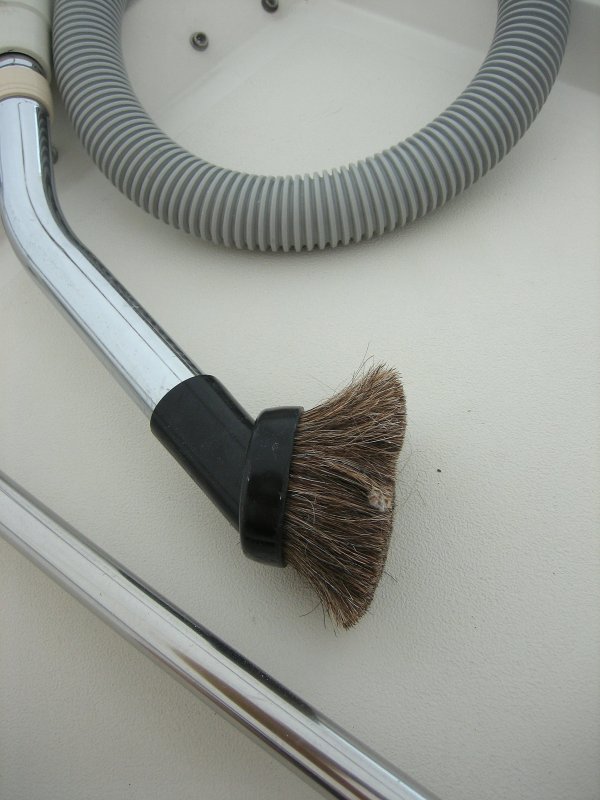
I know this has nothing to do with NFM portlights but the Rigid 6 Gallon wet dry vacuum, from Home Depot, at $39.00 is a great investment for working on your boat! I actually got rid of my big shop vacuums and now have three of these 6 gallon models. One for the barn, one for the garage and one for the boat!! It's tiny, powerful and easy to lug up and down ladders.
I always ditch the hoses that come with shop vac's and visit a local vacuum shop for an adapter and about 20 feet of central vac hose. This makes using a cumbersome shop vac a pleasure. The home attachments are better too. The horse hair brush (pictured) is one of my favorites. Within 25 minutes I had totally cleaned my interior of all the routing dust with the horse hair brush and the central vacuum hose.
I love this combo, so I thought I'd share.
MAY-2006
My Ryobi Laminate Trimmer / Flush Cut Bit
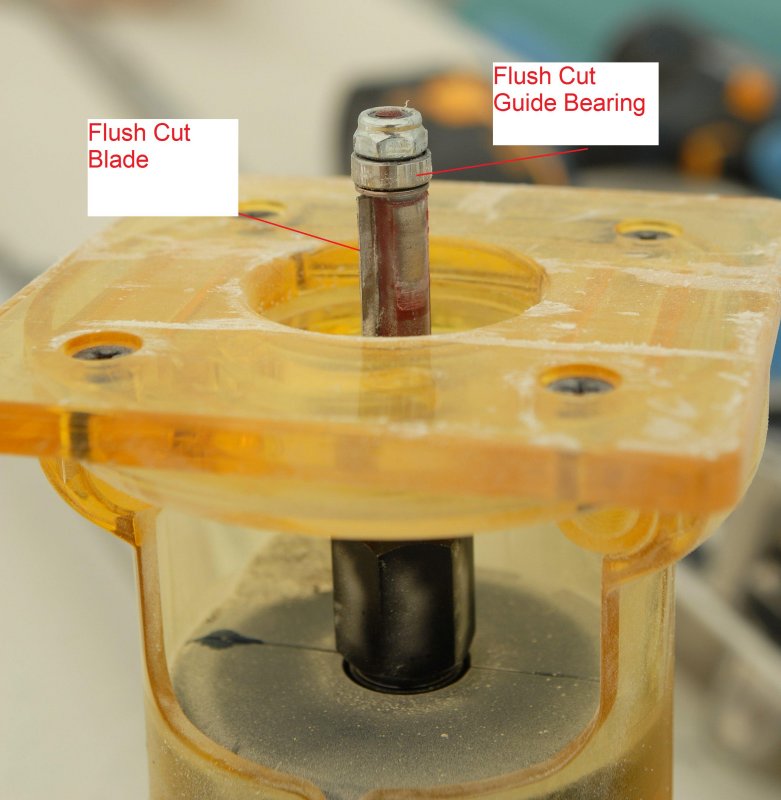
Here's a close up of my laminate trimmer. The base of my standard Porter Cable router was just a bit large for cutting these port openings. Unless you have lots of flat cabin side real estate on your particular boat use a laminate trimmer. The base of a laminate trimmer is nice and small and it worked very well, on our boat, when used from the outside. The cabin liner on the inside interfered with the base this is why I chose to cut from the outside.
Basically, once adjusted for proper depth of cut, the guide bearing rides along the surface of the template and the blade cuts the fiberglass. It's quick easy and neat but NOT clean.
I advise having a shop vac on board for this job. No matter how you try and contain the dust it makes a HUGE mess. One other tip is to remove your interior cushions before doing this job..
*******CLICK BELOW FOR PAGE 3*******