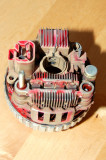
In this photo you'll notice a 2" long brad nail stuck into a tiny hole next to the brushes. This is how you retain the brushes to re-install the rotor. I found this 2" brad nail to be the perfect tool to retain these brushes.
Unfortunately with many of these dual internal fan Japanese style alternators the voltage regulator and brush assembly is all one unit. The voltage regulator and brush assembly is also soldered directly to the stator. While not hard to replace it is more of a pain than the bigger Delco or Hitachi style alternators.
Fortunately for me this one is still in perfect condition and operating flawlessly. I'm sure it will run a bit cooler now that I cleaned all the dust and grime out of it too.