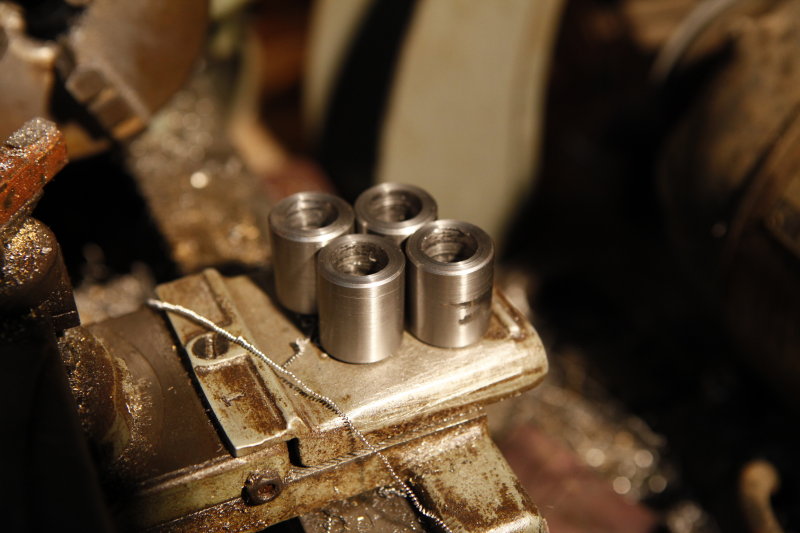
30-SEP-2012
Lathe work is done
All four hinge pieces are complete with the exception of the final reaming.
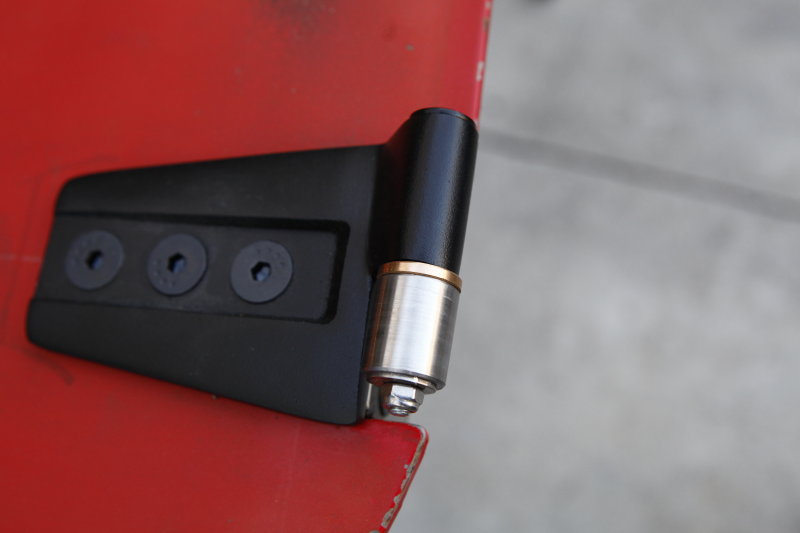
02-OCT-2012
Hinge bushings ready
I got the the bronze bushings installed in my new hinge parts after opening up the holes with a reamer. Thanks go out to my brother who got me a the reamer that I needed to open up the final inside diameter to the exact measurement that I needed for the OD of the bushing.
Next step is to make the pieces that weld to these hinge pieces so I can bolt them to the door jambs that will allow me to hang my doors.
03-OCT-2012
Mating hinges all tacked up!
Finally! I got the hinge parts complete and now all tacked together and the best part of it is that the doors open very nice and smooth. I will finish welding the hinges together and then attack getting the doors (that seem twisted) aligned in the tub.
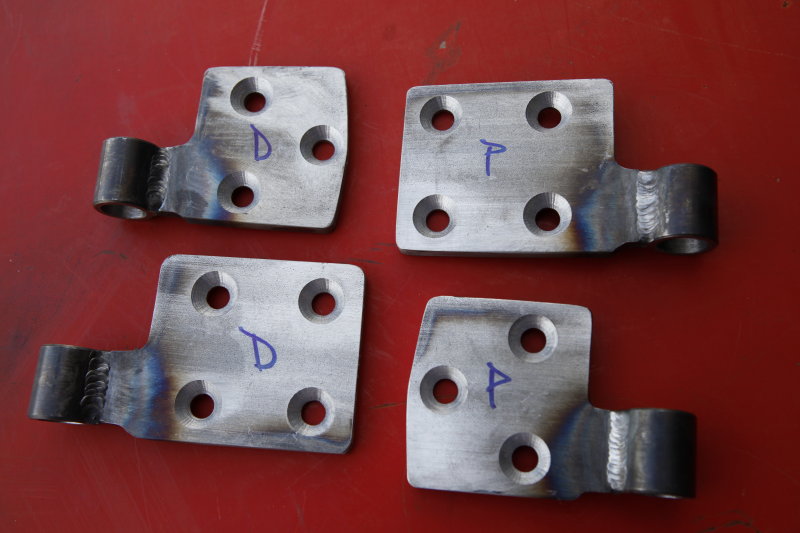
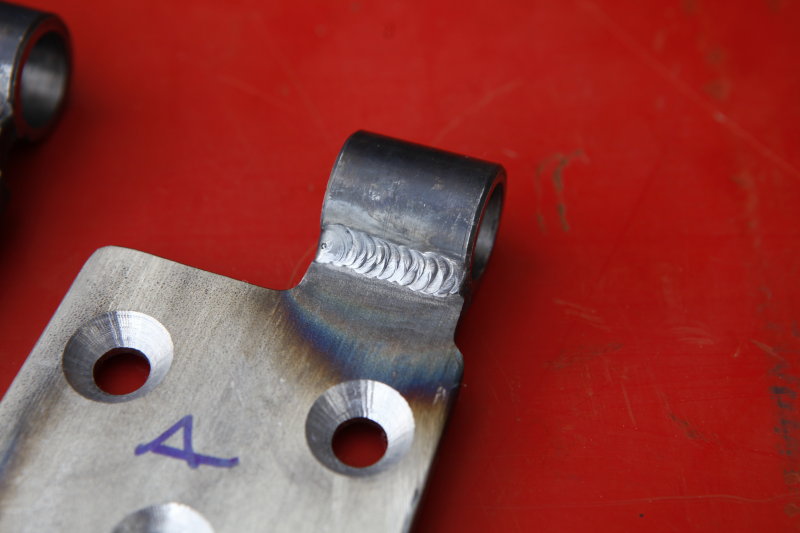
06-OCT-2012
Complete set of hinges done
I welded up all of the hinge halves and countersunk all of the mounting holes to accept the new flathead socket bolts.
06-OCT-2012
Nice strong welds all the way around
I welded the hinge halves all the way around with a nice strong weave pattern which should make a good solid and strong hinge. After the pieces cooled down I had to chase the hinges with the reamer so that the bronze bushings would fit.
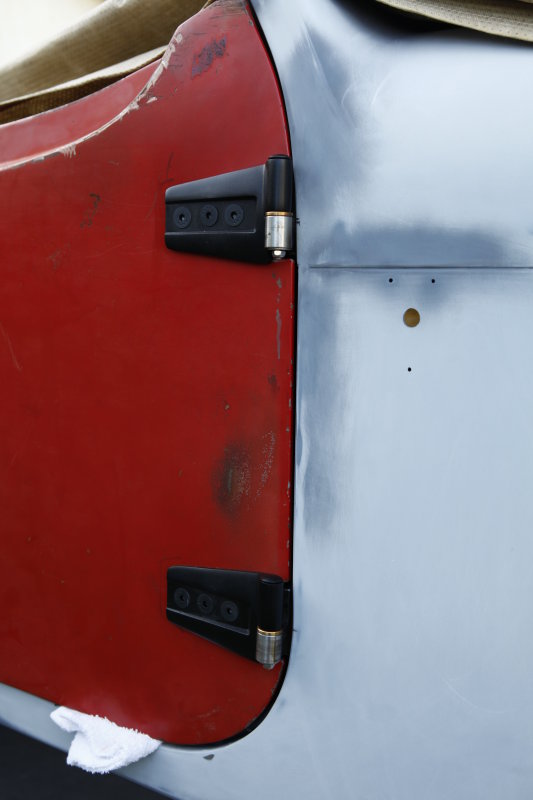
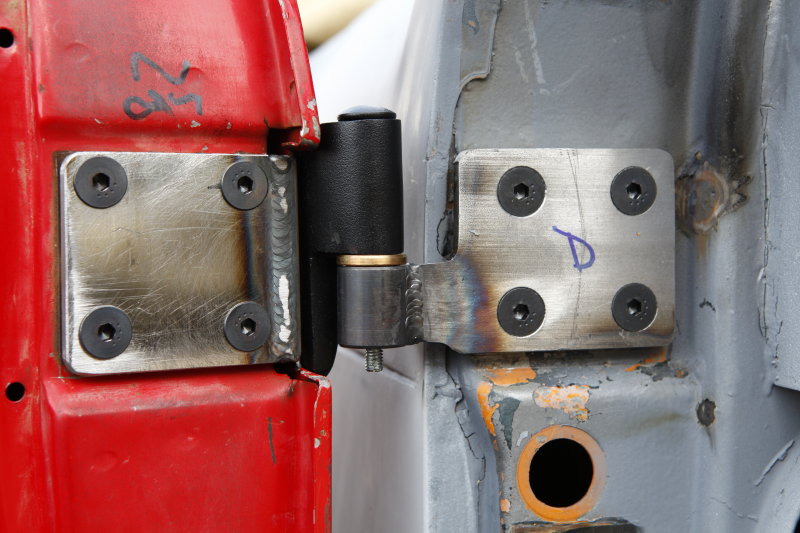
06-OCT-2012
Hinges installed and doors hung
I installed all the hinges and got the doors hung, now the task of getting the doors to sit right when they are closed. For some reason both doors seem to have a slight twist to them that makes them not sit very well. Time for a little manipulating!
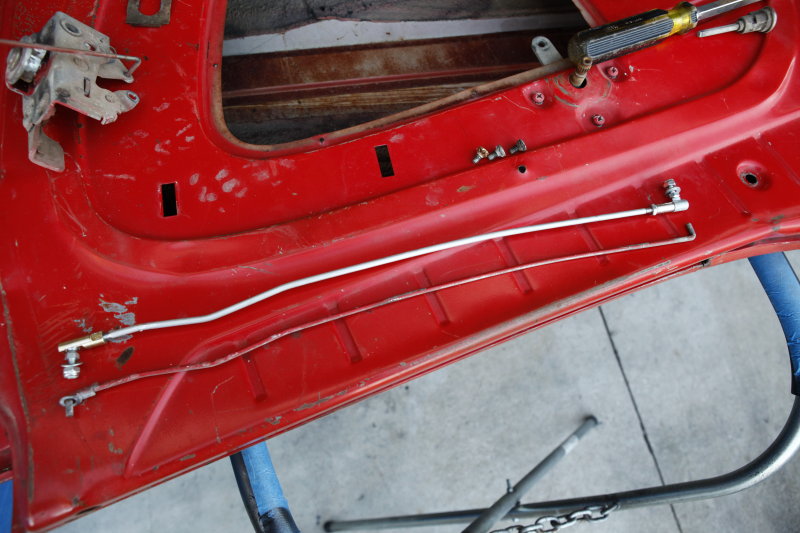
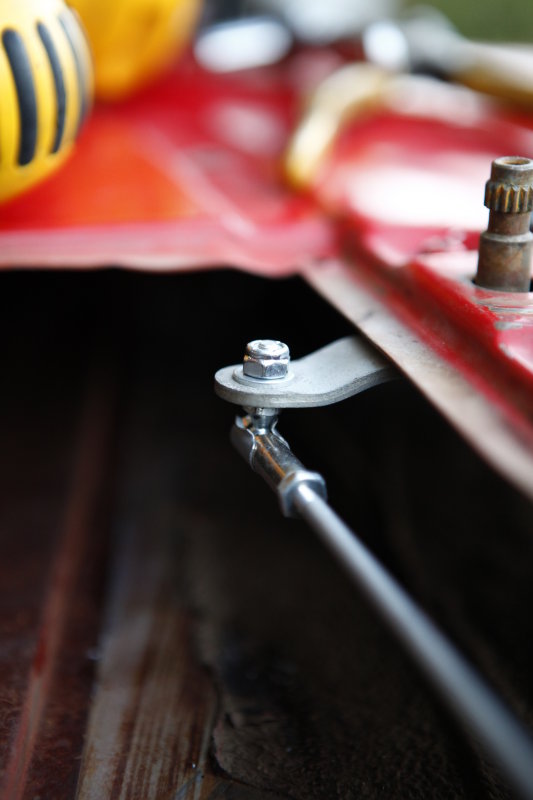
07-OCT-2012
New linkage for the opening lever
On both of my doors I am missing the plastic bushing and the clip that holds the linkage rod to the lever. I didn't think that I would be able to find the clips anywhere so I came across some linkage that actually is the perfect length with adjustable ball joint ends. I bent it to the exact bends in the OEM linkage and it will work out great.
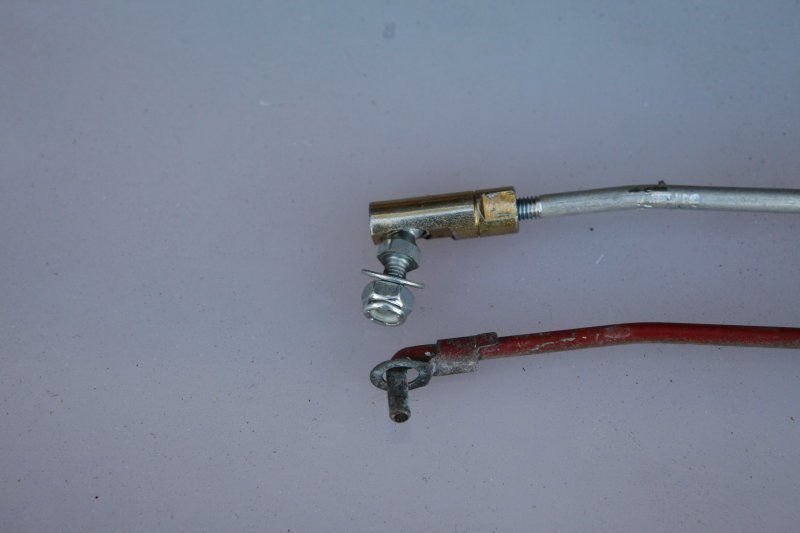
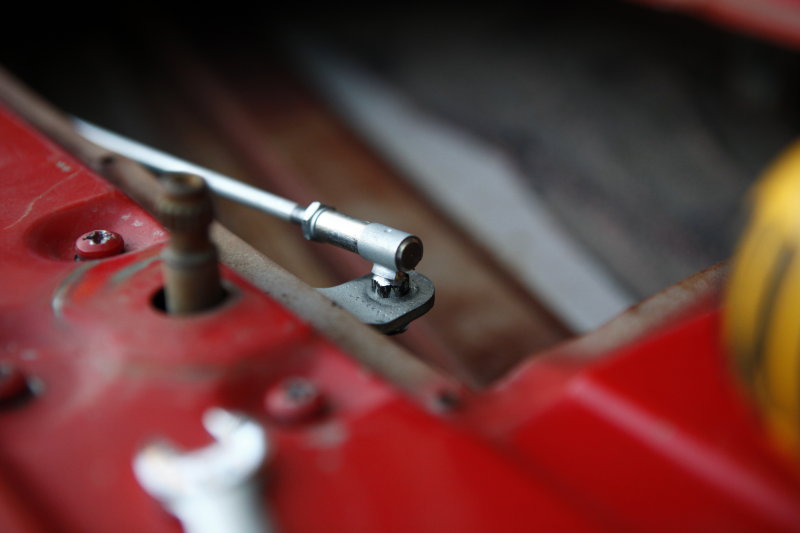
07-OCT-2012
Closeup of the linkage ends
Since the rod is used in an industrial application the ball joint ends should be good and strong.
07-OCT-2012
Ball joint fitting mounted
One end of the linkage has a removable ball mount and the other end has a fixed ball mount. the link rod has RH and LH threads so that the rod can be adjusted in place without removing the ends.
07-OCT-2012
Ball mounted facing up
I bent the bracket that the opening lever mounts to for clearance so that I could mount the ball facing up.
07-OCT-2012
Turned the mount upside down
For clearance purposes I turned the mount upside down. The clearance is much better with the ball mount mounted inward.
09-OCT-2012
Door caps installed
One of the modifications that I visualized for my doors was that I wanted factory half doors. I also want to make some soft upper doors with zippered windows to use with the soft top. I had previously gutted the windows and wind wings from the doors to prepare them.
I had time tonight after work to cut the material for both doors needed to seal up the door tops. My doors are a little messed up so both doors measurements are completely different for each window slot.