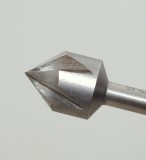
So why on earth do I countersink or chamfer the deck side of the skins?
#1 It does a lot to prevent gelcoat crazing. By feathering the edge of the gelcoat, through the use of countersink bit, you are now a lot less likely to start a crack or craze mark in the gelcoat. Gelocat is an un-reinforced product and because of this its prone to cracking. Sharp right angle holes are a good place for these cracks to begin when you tighten the deck hardware and potentially flex the substrate. Beveling the edge of the hole or feathering it limits the ability of the crack to begin or start. This is why you often see holes drilled into plate glass that will have beveled or rounded edges too.
#2 By creating a bevel or countersunk recess in the surface of the deck the marine sealant or butyl tape has a cavity to fill. Without a bevel the hardware would compress the sealant to about 1/64th of an inch thick after the fasteners are tightened. Marine sealants do have some flexibility but not as much as you would guess. Follow me for a moment; Let's say you have a marine sealant that has a rating of 400% elongation before break on a 1/64" thick joint. Simple math shows you that 400% of 1/64" is only 1/16" of total allowable joint movement before a joint failure or leak starts. In the case of a stanchion base 1/16" is not much allowable movement before failure.
#3 By countersinking around the bolt holes you increase the maximum thickness of the sealant, at the bevel, to roughly a 3/32" depth at it's deepest point. Using the same math as above 3/32" X 400% gives you a total joint movement before failure of 3/8". If a mechanically fastened joint is moving 3/8" you have more problems than just a deck leak! So 1/16" allowable movement before failure at 400% without countersinking or 3/8" allowable movement at 400% before failure with countersinking. Even a small bevel will drastically increase max allowable movement before failure. Countersinking to a mere 1/16" depth will give you 1/4" total movement around the bolt before failure. You don't need a deep bevel to make a large difference between a failure and a seal.
#4 Countersinking is a no brainer and has many many benefits. For instance, you can install the fitting and tighten it down NOW with no waiting and you can seal deck hardware alone.
I am going to inject some strong opinion here so please move on to the next photo if you don't want to hear it.
I truly dislike the Don Casey "two step", "wait to tighten until cure and form a gasket" method of bedding deck hardware. Believe it or not, I'm not a conspiracy theorist. I do however feel as if Don wrote that technique to guarantee boatyards future revenue. (grin & wink) This is NOT to say that it can't work though. It certainly can and does work. The problem with the two step method, using a marine sealant, is this;
Can the average DIY or yard employee get repeatable results that are reliable and consistent? The answer to that is very often no.
This is NOT about the idea of forming a layer of sealant between the fitting and deck being a bad idea, but rather about the EXECUTION and installation which can be very difficult to perfect and get repeatable results.
Think about it. If the sealant cures, to form a "gasket", and you then move the bolt while tightening it down on the "second step".... It can break the seal and leak... If you create a gasket too thick, and then can't get the mechanically fastened hardware tight enough against the deck, because of compression resistance, the hardware will move, and the sealant will eventually fail, so again, it can leak. If you don't let the material "kick" just right, which is very difficult to predict, it can all squeeze out and again it can leak.
Honestly, I mean no disrespect to Don Casey, he is a great guy and he writes excellent, excellent articles and books that have helped many thousands of boaters. Sadly that method is flawed in execution something that is very hard to predict. The two-step forma gasket method is one of the most difficult procedures to properly execute that I've read in any sailing/boating related book especially when applied to the average DIY attempting it.
On another note Don Casey has recently recommended using butyl tape. This was in a boat US article and he even weent so far as to link his Boat US article to the article you're currently reading.. Marvelous!!!
Sadly I have witnessed far too many cases of core rot due to the DIY & professional "two step" bedding procedures than I would have liked to. The big problem is that these sealants are moisture cure and you really have no way to know what state of cure they are in. The edges of a fitting may be at the right state but the middle of the fitting still wet & unchanged. Getting even cure distribution is extremely difficult.
With Bed-It Tape it is more "one step" because the consistency of the product is not changing and all your doing it tightening slowly, over time, to let it "displace" out from under the fitting.
So where did I lean the countersinking method? I learned this from a worker at Hinckley Yachts back in the 80's. Morris, Sabre and other top quality builders have known this secret for years but many of the big production builders are still either too cheap, or just don't know about it. This extra step takes all of about 30 seconds per deck fitting but apparently it's too much "extra" work for most builders.
OK I'm done with my rant...for now...