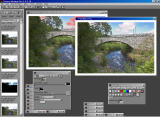
Setting the overlay to only 40% in the previous step left the clouds too washed out, so I repeated the composite transformation using a mask that only selected the clouds. Used the mask tool, color/contract to pick up the clouds, painted to adjust things to where I selected what I wanted out of the clouds. Then I save that mask, use combine to re-apply it, blur it, and the reapply it with the "Overlay" combination mode to sharpen up the edges (and avoid messing up the fence railing and light poles). Once I have the mask where I want it, I redo the composite/overlay at 60%, and that overlays the clouds more strongly from the original RSP-sky-processed image. These clouds have more detail in them, but still have posterization and color shifting issues that I'll worry about next.