photo sharing and upload picture albums photo forums search pictures popular photos photography help login
Compass Marine How To | all galleries >> Welcome To MarineHowTo.com >> Making a New Stereo Cabinet > The Finished Product
previous | next
05-FEB-2010

The Finished Product

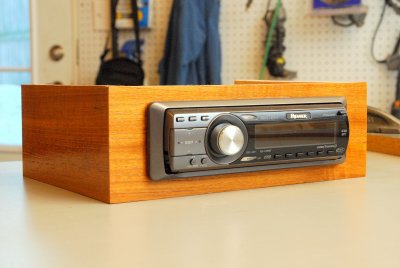
Ok not technically "finished", as I will put a few more coats of varnish on. I wanted to complete the wiring and fitting first then I will sand and add a couple more coats. I've learned over the years that a coat or two in the shop is not a bad thing as it prevents handling stains from greasy fingers or some errant grease on a work bench that can mess up a beautiful piece of teak.


Over all the whole thing took me about two hours to complete but certainly looks a lot better, IMHO, than the plastic stereo housings sold at West Marine etc.. This is an easy way to learn veneer work and a cheap enough project that you don't go broke on teak veneer if you mess up. A 2' X 4' sheet of quarter sawn teak veneer from Boulter runs about $33.00.

Nikon D200
1/60s f/8.0 at 38.0mm iso1250 hide exif
Full EXIF Info
Date/Time05-Feb-2010 15:44:41
MakeNikon
ModelNIKON D200
Flash UsedNo
Focal Length38 mm
Exposure Time1/60 sec
Aperturef/8
ISO Equivalent1250
Exposure Bias
White Balance
Metering Modecenter weighted (2)
JPEG Quality
Exposure Programprogram (2)
Focus Distance

other sizes: small medium large auto
share
Peter F 20-Mar-2015 15:02
Would also like to know best way to mount something like this to a fiberglass cabin liner. Thanks.
Chris OCallaghan 23-Sep-2013 15:40
I'm a great fan of your work. i've used your tutorials on seacocks, backing plates and diesel polishers, and am about to try the stereo cabinet one to build an enclosure for my vhf and ssb radios. I do have one question that I hope you will be kind enough to answer: what is the best way to attach the completed cabinet to an interior fiberglass liner? Many thanks.
lance11peter13-Aug-2013 09:50
Where on the boat was it mounted?