


|
|
|
|
|
|
| |
| 02-JUL-2008 | |
Here is the same diameter hole made using the same brad point bit only this time I started the cut with the drill in reverse mode not forward. You'll notice that it did not even tear the paper. If it can make this clean of a cut in paper it will make a very, very clean cut in the surface of your NavPod or gelcoat or teak or what ever surface you decide need a hole in it.
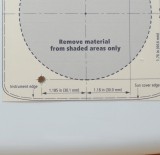
Step#6 When using a hole saw pre-drill the arbor hole using a 1/4" brad point drill first. This will ensure your hole is perfectly centered over the X on the template and that the instrument hole will line up with the mounting screw holes.Most all hole saw arbors use a 1/4" bit whether it's a Starrett or a Lennox but do confirm your hole saws arbor bit size first.
Step #7 When using a hole saw, like when mounting Raymarine ST-60 series instruments, start in reverse then switch to forward. This will give a nice clean entry with no chipping of the plastic.
Step #8 Use the absolute SLOWEST speed your tools will go and if the plastic begins to melt stop, let it cool and then start again. I used my air compressor to blow the chips away as I cut and to keep it cool. It took about 5 minutes to rig the set up so that it would automatically blow where I was cutting. If you have an air compressor this may be worth while. A simple 3.5" hole, like for an ST-60 gauge, may take as long as 15 minutes to cut while trying to prevent melting of the plastic. Patience is a virtue!!
© All Images property of Compass Marine Inc.