


|
|
|
|
|
|
| |
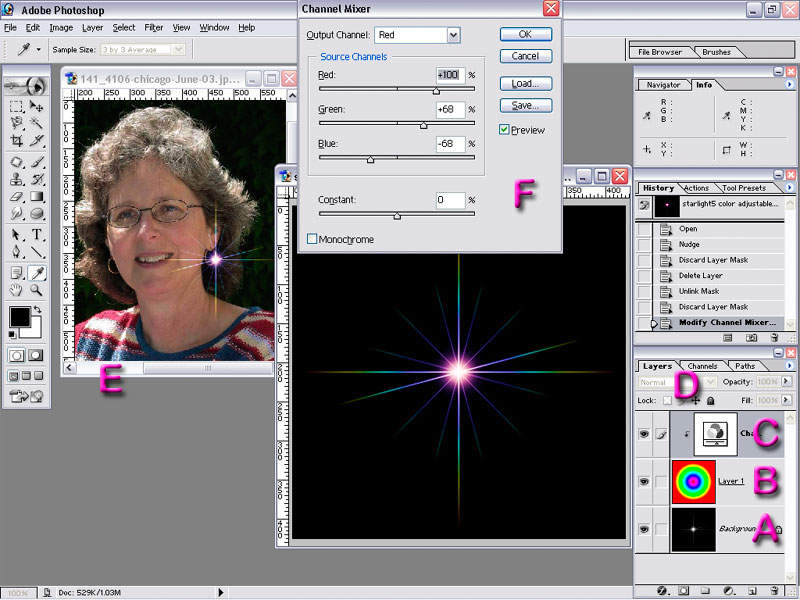
1. Open picture of black and white star pattern (A)
2. Make New layer (B), fill with radial gradient (I chose the SPECTRUM pattern) centered over the star. Change layer blending mode (D) to OVERLAY.
3. Add Adjustment layer (C), Channel Mixer, Group with previous layer ((Leave Layer blending mode (D) NORMAL. I don't know if this actually makes any difference, but NORMAL works))
4. SAVE AS the layered PSD file for future use.
Now to apply the star to a picture:
5. Open target picture for which star is to be applied (E).
6. Return to star picture and adjust the Channel mixer colors (F) to compliment the target image.
7. Flatten the Star picture.
8. Drag it onto the target image.
9. Change star layer blending mode to LINEAR DODGE to hide the black background
(The other modes LIGHTEN, SCREEN, COLOR DODGE can be tested for variations)
10.With star layer active, EDIT>TRANSFORM> move to desired position, adjust scale and shape.
11.Finally, if desired, adjust the opacity of the star layer to soften the effect.
© Joseph E. Filer