


|
|
|
|
|
|
| |
| 24-JAN-2011 | |
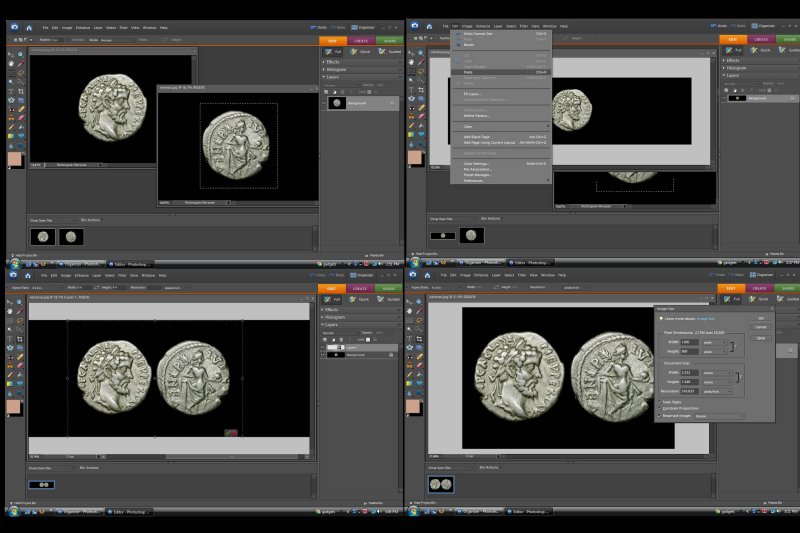
20. As promised, I will close with basic instructions on how to combine obverse and reverse photos into one file. This can be done with most photo editing programs including many that come packaged with cameras and freeware available online. My samples show the use of Photoshop Elements which is what I use for my photo needs.
First (upper left), process the two images separately so they are pleasing to you and match each other. Then, using the selection tool, copy the reverse image leaving minimal border on the left side that will be next to the obverse.
Second (upper right), enlarge the canvas size of the obverse so there will be room for the reverse next to it.
Third (lower left), paste the reverse that you placed on the clipboard in step one into the space you created in step two.
Finally (lower right), crop away the unused background areas. I always crop into a 2:3 proportion since this will allow easy printing of 4x6” prints which I usually order without danger of cutting into the coins. If you only intend to use the images online, you can crop to any shape wanted.
Obviously the exact controls for each of these steps might be a little different depending on which of the hundred different image processing programs you use.
Please login or register.