Start here: Select
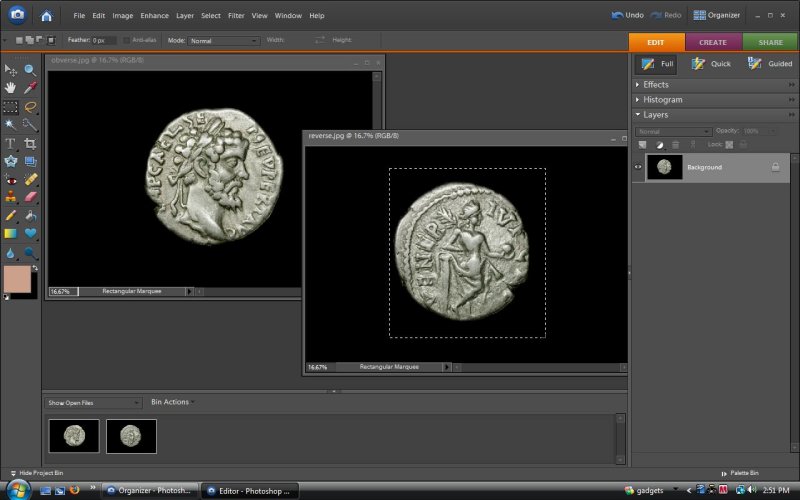
Open in the editor both the obverse and reverse image of the same coin. Use the selection rectangle tool (toolbar on left edge of screen, third down) to draw a dotted line around the reverse taking care not to leave much space on the left side.
Copy Reverse
Copy this selected area using either the pull down edit menu or Control-C.
Enlarge Obverse Canvas
Click in the obverse image to make it the active window. Using the Image pulldown, select Resize Canvas and make the image wide enough to receive the reverse you copied. I enlarged it here by 4444 pixels since that is easy to type and oversize for all images. It makes no difference what size you use or if you tell the program to put all the extra on one side since you will soon be cropping it down.
Paste Reverse in Obverse Image
Paste the reverse using either the Edit Pulldown or Control-V. The pasted image will appear on top of the obverse but can be dragged where you want it with the mouse. This is a last chance to straighten either image if crooked and adjust brightness or color if they don't match and you have not already taken care of these problems.
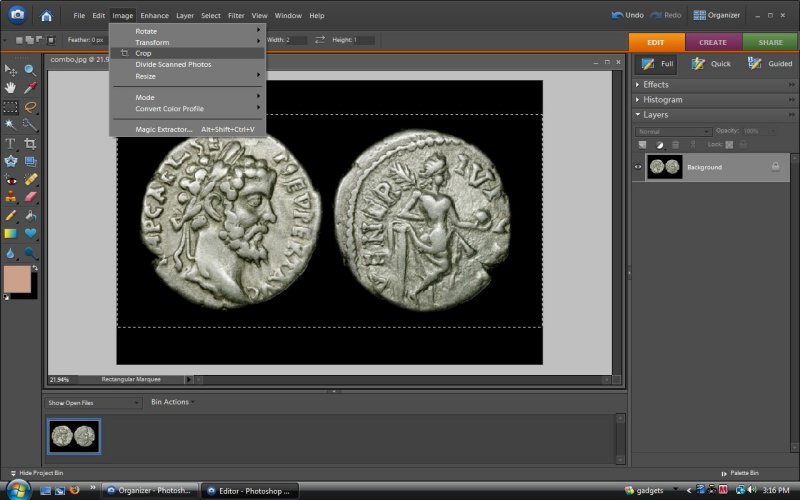
Crop Away Surplus Background
Now its time to trim away all the surplus background we created in an earlier step. I get my prints made at a place that makes 4"x6" size prints so it is important to have enough background at top and bottom that the printing equipment doesn't crop into the ends of the coin. The proportions of the print need to be a 3:2 ratio so there will be background to print above and below the coin. Having set the crop tool to keep 4x6 proportions, draw a crop box around the coins and slide it around until you see what you want saved. Accept the crop by clicking on the check mark in the corner.
Flatten Image - Eliminate Layers
Up to this point the two sides of the coin have been kept separately, the obverse on the background level and the reverse as a layer above it. Note the window at the right showing the status of these two sections of the image. To combine the two pull down the Layer menu and click on Flatten Image.
Save the Combination
Save the completed combination in its full size by pulling down the File Menu and clicking on Save As. Type in a different name. If you leave Obverse in the box, it will save the combination in place of the obverse. Here I named it combo.jpg but in most cases you will give it a file name that will identify the coin. The next image is the full size result.
06-NOV-2008
The Full Size Combination
This is the full size file to be used for printing. If it does not look very large to you, be sure you are seeing the full size image by clicking on 'Original' under 'Other Sizes' below. Obviously it is of no use for web pages since you can not see all at once and the load time for dial up users would be terrible. The next pages address the process of making a reduced size image.
Resize for Web Use
To produce a more web friendly image size, pull down the Image menu and select Resize Image. Type 1200 in the width box and the program will fill 800 in the height box keeping the proportions in the 3:2 ratio. At the bottom of the dialog box is a check box Constrain Proportions which you could uncheck and force the image into whatever height you prefer but doing so would distort the image making the coins oval.
Crop to Web Format as Desired
Return to the selection tool used in the first step but this time use the Mode selection box choosing fixed Proportions and type in that you want the width to be 2 and the height to be 1. Draw a selection box by clicking where you want the upper left corner and (holding down the mouse button) drag to the lower right. Be sure to start and finish at the edges if you want the result to be the full 1200 pixels wide and 600 pixels high. The box position can be adjusted after it is drawn by using the up and down arrow keys. Pull down the Image menu and click on crop to eliminate everything outside the box.
Sharpen with Unsharp Mask
Enlarge the image to 100% full size by scrolling the mouse wheel or by pressing Control/Alternate/0 all at once. Resizing the image introduces some unsharpness in the small image which can be corrected using the Unsharp Mask tool found (moved for PSE6 - earlier versions had it under Filter) in the Enhance menu. The settings used for Unsharp Mask are a matter of personal preference and individual image situations. I frequently prefer to apply a weak setting like 40 two or three times rather than one pass at a highter number. I do prefer to keep the Radius at 0.3 and Threshold at 0 but there are books written on how to get the most out of sharpening tools and each can decide what they like. Be sure to evaluate results at 100% size (the first step on this page) or you may not see what you will actually get.
Save the Reduced Version
Save the smaller version with some compression to reduce file size. I often use level 7. After selecting this, you will see the box used before to name the saved image. Again you need to use a different name to avoid overwriting your large image. Here I called it reducedcombo.jpg which is the final product of this project and our next image.