photo sharing and upload picture albums photo forums search pictures popular photos photography help login
David Boyett | profile | all galleries >> Galleries >> Samsung DLP Color Wheel Replacement tree view | thumbnails | slideshow

Samsung DLP Color Wheel Replacement

Samsung DLP Color Wheel Replacement Procedure
HLR5067WX/XAA Version (Blank) = L3 Chassis (see label on side panel close to AV inputs)
Color Wheel Assy Samsung Part Number BP96-00674A ($139.47 with shipping, Amazon)
Service Center Cost $400+, parts and labor.

Place the TV on a TV Stand or work bench.
1. Remove the 12 screws holding the back cover and remove cover. Not necessary to remove bulb replacement panel. I used a power screwdriver to remove the screws.
2. Locate the bulb and remove the single screw and slide out the bulb assembly and set aside.
3. Remove three screws holding a chrome plated metal strap along the bottom right side of the chassic.
4. Unscrew and disconnect the large white computer monitor type connector and black line going into the AV section.
5. Pull up connector and disconnect the 10 wire ribbon line. Nine white wires and one gray, gray toward back of set.
6. Press together the lock connector on the red/blk/yel line and pull up to disconnect, yellow wire to your right.
7. Press together the lock connector on the blu/blk line and pull up to disconnect, black wire to your right.
8. Press together the lock connector on the blu/brn line and pull up to disconnect, brown wire to your right.
9. Remove front botton screw under the L3-XX-XX=XXXXX label.
10. Remove the white plastic cable stay attached to the AV section as it sticks out too far preventing the panel containing the color wheel, bulb section and lens to freely slide out. I just cut it off with a wire cutter as it is not needed.
11. Start sliding out the panel. I had to pull up a few cable wires across the top and lift up slightly. The panel was easy to slide out. Don't pull it completely out, just enough to see the top of the color wheel and it's two screws and two wire connectors. Rotate slightly clockwise exposing the top of the color wheel. I put waxed paper over the section containing the lens to protect it from dust.
12. Remove the two screws on top of the color wheel, I used a #1 4in phillips with a magnetic head to left the screws out.
13. Remove the three wire (white/white/blue) connector and line, blue to your right. I pried it up slightly, from the front, with a small flat head screwdriver. It easily lifted up and disconnected.
14. Remove the small flat ribbon connector, just pull it straight up with your fingers. The bare connections are on the side facing you.
15. The color wheel will can now be pulled straight up after removing the two screws and cables.
16. After removing inspect for broken parts of the color wheel that may have landed in the bottom of the color wheel compartment. I had a lot of broken pieces and used a small battery operated vacumm to get them all out.
17. Good time to clean both fans if they are dirty. I used compressed air and a large camera lens puffer to clean the fans and any dusty areas.
18. Drop in the new color wheel making sure the new rubber gasket stays in place as you lower the wheel in place. Make sure you don't bump or scratch the new wheel! Once in place, install the two screws and check for a good fit like the old one had.
19. Connect the flat ribbon, remember that the exposed wires face toward you. I used a neadle nose to hold the ribbon in place and slipped it straight down into the socket.
20. Connect by pushing down the three wire (white/white/blue) connector and line, blue to your right.
21. Remove the wax paper. I puffed any dust off first and carefuly removed the paper keeping the lens dust free.
22. Time to slide back the panel. Again holding up the cables and lining up the lens housing to the hole going to the screen. Slowing sliding back in place, do not force anything. When lined up correctly, it slides easy.

Follow in reverse #9 to #1 above. It took me about 2.5 hours, slow and easy, taking photos and notes as I went.

Notes: Didn't have to make any additional adjustments in the service menu (CCA values) as the picture and color was perfect. If you need to adjust color, use the service menu to set the Color Wheel Timing to max red color. This sets the colors.
Another DIY: http://mistermarbles.blogspot.com/2008/04/replacing-color-wheel-for-samsung-hl.html

UPDATE: July 2010, Class Action Lawsuit results in Samsung DLP warranty extension until October 22, 2011. This extension only applies to Shadow Effect repairs (transparent bars on side of picture). http://www.samsung.com/dlptvsettlement No relief for DLP color wheel replacement.
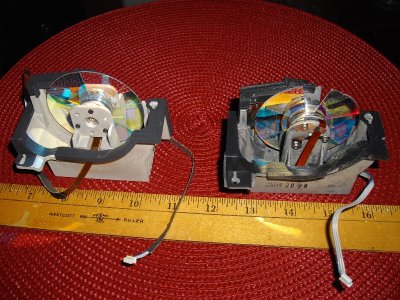
Color Wheels (New & Old) Bottom Side Up
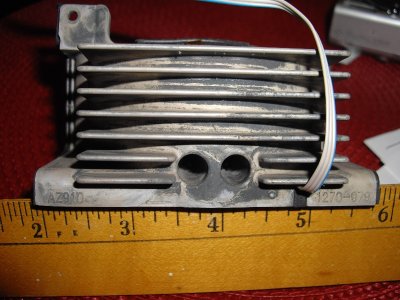
New Color Wheel Samsung BP96-00674A
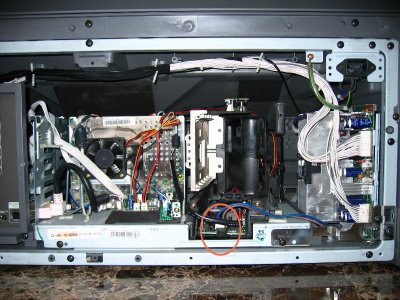
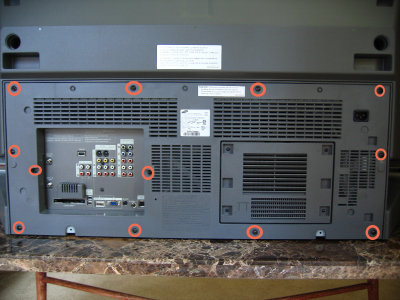
Step 1, Back Cover, 12 screws
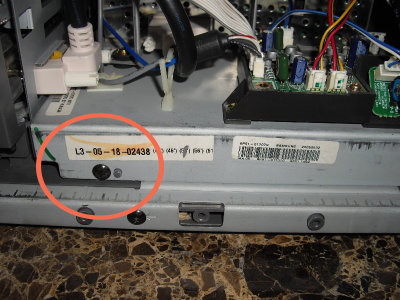
Step 2, Projector Bulb Release Screw
Step 2, Projector Bulb Removed
Step 2, Projection Bulb Removed
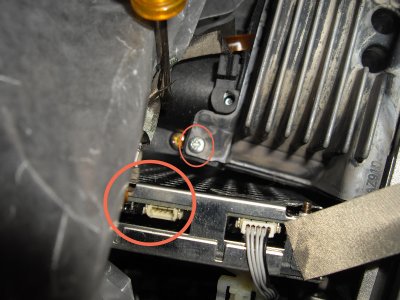
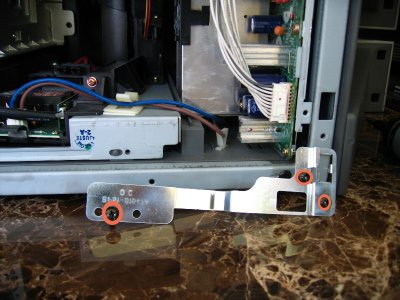
Step 3, Metal Strap To Remove
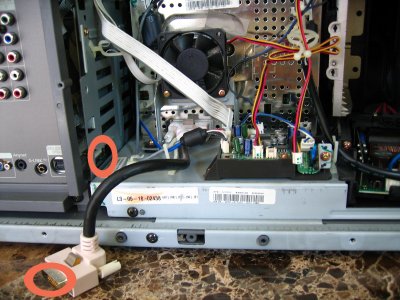
Step 4, Computer/DVI Plug, Remove
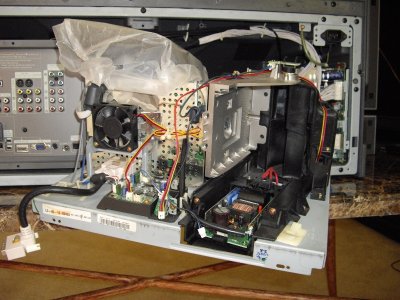
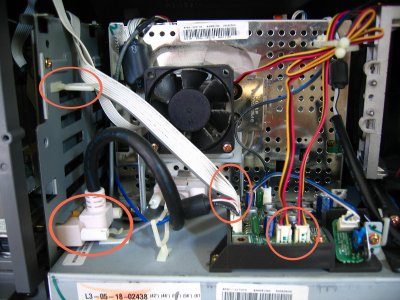
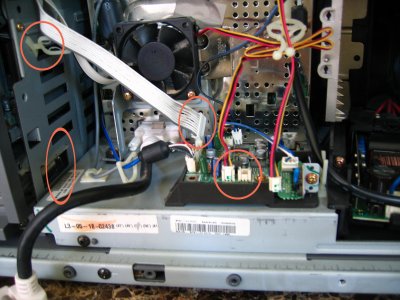
Steps 4-8, 10, Remove Cables, Cut Stay
Step 8, Disconnect  Cable
Step 8, Disconnect Cable
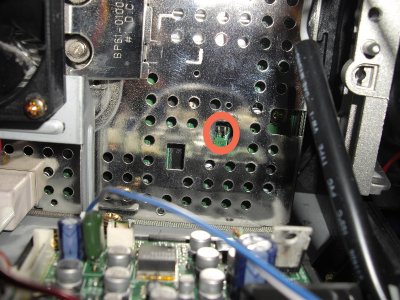
Step 9, Remove Screw
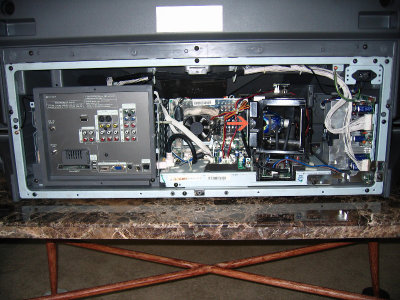
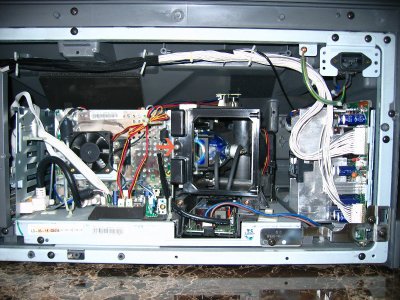
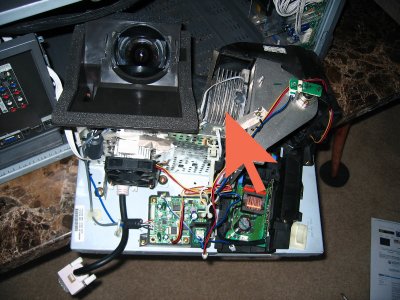
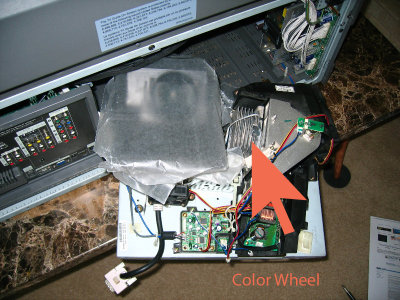
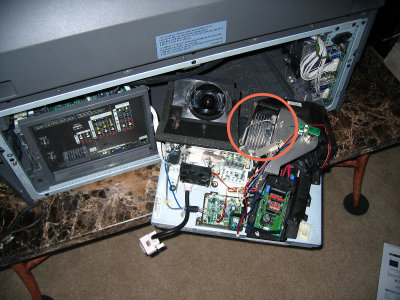
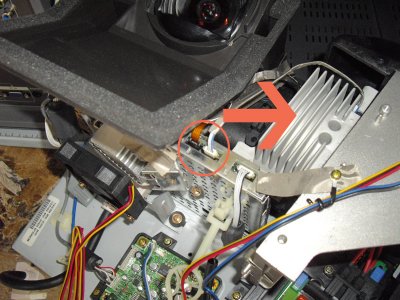
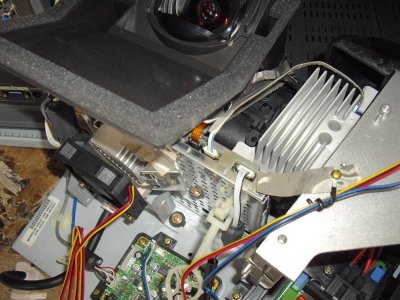
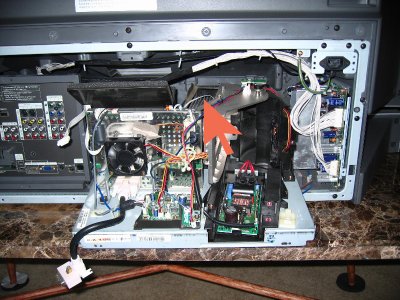
Step 11, Pull Out Panel, Arrow to CW
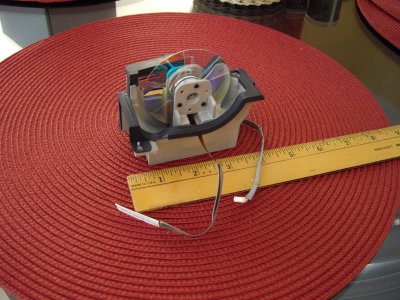
Top of Color Wheel
Top of Color Wheel
Top of Color Wheel
Top of Color Wheel
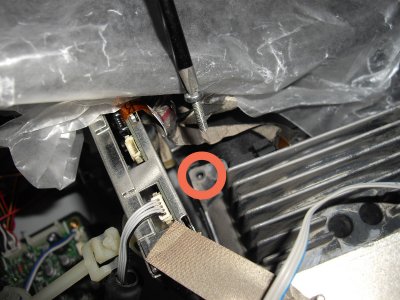
Step 12, Remove Screws Top of Color Wheel
Top View of Color Wheel
Step 13-14, Disconnect Cables Top of Color Wheel
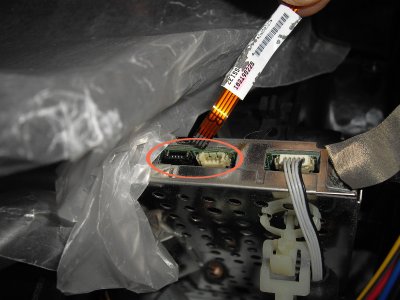
Step 13-14, Disconnect Cables Color Wheel Connectors, Remove
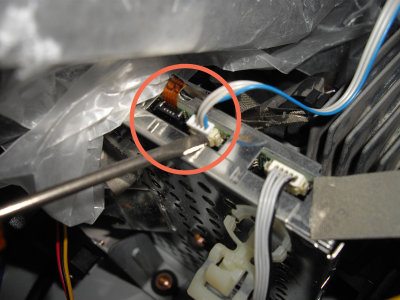
Steps 13-14, Remove Cables
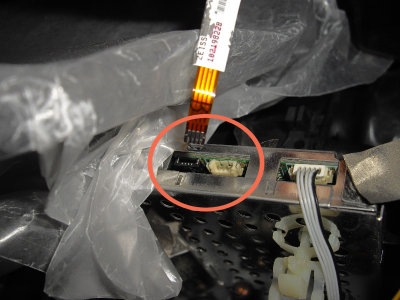
Step 14, Pull Ribbon Cable UP
Step 15, Top of CW, Pulls UP and OUT
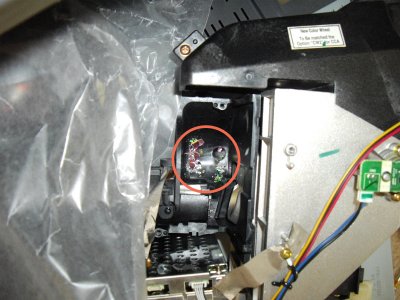
Broken Glass in Bottom of Wheel Area
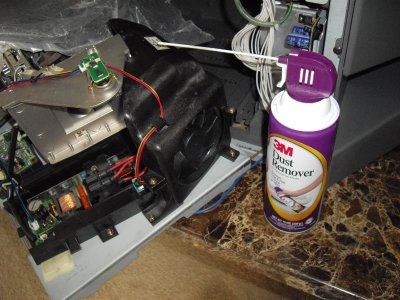
Step 17, Clean the two fans
Step 18, New Color Wheel Installed
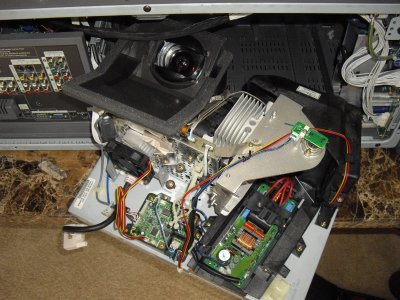
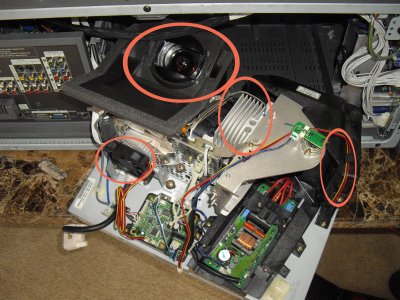
Step 18, New Color Wheel Installed (Lens, CW, Fan & Fan)
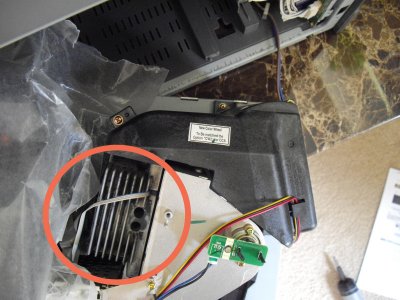
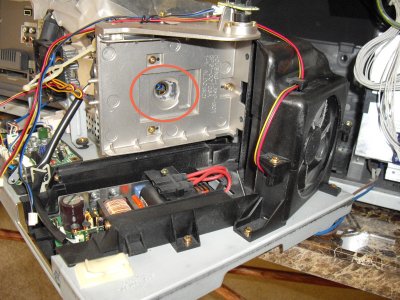
Projector Bulb Shines Through This Hole To Color Wheel
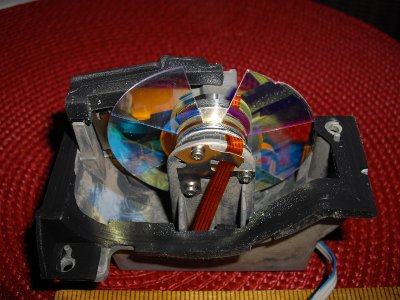
Broken Samsung DLP Color Wheel, Bottom View (Zeiss)
Defective Samsung DLP Color Wheel, Top View
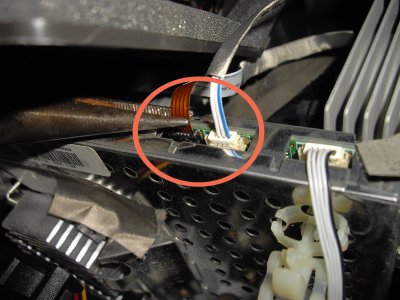
Steps 19-20, Attach New DLP Color Wheel Cables
DMD Board, CN810, No Jumper