photo sharing and upload picture albums photo forums search pictures popular photos photography help login
Sylvain B. | all galleries >> Galleries >> Easy skin touch-up tutorial > Skin touch
previous | next
13-APR-2008

Skin touch


- Duplicate layer.
- On the duplicated layer, select "overlay".
- Inverse the layer (ctrl+i)
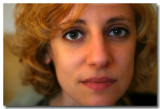
- Filter -> Other -> Highpass: Correct the radius from Left to Right until you consider all skin becomes smooth (in this example I use a radius of 3.8 pixels)
- Filter -> Blur -> Gaussian Blur: Gaussian blur will correct highpass effect. Correct the radius from Right to Left to reveal previous highpass effect till you consider the skin is at your taste ;)
- Merge all layers down
- Save the photo as a Pattern (Menu: Edit -> define pattern)
- Go back to the original photo and select "patterns". a New pattern layer is created. The new layer shows a white "Pattern fill 1".
- Inverse this new layer (select it then ctrl+i). The "Pattern fill 1" becomes black
- Select a white brush and brush the part of the skin you with to correct. The white brush will reveal the pattern underneath the original picture! (this way you can precisely select areas of skin to correct. You can play with the brush transparency as well)

Canon EOS 30D ,Canon EF 50mm f/1.4 USM
1/50s f/1.8 at 50.0mm iso200 full exif

other sizes: small medium large original auto
previous | next
comment | share
Sylvain B.18-Jan-2011 10:46
If I remember well, go back to the original photo means: select the original layer.
As for pattern I need to check I don't have photoshop elements with me now.
Brian Helder 14-Jan-2011 15:49
You say to go back to original photo, what does that mean? Then select "Patterns", where is that? White brush?

Thanks!
Sylvain B.25-May-2010 11:52
Overlay is a property of teh layer:
Rick 24-May-2010 21:30
I am having a few problems with the sequence.
I duplicate the image, but where do I find overlay?
I inverse the photo and it turns gray, should it be gray?
When I go back to save as a pattern there is only one photo and it is gray, the original is gone. After I brush the skin, do I merge or save it. I guess I just need a more detailed sequence, or I am missing something. Thanks